Blog

Housekeeper vs Maid
Blog

Housekeeper vs Maid | Are They the Same?

Housekeeper vs Maid: Are They the Same? The cleaning never seems to end, right? Between work, family, and a huge pile of laundry, sometimes the house just feels like it needs help. A tidy home can reduce stress, free up time for activities that you enjoy. It even improves your general health. So, you’ve decided to bring in some cleaning reinforcements – awesome! But now you’re wondering, which one should you hire, “Housekeeper vs maid? Are they the same?” The answer can be a bit confusing. The terms “housekeeper” and “maid” have been used for quite some time, and their exact meanings can vary depending on the region or even the individual family. But don’t worry, we’ll break down some general differences to help you pick the perfect home cleaning Calgary pro for your needs. Who is A Housekeeper? You can think of a housekeeper to be a more all-encompassing home manager. They do more than just clean. You can use your time and energy for other things by hiring a housekeeper that can help with a wider range of activities. Here are some of the things a housekeeper vs maid might typically do: Regular cleaning tasks Of course, cleaning is still a big part of the job! This upholstery cleaning Calgary includes vacuuming, mopping, dusting, wiping down surfaces, professional sofa cleaning and cleaning bathrooms and kitchens. Laundry Folding, ironing, and putting away clothes can be a hectic and time-consuming chore. A housekeeper can take care of that for you. Errands If you need groceries picked up, or dry cleaning dropped off, a housekeeper will handle those errands for you. Light meal preparation Some housekeepers might be able to make simple meals or snacks, or help with meal prep. Organizing and tidying Does your home tend to become crowded quickly? A housekeeper can help you keep things organized and put away. Pet care Some housekeepers might be willing to walk your dog, feed your cat, or scoop the litter box. Who is a Maid? Traditionally, a maid’s focus is primarily on cleaning tasks. They’ll keep your home sparkling clean and tidy, but their responsibilities won’t include other household chores or errands. Here’s what you can expect from a maid service in housekeeper vs maid discussion: Thorough cleaning Maids are experts at deep cleaning your home. They’ll dust, vacuum, mop, scrub bathrooms and kitchens, and leave your entire house looking and feeling fresh. Attention to detail Maids will pay close attention to detail, ensuring every corner of your home is clean. Flexible scheduling Many maid services offer flexible scheduling options, so you can choose the cleaning frequency that best suits your needs. Housekeeper vs Maid: Which One Do You Need? The best choice for you depends on your specific needs and lifestyle. Here are some questions to consider: If you just need someone to come in and do a deep clean every other week, a maid service might be a good option. If you’d like someone to handle a wider range of tasks and help out around the house more generally, then a housekeeper might be a better fit. Generally, housekeepers charge a bit more than maids, as their services are more comprehensive. Regular housekeeping or regular maid service costs will vary depending on your location, the size of your home, and the frequency of service. Do you need someone to tackle the cleaning so you can relax on the weekends? Or are you looking for someone who can also help with errands, laundry, or other household tasks? How to Find the Perfect Fit Once you’ve decided whether a housekeeper or a maid is the right choice for you, it’s time to start your search. Here are some tips: Get recommendations Ask friends, family, or neighbors for recommendations on cleaning professionals they trust. Read online reviews Check out online review sites to see what other people have to say about different housekeepers and maid services in your area. Interview potential candidates Once you’ve narrowed down your options, interview each candidate to discuss your specific needs and expectations. Be clear about your budget Let the cleaning professional know your budget upfront so you can find someone who offers services within your price range. Things to Consider No matter whether you choose a housekeeper or a maid service, the most important thing is to find someone who you trust and who can help you keep your home clean and organized. A clean home can make a big difference in your life, reducing stress, giving you back precious time, and creating a more relaxing and enjoyable environment. Here are some things to consider: Experience and qualifications Look for a housekeeper or maid service with experience and a good reputation. Some housekeepers might have additional certifications or training in areas like pet care or senior care. Communication style It’s important to find someone you feel comfortable communicating with. Discuss your expectations clearly and make sure you’re both on the same page. Provide clear instructions Let the cleaning professional know what your priorities are and what areas you’d like them to focus on. Stock cleaning supplies If you prefer the cleaning professional to use your cleaning supplies, make sure you have everything they need on hand. The Final Decision: Housekeeper vs Maid Ultimately, the decision between a housekeeper and a maid is a personal one. It all relies on your own needs and preferences. Consider the points we’ve discussed, do your homework, and hire a cleaning specialist to help you create a clean and comfortable home environment. How to Maintain a Clean Home Between Professional Cleanings Hiring a professional for cleaning can keep your home spotless, but maintaining that cleanliness between visits is more important. Whether you have chosen a maid or a housekeeper, here are some tips to help you keep your home tidy until the next service. The distinction between housekeeper vs maid might also guide you in how to approach cleaning your house. Create a Daily Cleaning Routine Quick Daily Tidying: Spend

outdoor cleaning tips
Blog

Outdoor Cleaning Tips for your Spring Celebrations

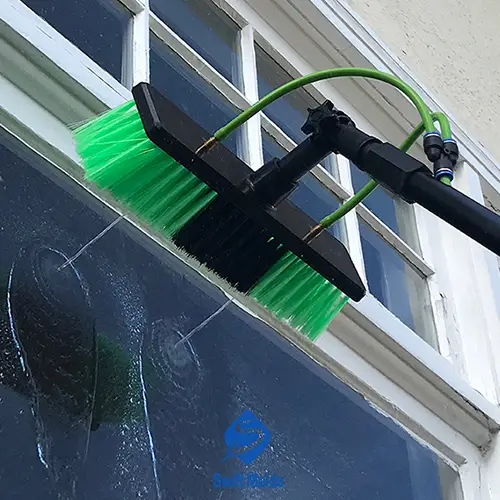
Spring’s arrival brings a refreshing burst of energy, as nature reawakens and invites us to bask in the sunshine. The urge to open windows and welcome loved ones for outdoor gatherings is undeniable. However, before indulging in spring festivities, it’s essential to prepare your outdoor spaces for the new season. Winter’s harsh conditions can leave their mark on furniture, patios, and windows, making them less than inviting. Fortunately, with a systematic approach and effective outdoor cleaning tips, you can transform your backyard into a pristine and welcoming oasis in no time. Outdoor Cleaning Tips: Declutter your paradise   The first step to a sparkling outdoor space is a good decluttering session. Gather some bins and boxes, and sort through everything with a ruthless (but fair!) eye. Ask yourself: “Have I used this in the past year?” “Does this spark joy?” (Yes, we’re borrowing a bit of KonMari magic here!) “Can this be repaired or repurposed?” Donate gently used items, recycle what you can, and discard anything broken or beyond saving. Now, breathe easy! You’ve created a clean canvas for your spring cleaning masterpiece. Transforming your Patio Patios are the heart of any outdoor gathering. But after a long winter, they can look a little worse for wear. Here are some outdoor cleaning tips to bring your patio slabs back to life: Sweep Away the Debris: Start by sweeping away any leaves, twigs, or accumulated dirt. A good blower can be great, especially for tackling those stubborn corners. Patio Slabs Cleaning Tips: Now, for the cleaning itself. The best approach depends on the type of patio slabs you have. For concrete or stone, a mixture of warm water and dish soap often works wonders. For tougher stains, consider a diluted solution of white vinegar and water. Remember to test cleaning product on an inconspicuous area first! Use the Hose: Once you’ve scrubbed the slabs, give them a good rinse with a hose. This will remove any cleaning residue and leave your patio looking squeaky clean. Giving Your Furniture a Spring Makeover Outdoor furniture takes a beating throughout the year. Here’s how to wake them up! Dust Off the Cobwebs: Start with a good dusting. A broom or a soft brush can do the job of removing cobwebs, leaves, and other debris. Deep Cleaning for Different Materials: The cleaning method depends on the material. For example, wipe down plastic chairs with a soapy water solution. Wooden furniture might benefit from a special wood cleaner or a light sanding (followed by a protective stain or sealant). Wrought iron pieces might require a bit of elbow grease with a scrub brush and soapy water. Don’t Forget the Cushions: Outdoor cushions can get mildew buildup or stubborn stains. Check the care instructions on the tags. Some cushions can be washed with mild detergent, while others might require spot cleaning. If yours are beyond saving, consider investing in new ones to add a pop of color and comfort to your spring gathering. Pressure Washing Power (Optional): For heavily stained patios, fences, or concrete surfaces, pressure washing can be a powerful tool. However, be cautious! Improper use of a pressure washer can damage surfaces. If you’re unsure, consider hiring a professional like Swift Maids (shameless plug!). We have the expertise and equipment to handle pressure washing Calgary safely and effectively. Window Wonderland: Tips for Cleaning Windows Outside Sparkling windows are like portals to the beauty of spring. Here are some tips for cleaning windows outside to ensure a crystal-clear view: Safety First: Always prioritize safety when cleaning high windows. Consider using a sturdy ladder with someone to hold it steady, or invest in an extension pole with a cleaning attachment. The Squeegee can go a Long Way: A squeegee is your best friend for streak-free windows. Use a solution of warm water and dish soap, and work your way from top to bottom, using the squeegee to remove excess water and prevent streaks. Stubborn Stains: Bird droppings, sap, or other stubborn stains might require a bit more muscle. A solution of white vinegar and water can be just what the doctor ordered. Extra Touches for your Spring Celebration Now that your patio is clean, your furniture is sparkling, and your windows offer a breathtaking view, it’s time to add some extra touches that will transform your space completely. Light Up the Night: String lights are a fantastic way for creating a magical ambiance. Drape them over your patio, around trees, or along fences. As the sun sets, turn on the lights and watch your outdoor space come alive. Welcome the Birds: Spring is synonymous with bird songs. Attract feathered friends by hanging bird feeders filled with seeds. You can even set up a bird bath for them to enjoy. Add a Touch of Green: Flowers are the ultimate symbol of spring. Place potted plants around your patio or create a vibrant flower bed. Not only will they add a splash of color, but they’ll also fill the air with a fragrance. Comfy Seating: Nobody wants to perch on a hard chair for hours. Invest in some comfortable outdoor seating cushions and throws for your guests to relax in. Set the Mood with Music: Music sets the tone for any gathering. Create a playlist with upbeat tunes or calming melodies, depending on the vibe you’re going for. Don’t Forget the Bugs: Mosquitoes can put a damper on any outdoor party. Light citronella candles or use a natural bug-repellent spray to keep those pesky insects at bay. Spring Cleaning with Swift Maids Spring cleaning can be a big undertaking without a doubt. If you’re short on time or simply don’t relish the thought of scrubbing patios and windows, Swift Maids is here to help! We offer a range of cleaning services, including home cleaning Calgary outdoor cleaning, window cleaning, and Pressure Washing . Our professional cleaners are trained in using the right methods and products to ensure your outdoor spaces are sparkling clean and ready for your spring

prepare for professional carpet cleaning
Blog

The best ways to prepare for professional carpet cleaning

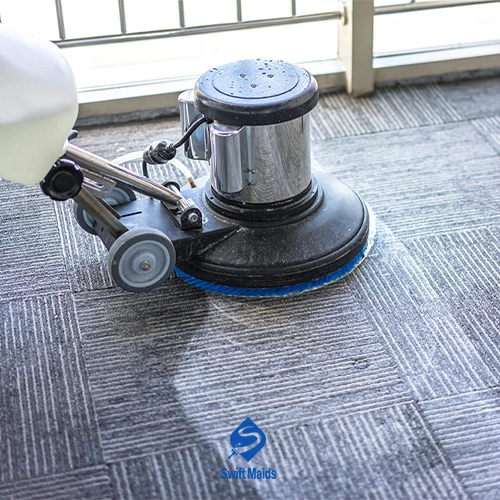
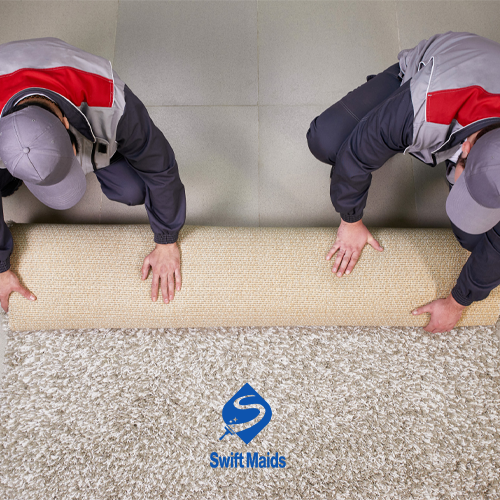
Carpets endure significant wear and tear, collecting dirt, food particles, and unexpected stains. Over time, even the brightest carpets can appear dull and lose their fresh scent. Professional carpet cleaning offers a revitalizing solution, restoring carpets to their original luster and leaving them with a pleasant fragrance. However, before the cleaning experts arrive with their specialized equipment, there are essential steps for how to prepare for professional carpet cleaning. Why prepare for professional carpet cleaning? Taking some time to prepare before the professionals arrive offers several benefits: Maximum Cleaning Power: By removing furniture and loose debris, the cleaners have better access to the carpet fibers, resulting in a deeper and more thorough clean. You want them to banish every dust bunny in sight, right? Save Time and Money: The less prep work the cleaning crew needs to do, the faster they can get to work, which saves you both time and money. It’s a win-win situation! Protect Your Belongings: Moving furniture out of the way minimizes the risk of accidental bumps or spills during the cleaning process. Your precious antique lamp will thank you! Stress-Free Zone: A clear path for the cleaning crew allows them to work efficiently, minimizing disruption to your day. You can relax and enjoy a cup of coffee (not on the carpet this time!) while they do their magic. Preparing for a Professional Carpet Cleaning: A Step-by-Step Guide Here’s the good news: these preparations don’t require a herculean effort.  With a little planning and some elbow grease, you can have your home ready in no time.  So, grab your favorite playlist (cleaning can be fun with some tunes!), and let’s get started! Step 1: The Great Furniture Shuffle The biggest part of preparing before the professionals arrive involves moving furniture. Think of it as giving your carpet some breathing room. Here’s how to tackle the furniture shuffle: Move all furniture off the carpeted areas you want to be cleaned. This includes couches, chairs, tables, ottomans, and even those decorative plants in heavy pots. Important note: If you have any particularly heavy furniture that you can’t move yourself, let the cleaning company know in advance. They might be able to offer assistance. Step 2: Vacuuming Your Carpet Now that the furniture is out of the way, it’s time to remove all the dust from your carpet. Vacuum: Give your carpets a thorough vacuum using the appropriate attachment for your specific carpet type. Pay special attention to high-traffic areas, corners, and under furniture bases (where those pesky dust bunnies love to hide). Imagine all the dirt and dust disappearing with each vacuum stroke! Reach for the Crevices: Use the crevice tool on your vacuum cleaner to get into those hard-to-reach areas like baseboards and along furniture edges. No dust bunny should be left behind! Step 3: Tidy the floor Even after vacuuming, there might still be some loose debris lurking on your carpet.  Here’s how to send it packing: Walk around the carpeted areas and pick up any remaining toys, pet hair, or other loose objects. The cleaner the surface, the better the cleaning results. If you have any area rugs that you want professionally cleaned, roll them up and place them near the door for easy access by the cleaning crew. SwiftMaids offers rug cleaning Calgary services in addition to carpet cleaning Calgary, so you can get all your floor coverings looking their best in one go! Step 4: Pre-treating Stains For particularly stubborn stains, like pet accidents or red wine spills, you might want to pre-treat them before the cleaning crew arrives. Check the Label: Always check the care label on your carpet before using any stain removers. Some cleaners can damage certain carpet fibers. A little caution here can prevent a bigger headache later! Spot Check: If you decide to pre-treat a stain, test the cleaning solution on an inconspicuous area of the carpet first to ensure it doesn’t cause discoloration. You wouldn’t want to create a new problem while trying to solve an old one! Let the Pros Take Over: For any major stains or concerns, it’s best to leave it to the professionals. SwiftMaids uses green carpet cleaning solutions that are effective on stains while being safe for your family and pets. Our technicians are trained to handle a variety of stains and will know the best course of action for even the toughest spots. No need to stress about tackling those mystery stains yourself! Step 5: Parking Pointers If there are any designated parking spots for the cleaning crew, be sure to let them know in advance. This will save them time and ensure they can get started on the cleaning right away. A little heads-up goes a long way! Step 6: Open Up the Airflow Good ventilation is key during and after a professional carpet cleaning. Here’s how to create a fresh and airy environment: Open the Windows: Crack open the windows in the rooms that will be cleaned to allow for proper ventilation. Fresh air will help the carpets dry faster and reduce any cleaning solution odors. Imagine a gentle breeze carrying away any lingering cleaning smells. Clear the Airflow Paths: Remove any curtains, blinds, or other items that might obstruct airflow near windows or vents. The more air circulation, the better! Step 7: Make a List Beforehand You should make a list of everything you want the cleaning crew to work on while you wait for them to arrive. Let the company know if you have any specific concerns or areas that require extra attention, like pet accidents or high-traffic areas. The more information you provide, the better equipped the crew will be to tackle your specific cleaning needs. Special Requests: Do you have any allergies or concerns about the cleaning products used? Let the cleaning company know beforehand so they can choose the most appropriate solutions for your needs. SwiftMaids offers green carpet cleaning options that are safe for people with allergies and pets. Peace of mind

upholstery cleaning tips
Blog

Upholstery Cleaning Tips for Spotless Furniture | Ultimate Guide

We all love our upholstered furniture. It’s the comfy haven where we unwind after a long day, binge-watch our favorite shows, and maybe even sneak in a quick afternoon nap. But let’s face it, we can’t avoid accidents forever.  Drinks get spilled, muddy paws track across the cushions, and small clumps of dust and dirt make your couch their home. Before you know it, your once clean and fresh furniture is looking a little worse for wear. Fear not, Keeping your upholstered furniture clean doesn’t have to be a chore. With a little know-how and some simple upholstery cleaning tips, you can remove dirt, stains, and allergens, and keep your furniture looking and feeling fresh for a long time. Understanding Upholstery Types No two pieces of upholstered furniture are exactly alike. The first step in cleaning the grime is understanding what you’re dealing with.  Here’s a quick breakdown of the most common upholstery types and how to care for them: Natural Fibers (Cotton, Linen): These breathe well and are generally easy to clean. Regular vacuuming and spot cleaning with a mild soap solution will do the trick. Synthetic Fibers (Polyester, Nylon): Durable and stain-resistant, synthetics are a good choice for high-traffic areas. They can usually be cleaned with a little dish soap and water. Leather: Luxurious and timeless, leather requires special care. Regular dusting and occasional conditioning with a leather cleaner will keep it supple and beautiful. Always check the care label! Most furniture will have a tag with cleaning instructions specific to the fabric.  Following these guidelines will ensure you don’t accidentally damage your beloved piece. Must-Have Upholstery Cleaning Supplies Now that you’ve identified your upholstery foe, it’s time to gather your cleaning supplies.  Don’t worry, you won’t need anything fancy or expensive.  Here’s your basic upholstery cleaning toolkit: A vacuum cleaner with upholstery attachment: This is your first line of defense against dust, dirt, and crumbs. Use the attachment to get into all the nooks and crannies. Soft bristle brush: A gentle brush can help loosen dirt and debris before vacuuming. Microfiber cloths: These are non-abrasive and perfect for blotting up spills and applying cleaning solutions. Dish soap: A mild dish soap is a great all-purpose cleaner for most upholstery fabrics. White vinegar: A natural cleaning powerhouse, white vinegar can help neutralize some stains. Baking soda: This absorbent powder is fantastic for tackling greasy spills and odors. How to Clean Upholstered Furniture: A Step-by-Step Guide With your cleaning arsenal assembled, you’re ready to tackle those upholstery battles!  Here’s a step-by-step guide to basic upholstery cleaning: Vacuum Time:  Start by giving your furniture a thorough vacuuming.  Use the upholstery attachment to get into all the crevices and remove any loose dirt, dust, and pet hair.  Pay special attention to seams and cushions. Spot Cleaning 101:  For spills and stains, act fast!  The sooner you address them, the easier they will be to remove.  Blot up any excess liquid with a clean, absorbent cloth.  Remember, don’t rub!  Rubbing can spread the stain and make it worse. Mix Your Cleaning Solution:  For most upholstery fabrics, a mixture of mild dish soap and warm water will do the trick.  Mix a few drops of dish soap in a bowl of warm water.  Test the solution on an inconspicuous area of the furniture first to make sure it doesn’t cause any discoloration. Gently Does It:  Dip a microfiber cloth into the cleaning solution, wring it out well (you don’t want the fabric to be soaking wet), and then gently blot the stain.  Work from the outside of the stain towards the center to prevent spreading. Rinse and Repeat:  Once the stain is gone, rinse the area with a clean, damp cloth to remove any cleaning solution residue.  Blot the area dry with a clean towel. Baking Soda Power:  For greasy stains, baking soda can be your saving grace.  Sprinkle baking soda on the stain, let it sit for 30 minutes to absorb the grease, and then vacuum it up. White Vinegar Magic:  White vinegar can be a lifesaver for certain stains, like coffee or ink.  Mix equal parts white vinegar and water in a spray bottle.  Lightly spritz the stain, blot with a clean cloth, and repeat until the stain is gone. Important note:  Always test vinegar on an inconspicuous area first, as it can affect some fabrics. The Power of Fresh Air:  Once you’ve finished cleaning, allow your furniture to air dry completely.  Open some windows and let the fresh air circulate.  You can also speed up the drying process by using a fan on a low setting. How to Take Care of Upholstered Furniture A little preventative care can go a long way in keeping your upholstery looking its best. Here are some tips: Treat spills immediately: The faster you address a spill, the easier it will be to remove. Regular vacuuming: Vacuum your furniture weekly to remove dust, dirt, and pet hair. Seat covers: Consider using seat covers in high-traffic areas, especially if you have pets or children. Sun’s not a friend: Avoid placing your furniture in direct sunlight, as this can fade the fabric over time. Rotate the cushions: Regularly rotate and flip the cushions on your furniture to help prevent uneven wear and tear. Upholstery Cleaning Tips: Beyond the Basics For deeper cleaning or stubborn stains, there are a few additional things you can try: Steam Cleaning: If your upholstery is particularly dirty or stained, consider steam cleaning. You can rent a steam cleaner or hire a professional cleaning service. Important note: Not all upholstery fabrics can be steam cleaned. Always check the care label first. Professional Help: For delicate fabrics, extensive stains, or if you’re just short on time, professional upholstery cleaning Calgary is the best option. SwiftMaids offers upholstery cleaning services that are safe and effective. Our trained technicians will leave your furniture looking and smelling fresh. Keeping Your Upholstery Happy By following these upholstery cleaning tips and practicing preventative care, you can keep your

Carpet Stain Removal
Blog

Carpet Stain Removal | Best Guide for You

It’s happened to the best of us. You’re unwinding at home, enjoying a warm beverage, when suddenly disaster strikes! Your mug topples over, leaving an unsightly stain on your beloved carpet. Don’t panic! Accidents happen, and carpets seem to attract spills. But before you rush out to buy a new rug, take a moment to relax. With a bit of knowledge and some common household supplies, you can often remove most carpet stains. Here at SwiftMaids, we understand the frustration of carpet stain removal. We’ve seen it all, from mystery spills to muddy paw prints and everything in between. That’s why we’ve put together this handy guide to help you conquer those carpet catastrophes and get your floors looking their best. First Things First: Act Swiftly! The first rule of carpet stain removal: that time is of the essence. The sooner you tackle the stain, the easier it will be to lift. Fresh spills are much more forgiving than ones that have had a chance to set in and become best buddies with the carpet fibers. So, the moment that mishap occurs, grab your cleaning supplies and get ready to remove the stains from your carpet. Identifying the Stains Half the battle is knowing what you’re up against. Different cleaning methods are required different types of stains. For example, greasy spills like butter or oil need a different approach than a coffee stain or a pet “accident.” Here’s a quick cheat sheet to get you started: Water-based stains: These include coffee, tea, juice, and even some pet accidents. They tend to be the easiest to remove with a little blotting and cleaning solution. Protein-based stains: Think blood, milk, or baby food. These require a special touch, as harsh chemicals can set the stain further. Greasy stains: Butter, oil, or salad dressing fall into this category. Baking soda is your best friend here, as it absorbs the grease. Ink or dye stains: These can be tricky, and professional carpet stain removal might be necessary. Gather Your Arsenal: DIY Carpet Stain Removal Solutions No need to call in the hazmat team just yet! Most carpet stain removal can be tackled with items you probably already have in your pantry or cleaning cabinet. Here’s your stain-fighting toolkit: White vinegar: A natural cleaning powerhouse, white vinegar can help neutralize many types of stains. Baking soda: This absorbent wonder is fantastic for greasy spills and even helps eliminate odors. Dish soap: A gentle yet effective cleaner, dish soap can be a key ingredient in your homemade cleaning solutions. Hydrogen peroxide: This can be a great option for stubborn stains, but always test it in an inconspicuous area first, as it can lighten some carpet colors. Clean, white cloths: Microfiber cloths work best, as they won’t leave any lint behind. How to Tackle Those Carpet Stains Now that you’ve identified the stain and gathered your cleaning supplies, it’s time to put on your metaphorical boxing gloves and get ready to rumble! Here are some general carpet stain removal tips: Blot, Don’t Scrub: Scrubbing can spread the stain further and damage the carpet fibers. Always use a clean, white cloth to blot up as much of the spill as possible. Work from the outside of the stain towards the center to prevent it from spreading. Test First: Before applying any cleaning solution directly to the stain, test it on an inconspicuous area of the carpet to make sure it doesn’t cause discoloration. Work in Sections: Clean the stain in small sections, working your way from the outside in. This helps prevent the stain from spreading. Rinse Well: After cleaning the stain, rinse the area with clean water to remove any cleaning solution residue. Blot the area dry with a clean cloth. Stain-Specific Strategies Now, let’s get down to specifics! Here are some common carpet stains and how to remove them for good: Coffee Stain Out of Carpet Removal: Coffee can leave a stubborn brown stain, but don’t fret! Mix equal parts white vinegar and water in a spray bottle. Lightly spritz the stain, blot with a clean cloth, and repeat until the stain is gone. Rinse the area with clean water and blot dry. Carpet Pet Urine Remover: Accidents happen, and let’s be honest, sometimes our furry friends have little mishaps. For fresh pet urine stains, blot up as much of the liquid as possible with a clean cloth. Mix a solution of 1 cup of white vinegar and 2 cups of warm water. Spray the affected area, let it sit for 10 minutes, and then blot dry. Follow up with a baking soda paste (mix baking soda with a little water to create a paste) to absorb any lingering odors. Leave the paste on the carpet for several hours, then vacuum it up. Important note: If the stain is older or your pet has repeatedly used the same spot, enzymatic cleaners specifically designed for pet accidents are a more effective solution. Remove Wine Stain From Carpet: Act fast! Blot up as much of the wine as possible with a clean cloth. Then, mix a solution of 1 tablespoon of dish soap and 1 cup of cool water. Spray the stained area and blot it with a clean cloth. Repeat until the stain is gone. Rinse the area with clean water and blot dry. For stubborn red wine stains, a club soda solution (mix equal parts club soda and water) can also be effective. Carpet Blood Stain Remover: Blood stains require a delicate touch. For fresh blood stains, blot up as much as possible with a clean, cool cloth. Do not use warm water, as this can set the stain. Mix a solution of 1 tablespoon of hydrogen peroxide and 1 tablespoon of dish soap in 1 cup of cool water. Always test this solution in an inconspicuous area first! Using a clean cloth, dab the stain with the solution, working from the outside in. Blot with a clean, dry cloth to absorb the liquid. Repeat

The Benefits of window cleaning
Blog

What Are The Benefits of window cleaning

Windows are essential for the aesthetic appeal and functionality of a home. In addition to their decorative significance, clean windows offer numerous benefits for both the interior and exterior of your living space. Experts recommend regular window cleaning, which yields a range of advantages that extend far beyond visual appeal. In this blog, we will discuss the benefits of window cleaning. It enhances the beauty of your home, prolongs the lifespan of windows, removes unhealthy impurities, reduces allergens, keeps pests at bay, and contributes to a fresher, more vibrant living environment. In addition, we emphasize the importance of professional window cleaning services not only for maintaining clean windows but also for detecting potential problems and defects, which ultimately ensures the safety and longevity of your home. The most important benefits of window cleaning Windows plays an important role in the beauty of the house. The window is important both in interior and exterior decoration and in terms of light passage. Experts recommend that windows should be cleaned regularly. The most important benefits of window cleaning are: The appearance of the house becomes more beautiful When the windows are clean, more natural light enters the house and finally the beauty is reflected more clearly. The life of windows increases Snow and rain, humidity, and water can cause unwanted deposits on aluminum windows and glass. This not only creates a bad appearance but also makes the windows prone to cracking and shattering. Removes unhealthy impurities The presence of moisture causes mold to form on the corners of the windows. These molds can be seen in the form of unpleasant black and dark spots on parts of the window. Molds generally grow in warm and humid places. It is even possible that molds grow in the compartment between the window and the glass and are hardly noticeable. Using professional cleaning services can help remove mold and contamination completely. In such services, special chemicals are usually used that destroy molds well and restore health and beauty to your home. Reduces allergens in the home Dust, pollutants from car fuel, plant pollen, and other allergens accumulate on the windows and window sills. The entry of these substances into the house disrupts physical health. Symptoms such as headache, fatigue, runny nose, cough, sneezing, and itchy eyes are the most important things that can be mentioned. Using professional cleaning services can help reduce allergens in the home and bring more health by thoroughly cleaning the windows. It keeps insects and pests away from the house Bees, flies, mosquitoes, spiders, and cockroaches are just some of the insects that enter the house through windows. Corners and windows are a safe place for spiders to build nests. The presence of such insects can be annoying and unpleasant. Regular cleaning of windows prevents unwanted entry of insects into the house. A fresher life Regular cleaning of windows helps to let more light into the house. A bright house creates a sense of freshness in the family members. Many flowers and plants can be grown in bright houses, and in this way, a bright house will be a house full of energy, vitality, and freshness. Problems and defects of windows are discovered Using professional window cleaning services brings benefits beyond just cleaning the windows. In such cases, the experts observe the windows well and if there is a problem in the window frame or glass, they fix it quickly. Things like cracked windows, loose windows, and decay on the windowsills are among them. When such problems are fixed in time, it will save money in the long run. The more you ignore these simple repairs, the more you will have to pay more and more extensive repairs Requires Less Cleaning The obvious clean window offenders are fingerprints and water spots, but did you know windows are prone to smoke film buildup from activities like burning candles, cooking, smoking, or using your home’s fireplace? Buildup can occur on blinds and shades as well, so regular cleaning of window coverings is a must. Retain the privacy and energy-efficient benefits of window treatments but help cut down on dust, dirt, and other allergens with low maintenance between the glass shades and blinds. While you’re at it, take the time to clean your window screen too. A dirty screen traps dust, dirt, pollen, and other allergens, but a clean window screen can help keep the air flowing into your home cleaner. Refer to our window cleaning guide for more information on how to properly clean your window screens. Reducing the risks of glass breakage A faulty system of locks, cracked windows and such problems can cause sudden accidents at home. Old and defective windows are more likely to break and fall. Regular cleaning of windows helps you to discover and fix such problems faster. You are sure of the safety of your home The benefits of  Window cleaning help you know which windows need repair or replacement. To ensure the safety of the window structure, you need to check them regularly. The time to clear the windows can be the best time for such checks. The Window cleaning techniques Every house should receive professional window cleaning services at least once a year. In such a situation, you should know window cleaning tips or look for a company that has the necessary licenses and proper insurance for this work. You can get good deals through online reviews and getting information from friends and family. The most important advantages of using window cleaning services instead of personal cleaning are: – Such companies have professional and practical tools, equipment, and techniques to do this work, so the result will be better and more effective. – Receiving maximum care and regular window cleanings increases the lifespan of windows. – Having experience in cleaning windows in terms of choosing detergents, tools, cleaning techniques, etc. helps to clean windows in less time. Final words In conclusion, regular window cleaning offers benefits beyond aesthetics. Clean windows enhance the beauty of your

How to Eliminate Carpet Odors
Blog

Expert Tips for How to Eliminate Carpet Odors| Freshen Up

We all strive for a fresh-smelling home, but accidents like spills or pet stains can leave carpets with an unpleasant odor. While a vacuum cleaner is often insufficient for this issue, it’s important to understand why carpets develop bad smells. Unfortunately, when carpets become soiled or wet, odor-causing particles become trapped in the fibers, resulting in persistent unpleasantness. This article will explore effective methods for How to Eliminate Carpet Odors. Of course, don’t worry, here we at Swift Maids have some useful tips that are about How to Eliminate Carpet Odors in the shortest possible time. How to Eliminate Carpet Odors? First of all, you should determine who or what caused your carpet to smell bad. To find out why, it’s best to do a little digging, then follow our “How to Eliminate Carpet Odors” tips to get rid of the smell. Eliminate the smell of smoke Some homes constantly smell of smoke or cigarettes but don’t worry, there is a simple solution to remove the smell of smoke from carpets: Pour baking soda into a colander and sprinkle it over the affected areas, baking soda is a natural absorbent so it should effectively remove the smell of smoke. Walk on the baking soda until it has a uniform coating all over the carpet and is pressed on the carpet. Allow the baking soda to sit on your carpet for about thirty minutes, if you let it sit long enough the baking soda will penetrate the underside of the carpet. Now it is better to vacuum the carpet. If you notice the smell of smoke, repeat this process. Eliminate the smell of mold If your problem is mold or you suffer from respiratory problems or you live in a place with high humidity, stay with us to tell you How to Eliminate Carpet Odors: If your carpet is damp, it is better to dry it first with a fan or special devices. After the area is dry, mix 2 cups of warm water or 1 cup of white vinegar and spray gently on the carpet. The strong acidity in vinegar destroys odor-causing compounds and removes them forever. Tip: If the carpet gets too wet during the treatment, the problem of mold will arise. When the carpet dries, the smell of vinegar will disappear and you will be left with nothing but freshness. Eliminating the smell of bacteria + the smell of mold For stubborn odors such as bacteria and mold, a shot of vodka may be recommended, alcohol removes odor-causing compounds: Pour some clear, ungreased vodka into a spray bottle and spray any area that smells bad. Let the alcohol sit for 15 minutes. Blot with a rag until dry. If the smell remains, use some baking soda. Let the baking soda sit for 30 minutes, then vacuum. Eliminating the basement funk smell Most of you know what we are talking about. This is the subterranean scent that spreads throughout the lower level of your home. Luckily there is an onion solution, yes that’s right an onion makes your basement smell better: Peel the onion cut it in half and place it overnight on a plate in the basement. Check it in the morning. Onion absorbs excess moisture from the air and carries unpleasant odors with it. Repeat this for days until the smell is completely gone. Disposing of pet urine: Scenario 1 We are well aware that pets can urinate on carpets. It’s best to dry the urine as much as you can with a towel first, and do it very quickly, because the more the urine penetrates the carpet, the harder it is to get rid of the smell. Combine 2 cups of warm water, 2 cups of white vinegar, and 4 tablespoons of baking soda, pour the mixture into a spray bottle, and apply to the stained area. Combine 2 cups of warm water, 2 cups of white vinegar, and 4 tablespoons of baking soda, pour the mixture into a spray bottle, and apply to the stained area. Let the mixture sit for five minutes. Dry with a soft cloth. Disposing of pet urine: the second scenario If you can act quickly, a great solution is club soda because its aerated carbonation lifts stains up and out of carpet fibers. Pour club soda on the stain and let it sit for a few minutes. Open a window in the room to help the carpet dry faster, or turn on a nearby fan and direct it toward the stain. Wipe it off and repeat until the smell is gone. If the problem persists, check out more ways to get rid of pet urine odor. Eliminate the smell of sweat The smell of sweat can develop especially in resting areas in the home. You can use fabric sprays that eliminate unpleasant odors and give the fabric a very nice scent. You can also try the baking soda trick. Spray it on the desired area leave it overnight and vacuum it in the morning. If your carpet still smells like sweat, follow our ” How to Eliminate Carpet Odors” tips for treating mold and bacteria and just add vodka. Tip: If you’re not entirely sure why your carpet smells, baking soda is a general remedy. Follow the How to Eliminate Carpet Odors instructions for removing the smell of smoke or removing the smell of bacteria + mold. A little baking soda or vodka will go a long way in neutralizing carpet odors. Popular carpet odor removal products These products are usually in the form of powder, spray, or shampoo. They all have different scents, antibacterial properties, and specific instructions for specific types of carpets, so be sure to read and follow their instructions. Powder Powders work best when you intend to clean the entire carpet. Baking soda is usually the main ingredient in any type of powder deodorizer, so you can use baking soda directly, it absorbs and neutralizes odors. Powders are very easy to use, simply sprinkle them

How to Stain Grout
Blog

How to Stain Grout |Giving Tile a Whole New Look

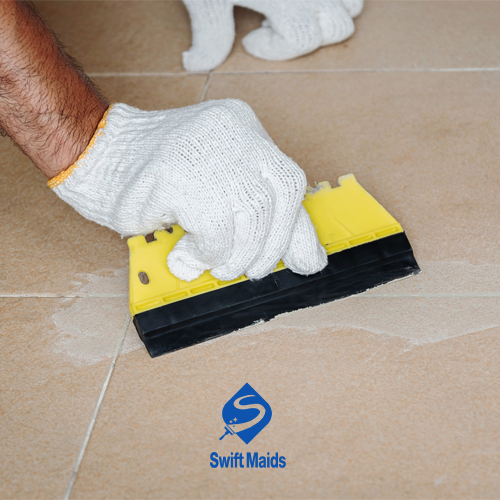
Between the tiles that define most kitchens, bathrooms, and accent walls, lies the humble yet vital grout. This porous material joins tile sections together while allowing slight flexibility in the total surface area. But after years of use, typically gray or white grout inevitably absorbs dirt, grime, and stains. Discolored grout lines can detract from the beauty of the surrounding tiles. While a full regrouting job may come to mind for refreshing the look, grout staining provides a much easier, more affordable makeover option. When done properly, staining can recolor dull grout with dramatic results. This blog post of  Swift Maids will walk through the grout staining process, how to stain grout, explaining the benefits of regrouting, choosing colors, preparing grout, application techniques, and sealing to protect the renewed aesthetic. With some simple steps, homeowners can achieve stunning grout makeovers. Why Choose Staining Over Regrouting? Staining dirty or damaged grout back to life provides clear advantages over the intensive process of removing and replacing all grout across a fully tiled area: Less Time and Skill Required Staining goes significantly faster, allowing DIY completion in the afternoon. No specialized tiling expertise is needed either. Staining simply involves applying colored pigment to existing grout lines. Digging out all old grout before reapplying new grout requires greater time and skill. Minimizes Disruption to Household The staining process is far less messy, noisy, and disruptive than the multi-day, dust-filled demolition work of regrouting an entire room. Grout staining fits conveniently into a weekend without destroying a kitchen or bath for days. Lasting and Cost-Effective Color Change High-performance grout stains penetrate within existing grout for years of renewed color versus new grout eventually getting dirty again down the road. Staining provides affordable, long-lasting color improvement. Great for Isolated Grout Damage If only portions of grout are aesthetically damaged but still structurally sound, concentrated staining just affected areas makes sense rather than regrouting everything. Staining tackles discoloration selectively. A Wide Range of Colors Available Grout stains come in a spectrum of hues from light to dark unlike plain new grout. This allows matching tile colors or going bold with contrasting colors. New grout is limited to gray and white. For situations where tired grout primarily needs aesthetic refreshment, staining offers far less hassle than full regrouting while transforming the look. Choosing a Stain Color to Complement Tiles Grout stains are available in a multitude of colors, so for how to stain grout, sampling products first in subtle sections is wise. Considerations when selecting the ideal stain shade include: Matching Tile Color for Subtle Uniformity Selecting a stain matching or closely coordinating with the tile color provides a subtle, uniform appearance. Light gray tiles could use a soft gray stain. Contrasting Tile Color for Definition Going slightly darker or lighter than the tile creates obvious definition between tile and grout. This adds visual interest. Dramatic Color Changes for Impact Choosing a bold, different color family like black or terra cotta grout stain on white tiles makes the grout pop dramatically. Weathered, Variegated Finishes Specialty stains like antique or mottled colors provide an aged, non-uniform finish full of character. Don’t commit fully until comparing swatches of different stain options side-by-side. Test different shades to select the perfect complementary or contrasting grout color. Prep Work for Flawless Staining Preparing grout appropriately before applying colorant ensures ideal stain penetration and vibrancy: Cleaning Out Dirt and Contaminants Use a specially formulated grout cleaner to scrub away any dirt, sealers, soap residue, or waxes clogging grout pores, which can prevent stain adhesion and absorption. Apply cleaner with a stiff grout brush. Rinsing Thoroughly Completely rinse stained areas with clean water 2-3 times to flush out all remaining grout cleaner residue or other contaminants. This prevents hazy color results. Ensuring Grout is Fully Dry Allow grout lines to dry overnight before staining. Lingering moisture keeps stains from properly bonding and curing within grout. Protecting Surrounding Tile Carefully apply painter’s tape around nearby tiles to shield from potential staining splatter or spills. Cover any adjacent furniture or flooring as well. When grout is cleaned, dried, and protected, it is ready to absorb the intense new stain color. Staining Step-by-Step for How to Stain Grout When ready to begin revitalizing worn-out grout, adhere to these best practices: Shake or Stir Stain First Before starting, vigorously shake or stir grout stain containers to fully mix pigment particles evenly distributed throughout the liquid. Apply Stain Systematically Use a small sponge, foam brush, or lint-free rag to wipe stains into grout crevices using steady circular motions. Maintain consistency across the entire surface. Allow Time to Penetrate Give the first application 10-15 minutes to penetrate fully before wiping any lingering excess stain off tile surfaces to prevent haze. Building Rich Color For more pronounced color or to deeply treat more damaged areas, do a second round of stain application following the same careful technique as the first. Avoid Over-Application Continuously wipe up any stain overflowing from aged grout lines onto tile surfaces to prevent staining surrounding areas. Precision prevents messy tile cleanup later. With care and patience, applying grout stain can dramatically refresh and recolor damaged or discolored existing grout. Protecting Stain Finish with Durable Sealer As a vital final step for how to stain grout, sealers lock in and protect grout stain colors from fading or washing out over time: Allowing Cure Time First: Let stains cure fully for 24-48 hours before applying any sealer. Sealers can disrupt proper bonding and curing if applied atop uncured stains. Choosing a Compatible Sealer: Select a grout sealer rated for use with grout stains without discoloring or chemically interacting with the colorant. Consult manufacturer guidance. Applying a Thin Protective Layer: Use a small paintbrush to wipe a thin uniform layer of sealer into stained grout, taking care not to overfill grout lines and pool excess sealer. Allowing Proper Dry: Time Give sealer applications proper time to dry fully before exposing grout to water or moisture. This enables maximum protection. With

How to Clean Dirty Carpet Without a Machine
Blog

How to Clean Dirty Carpet Without a Machine

Removing dirt and stains from carpets can be a challenge without a carpet cleaning machine. Fortunately, there are effective manual methods to restore your carpet’s appearance. This Swift Maids guide provides step-by-step instructions on how to clean dirty carpet without a machine using five hand cleaning techniques. Additionally, it offers tips for treating specific stains. Read Also: Choosing The Right Carpet Cleaning Methods For You Methods for How to Clean Dirty Carpet Without a Machine Before embarking on any cleaning venture, it’s paramount to understand the type of fabric your carpet is made of. Different fibers—whether synthetic like nylon and polyester, or natural like wool and cotton—respond differently to cleaning solutions and methods. Using Baking Soda Baking soda is a gentle but abrasive cleaner that absorbs odors, lifts stains, brings embedded dirt to the surface and gives proper results on How to clean a carpet without a machine. Thoroughly vacuum the carpet first to remove loose debris and dirt. Reach corners, edges, and along baseboards. Liberally apply baking soda over the entire carpet up to 1 cup per 10 square feet. Let sit for at least 15 minutes up to 24 hours, for heavy soiling. The alkaline soda dissolves residue as it absorbs odors. Thoroughly vacuum again in all directions to lift dirt brought up by the baking soda. its mild abrasion releases trapped particles from carpet fibers. Repeat treatments allow more time for the soda to neutralize odors and deeply absorb stains. The Acidity of Vinegar White distilled vinegar is a versatile cleaner due to its gentle acidity. When used correctly, vinegar disinfects carpet fibers safely while dissolving residue. Mix undiluted white vinegar into a spray bottle. Lightly mist over small sections to avoid over-wetting the carpet or pad. For stubborn spots, concentrate spray directly onto stains. Let vinegar sit briefly before blotting. As vinegar’s acidic components break down dirt, blot firmly with white towels to lift debris. A final spray of clean water neutralizes any remaining acidity. Blot once more with dry towels until no more moisture transfers onto the towels. Vinegar can degrade latex backing over time so avoid prolonged contact. Repeat as needed in gradually broader areas. The vinegar works best on fresh stains. Peroxide Power Hydrogen peroxide uses gentle oxidizing agents and fizzing bubbles that lift stains without excessive friction. By breaking bonds, peroxide can also restore brightness and remove foul odors. For removing surface debris, vacuum the carpet thoroughly. Fill a spray bottle with hydrogen peroxide solution. For heavier stains, use full-strength 3% solution; for lighter stains, dilute with equal parts water. Spray hydrogen peroxide onto a hidden section of carpet and allow it to sit for 2 minutes. Check for colorfastness and carpet discoloration. If no discoloration occurs, spray the solution onto stained/soiled areas of the carpet. Let the solution sit for 2 minutes allowing the oxygen-based bleach to break up stains and brighten the carpet. Gently blot with white towels. Apply a small amount of liquid dish soap to a white towel and work into the carpet with your fingertips to release more trapped soil. Rinse the area thoroughly by spraying lightly with cool water, then blot to remove moisture. Vacuum once fully dry, to restore the carpet pile. The Power of Plain Club Soda Club soda’s mild mineral content and pinpoint bubbles make it a gentle foaming cleanser. The light abrasion removes spills or stains without extreme friction or moisture. Quickly blot up any accessible liquid. Then spray chilled club soda onto the stained/spilled section until slightly damp. Let sit for 1-2 minutes for active bubbling to break down pigments. Firmly blot with white towels, forcing pressure deep into carpet fibers to absorb lifted dirt. Check towels and keep spraying, sitting, and blotting focused areas until no more soil transfers onto the towels. Fluff carpet pile with fingers once visibly clean. The gentle ingredients allow repetitive use without residue accumulating as with other cleaners. For buildup over time, rinse with plain water between uses. Renting Extractors Machine rental carpet cleaners use powered scrub bars, heated cleaning solutions, and strong suction to thoroughly clean carpets. Outlined below are key steps to follow for optimal soil removal: Select a carpet cleaner rental unit. Choose according to the carpet fiber type and size of the area being cleaned. Professional models with spinning brush bars, strong suction, and heating elements work best. Vacuum the carpet thoroughly before cleaning, removing all loose debris. Prepare the carpet cleaner with solution and water according to the manufacturer’s instructions based on surface area. Choose carpet cleaning solutions according to fiber type. Work in manageable sections slowly pushing and then pulling the cleaner over the carpet. Apply even pressure and overlap passes slightly. As the solution is dispensed and extracted, residue automatically gets removed. When tanks reach full level, empty debris/dirty solution tanks completely before continuing work, and rinse/replace any rental filters as needed. Once finished cleaning, run fans, dehumidifiers, or an air conditioner to accelerate drying time to under 12 hours. Do not walk over the damp carpet to prevent pressing residue deeper. Even with rental units, cleaning high-traffic areas takes considerable physical exertion and time for filling tanks and moving heavy equipment repeatedly. Spot Treatment Tips Carpet cleaning may not thoroughly remove heavy stains or long-set residue. Tailoring the treatment and giving extra focus to these areas for how to clean dirty carpet without a machine, helps eliminate any remaining discoloration or rings: Identify unknown spot sources with stain identifier charts. Match substance characteristics visually to likely causes. Select appropriate chemical agents accordingly. Gently loosen stubborn blemishes before wider cleaning passes. Using soft scrub brushes and advised pre-sprays lifts exterior residue without driving stains deeper. Start with the least harsh remover before gradually intensifying scrubbing action or cleaner strength based on improvements. Once carpeting finishes drying after overall cleaning, re-examine spots for any persistent staining. Treat individually with targeted products and techniques before new wicking action sets them permanently. Allow sufficient dwell time and repetitions for maximum

Carpet Cleaning vs Replacement
Blog

Carpet Cleaning vs Replacement| the Best Approach for You

If you’re here, chances are you’ve been paying a lot of attention to your carpets and noticed some imperfections, or maybe you’re planning to buy a new home and wondering whether or not to replace your carpets before you move in. In any case, you can follow the Carpet cleaning vs replacement guide steps below to determine if your carpet needs to be replaced or if cleaning is enough for it. Carpet cleaning vs replacement: which is the best option for you? View spots If you notice a stain or two, it’s worth getting help from the professional carpet cleaning Calgary team to clean your carpets. However, if you still see a stain after the cleaning process, or if cleaning the carpet results in discoloration due to stubborn stains, it’s time to replace your carpet. We recommend that you clean your carpet before moving into a new home. But if your carpet has not been cleaned, there may be stains that cannot be removed. If this is the case, you should invest in replacing the carpet. If you see stains on your carpet, likely, that dirt, bacteria, and their residues have completely penetrated the carpet. Attention to smells If you have noticed that your carpet still smells bad after cleaning. The problem is probably in the depth of the carpet. A bad smell that does not go away usually causes a complete replacement of the carpet. If you have a pet or have changed your lifestyle and are concerned about the smell of urine or dirt, professional Home Cleaning Calgary services are all you need to keep your home fresh and smelling. A regular carpet cleaning schedule along with frequent vacuuming and stain removal can keep your carpet healthy and there is no need to worry about Carpet cleaning vs replacement. Determine Texture Changes At times, rugs become so worn that they begin to lose their intended shape or the height of the rug begins to change. If you notice changes in the texture or height of your carpet or feel like you’re stepping on strange lumps and bumps, it’s time to replace your carpet. Water damage assessment Water damage can happen very quickly and have long-lasting effects on carpets. If your home has been flooded or where water has penetrated your carpet, you must dry the carpet as soon as possible. Molds can start to grow in a few hours and endanger the health of your family and the longevity of your carpet. If you cannot dry your carpet quickly or the source of the water is unsanitary, you should replace your carpet. Consider allergies Some degree of fecal sensitivity may be normal for many people. However, if you notice that your family’s allergies are getting worse for no apparent reason, your carpets may be to blame. Fortunately, this may mean that you should hire a reliable carpet cleaning service to perform a deep cleaning for you. Swift Maids can help assess the health of your carpets and let you know if a bigger problem is on the way and if it needs to be replaced. Calculate the age of the carpet At the end of your carpet’s life, it can help you determine if you need to replace it completely or just schedule a cleaning. When properly cared for with regular deep cleaning and regular maintenance, carpets can last more than 10 years. If your carpet is more than 10 years old and hasn’t been cleaned at least once a year, it may be time to schedule a replacement. Do carpet cleaners ruin carpets? Many people believe in the misconception that carpet cleaners scratch carpets. Or this issue is far from reality. By the way, washing the carpet increases the life of the carpet. But amateur cleaning can usually ruin carpets. How do professional carpet cleaners increase the life of the carpet? Over time, the dirt destroys the carpet fibers and this process continues until the dirt is removed. On the other hand, regular carpet washing removes contamination and preserves the carpet. Also, allowing mold to grow will cause the carpet material to break down. Eventually, it may become so widespread that cleaning cannot remove these molds. However, professional care will remove mold and other harmful substances before they ruin carpets. Professional steam cleaning also restores carpet fibers. A professional carpet cleaner can spot stains and other issues that an amateur might overlook. Professional cleaners also know the correct methods based on sex, texture, and other things. Carpet care can ensure that certain carpets are in good condition for many years. Amateur cleaning is what ruins carpets One of the reasons for this is that amateur cleaners usually use harsh detergents and devices that risk damaging the carpet fibers. They may also not remove detergent residue and excess water. As a result, the remaining detergent creates a sticky layer on the carpet that attracts more dirt than before. Also, the residual washing water causes the growth of carbon in the carpet fibers. Using low-quality tools and techniques can shorten the life of the carpet. Fortunately, the Swift Maids team is on hand to fully evaluate your carpet and let you know to choose Carpet cleaning vs replacement. In the meantime, it should be said that regular cleaning with our unique process can help extend the life of your carpet and keep it fresh So it is better to book your appointment today.

Scroll to Top