Blog

One-Time Cleaning vs Recurring Cleaning
Blog

One-Time Cleaning vs Recurring Cleaning – Which Suits You Best?

Think of it like this: a One-Time Cleaning vs Recurring Cleaning scenario is like choosing between a major overhaul and regular maintenance for your car. Both serve a purpose, but they address different situations. Maybe you just need that big spring clean to get everything back on track, or perhaps you’re looking for ongoing support to keep the chaos at bay. So, let’s dive into the nitty-gritty and explore when each of these cleaning options makes the most sense. We’ll chat about the benefits, the drawbacks, and ultimately help you figure out which path to cleanliness is the right one for you. The Power of the Single Session: One-Time Cleaning Sometimes, all you need is that deep, thorough clean to hit the reset button. A One-Time Cleaning vs Recurring Cleaning decision often leans towards the former when you’re facing a specific situation or just need a comprehensive spruce-up. Think about these scenarios: The Big Spring Clean: Rejuvenating After Winter’s Embrace Ah, spring! You can almost smell the fresh air and see the longer days. But let’s be honest, after a long Calgary winter cooped up indoors, our homes can feel a little… lived-in. Dust seems to have taken up permanent residence, every surface feels a tad grimy, and those dust bunnies under the furniture? They’ve probably started their own little civilization. That’s where a one-time deep spring clean comes in like a breath of fresh air. It’s your chance to throw open the windows, let the sunlight in, and really get into all those corners that have been neglected for months. It’s about more than just tidying up; it’s about revitalizing your entire living space and making it feel fresh and new again. Read Also: Spring Cleaning Challenge 2025 – Home Reset Begins Now Pre or Post Event: Sparkling for Guests, Relaxing After the Fun Planning to host a special gathering at your Calgary home? Whether it’s a cozy dinner party or a bigger celebration, you want your space to look its absolute best for your guests. A strategic one-time clean beforehand can ensure every room is sparkling, creating a welcoming and impressive atmosphere. And let’s not forget the aftermath! After all the fun and festivities, the last thing you want to face is a mountain of dishes and a disaster zone. A post-party one-time clean can be a lifesaver, allowing you to actually relax and recover while someone else takes care of the scrubbing and tidying. Moving In or Out: Starting Fresh, Leaving a Good Impression Moving is often cited as one of life’s most stressful events, and worrying about cleaning on top of everything else? No thanks! When you’re moving into a new Calgary home, a one-time move-in clean ensures you’re starting fresh in a truly spotless environment. It’s about creating a clean slate and making the space feel truly yours from the moment you arrive. Similarly, when you’re moving out, a thorough one-time clean is often essential for getting your security deposit back and leaving a positive impression on the landlord or new owners. It’s one less hurdle to worry about during an already hectic time. Read Also: Move out cleaning checklist | Ultimate & professional Post-Renovation Dust Debacle: Conquering the Construction Chaos Renovating your Calgary home can be incredibly exciting, transforming your space into exactly what you’ve dreamed of. But the one downside? The inevitable dust and debris that seem to get everywhere. It can linger for weeks, making your newly renovated space feel less like a dream and more like a construction zone. A professional one-time post-construction clean is specifically designed to tackle this mess. They have the specialized tools and expertise to remove all that fine dust and debris, leaving your newly renovated space truly livable, sparkling clean, and ready for you to enjoy. When Life Gets Overwhelming: Catching Up and Getting Back on Track Let’s be honest, life in Calgary can get incredibly busy. Work deadlines, family commitments, social events – sometimes, cleaning just falls to the very bottom of the priority list. And before you know it, things can feel a little out of control. That’s where a one-time cleaning can be a real game-changer. It’s not about admitting defeat; it’s about recognizing when you need a little extra support to catch up and get your home back to a manageable state. It’s a way to hit the reset button without the pressure of committing to a regular service, allowing you to regain control and feel more comfortable in your own space. The beauty of a one-time clean is its flexibility. You can tailor it to your specific needs and focus on the areas that require the most attention. It’s a powerful tool for tackling specific cleaning challenges or just giving your home a much-needed deep refresh. The Consistent Comfort: Recurring Cleaning On the other side of the One-Time Cleaning vs Recurring Cleaning debate is the option of ongoing support. Recurring cleaning services are all about maintaining a consistent level of cleanliness in your home, taking the burden of regular housework off your shoulders. Consider these benefits of a regular cleaning schedule: Time Savings: Reclaiming Your Precious Hours Let’s be real, life in Calgary is busy! Between long workdays, family commitments, maybe trying to catch a hockey game or explore the beautiful Rockies, finding the time for regular, thorough cleaning can feel like a constant battle. Recurring cleaning swoops in like a superhero, freeing up those precious hours you’d normally spend dusting, vacuuming, and scrubbing. Imagine what you could do with that extra time – pursue a hobby, spend quality time with loved ones, or simply just relax and recharge after a demanding week. For many Calgarians, this time savings alone is the biggest draw of a regular cleaning service. Consistent Cleanliness: Saying Goodbye to the Cleaning Rollercoaster You know that feeling – your home is sparkling clean right after you’ve spent hours tidying up, but then a few days (or even hours!) later, it’s back to feeling… well, lived-in. With
Spring Cleaning Challenge 2025
Blog

Spring Cleaning Challenge 2025 – Home Reset Begins Now

Okay, let’s get this place sparkling! You know how it is – winter finally loosens its grip, the days get longer, and suddenly… you notice all the dust bunnies having a party under your couch. Yep, it’s that time again. But don’t groan just yet! We’re not talking about some dreary chore. We’re talking about the spring cleaning challenge 2025! Think of it less like a task and more like a fresh start. A chance to hit the reset button on your living space and, honestly, on your mind too. You ever notice how a clean space just makes you feel… lighter? More organized? Ready to tackle whatever comes your way? That’s the magic of a good spring clean. Now, I know what you might be thinking. “Challenge? Isn’t cleaning enough of a challenge already?” And you’re not wrong! But this isn’t about turning your home upside down in a single weekend and then collapsing in a heap. This is about breaking it down, making it manageable, and even… dare I say… a little bit enjoyable? So, are you with me? Let’s dive into how we can absolutely crush this spring cleaning challenge 2025 and make your home a haven. Step One: The Grand Vision (and a Little Planning) Before you even think about grabbing a duster, let’s take a moment for some big-picture thinking. Walk through your home, room by room. What are the areas that are screaming for attention? What projects have you been putting off? Maybe it’s that closet that threatens to avalanche every time you open it, or perhaps it’s the windows that haven’t seen sunlight clearly in months. Jot these down. No need to be super detailed yet, just get a general idea of the scope. This helps prevent feeling overwhelmed later. Think of it like mapping out an adventure – you need to know the terrain before you start hiking! Now, let’s get a little more specific. Grab a notebook or your favorite note-taking app and let’s create a rough schedule. Don’t try to do everything at once! Break it down into smaller, bite-sized tasks that you can tackle over a few days or even a few weeks. For example, your week one might look something like this: Day 1: Tackle the living room – dusting, vacuuming, window washing. Day 2: Conquer the kitchen – cleaning countertops, appliances, mopping floors. Day 3: Bathroom blitz – scrubbing toilets, showers, mirrors. Day 4: Declutter a specific area – maybe that dreaded junk drawer or a bookshelf. Day 5: Laundry room refresh – wiping down machines, organizing supplies. Feel free to adjust this based on your home and your availability. The key is to be realistic and avoid burnout. Remember, this is a marathon, not a sprint! Step Two: Decluttering – The Great Purge Okay, this is where things might get a little… emotional. We all have those items we hold onto “just in case.” But be honest with yourself. When was the last time you actually used that chipped mug or that sweater you haven’t worn since 2018? Decluttering is crucial before you start the actual cleaning. Why clean around things you’re just going to get rid of anyway? Go through each room and be ruthless! Ask yourself these questions: Have I used this in the past year? Does it bring me joy? (Thanks, Marie Kondo!) Is it broken or beyond repair? Do I have multiples of this item? For anything you decide to part with, have three boxes ready: Donate: For items in good condition that someone else can use. Trash: For things that are truly unusable. Recycle: For items that can be recycled according to your local guidelines. Trust me, once you start decluttering, it can be surprisingly liberating. It’s like creating physical and mental space at the same time. Step Three: The Nitty-Gritty – Let the Cleaning Commence! Alright, the clutter is (mostly) gone. You’ve done the hard part! Now for the satisfying bit – making everything actually clean. Remember that schedule we mapped out? Time to roll up those sleeves and put it into action, room by room. Living Room/Dining Room: Dusting, Vacuuming, and Making it Shine Think about your living and dining spaces – these are often where we spend a lot of time, and they can really accumulate the dust. Let’s start by dusting absolutely everything. I mean light fixtures, ceiling fans (those blades can be dust collectors!), shelves, picture frames… you name it. Then, grab that vacuum or mop and tackle the floors, making sure to get under all the furniture where those sneaky dust bunnies like to hide. Wash those windows and mirrors until they sparkle – you’ll be amazed at how much brighter the room feels. Finally, wipe down all surfaces like tables and entertainment centers, and if you’re feeling ambitious, maybe even give your upholstery a good vacuuming or spot clean to freshen things up. Kitchen: Countertops, Appliances, and a Sparkling Sink Ah, the heart of the home! Let’s get this space gleaming. Start by cleaning all those countertops and backsplashes – they can get surprisingly grimy. Then, let’s tackle the sink; give it a good scrub to get rid of any lingering food particles or stains. Now for the appliances: clean inside and out of everything – the oven (that burnt-on stuff can be tough, I know!), the microwave (popcorn explosions, anyone?), the refrigerator (time to toss those old leftovers!), and even the dishwasher (it needs cleaning too!). Don’t forget to wipe down all the cabinets – they can get sticky. Finally, mop the floor to get rid of any spills, and let’s not forget the trash can – a little cleaning and deodorizing can go a long way! Bathroom: Scrubbing, Shining, and Organizing Time to make that bathroom feel fresh and clean! Let’s start with the essentials: scrub the toilet, shower, and sink until they’re sparkling. Then, clean those mirrors until you can actually see your reflection clearly! Wipe down all surfaces like

Why Calgary Residents Are Hiring Professional Cleaners
Blog

Why Calgary Residents Are Hiring Professional Cleaners

So, more and more folks are choosing to bring in the professionals to handle the cleaning, and it got me thinking – why Calgary Residents Are Hiring Professional Cleaners? It’s not just a random trend; there are some really solid reasons behind this shift. You know how it is here in Calgary. We’re a busy bunch. Between long work hours, family commitments, trying to squeeze in some time for those stunning mountain views, and maybe even braving a Stampede or two, who honestly has a ton of extra time to spend scrubbing toilets and dusting baseboards? Life just gets hectic, and housework often ends up at the bottom of the to-do list. But it’s not just about a lack of time. I think there’s a growing understanding that a truly clean home can make a real difference in your overall well-being. It’s about creating a sanctuary, a space where you can actually relax and recharge after a long day. And let’s be honest, sometimes our own cleaning efforts, while well-intentioned, might not achieve that deep, truly clean feeling. So, let’s delve deeper into why Calgary Residents Are Hiring Professional Cleaners and explore the different factors at play. The Precious Commodity: Time Savings In today’s world, time is arguably our most valuable asset. Think about how many hours you might spend each week cleaning your home – vacuuming, mopping, scrubbing bathrooms, dusting, and the list goes on. For many Calgarians, those hours could be much better spent pursuing hobbies, spending quality time with family and friends, or simply unwinding after a demanding work week. Hiring professional cleaners is like reclaiming those lost hours. Imagine coming home after a long day to a sparkling clean house, without having lifted a finger. That saved time alone is a huge draw for busy individuals and families. It allows them to focus on what truly matters to them, knowing that the cleaning is in capable hands. The Pursuit of a Deeper Clean Let’s be honest, our regular cleaning routines might tackle the surface-level dirt and dust, but professional cleaners have the expertise, the right tools, and the high-quality products to achieve a much deeper clean. They know the nooks and crannies where dirt and allergens like to hide. They have industrial-strength vacuums, specialized cleaning solutions, and the know-how to tackle tough stains and grime that might seem impossible to remove on your own. This isn’t just about appearances. A deep clean can significantly improve the air quality in your home by removing dust mites, pet dander, and other allergens that can affect your health, especially for those with allergies or respiratory issues. Why Calgary Residents Are Hiring Professional Cleaners often comes down to creating a healthier living environment for themselves and their families. The Stress Reduction Factor Let’s face it, cleaning can be stressful! It can feel like a never-ending task, especially when you’re already juggling so much. Coming home to a messy house after a long day can add to that stress. Hiring professional cleaners can alleviate this burden. Knowing that your home will be consistently clean can bring a sense of calm and order to your life. It’s one less thing to worry about, freeing up mental energy to focus on other aspects of your life. Imagine the feeling of walking into a spotless home, knowing that everything is taken care of. That peace of mind is a significant benefit for many Calgarians. Consistency and Reliability Life can be unpredictable. One week you might have plenty of time to clean, and the next you’re swamped. Hiring professional cleaners provides a consistent and reliable cleaning schedule. You can set up regular appointments – weekly, bi-weekly, or monthly – and know that your home will be cleaned to a high standard on a predictable basis. This consistency ensures that dirt and grime don’t have a chance to build up, making your home a consistently pleasant place to be. Dealing with Specific Cleaning Challenges Sometimes, there are specific cleaning tasks that are just too daunting or time-consuming to handle on your own. Maybe you’ve just finished a renovation and are facing a mountain of dust and debris. Or perhaps you’re moving in or out of a property and need a thorough deep clean. These are situations where professional cleaners really shine. They have the experience and equipment to handle these specific challenges efficiently and effectively. Investing in the Longevity of Your Home Regular professional cleaning isn’t just about making your home look good; it’s also an investment in its longevity. Regular deep cleaning can help protect your furniture, carpets, and appliances by preventing the buildup of dirt and grime that can cause wear and tear over time. By taking care of these things, you can potentially save money in the long run by avoiding costly repairs or replacements. The “Treat Yourself” Aspect Let’s be honest, sometimes hiring a professional cleaner is simply about treating yourself. It’s a way to invest in your own well-being and make your life a little bit easier. You work hard, and having a clean home without having to do all the dirty work yourself can feel like a well-deserved luxury. It’s a way to prioritize your time and energy for the things you truly enjoy. Read Also: The Advantages of Leveraging Cleaning Services Calgary Finding the Right Fit in Calgary For Calgary residents considering this option, finding a reliable and trustworthy cleaning service is key. You want a team that is professional, detail-oriented, and respects your home. It’s about finding a service that understands the specific needs of Calgary homes and can deliver a consistent, high-quality clean. For those of you in the Calgary area looking to reclaim your weekends or achieve that truly deep clean, perhaps it’s time to consider a professional touch. Services house cleaning Calgary provided by Swift Maids, right here in Calgary, are dedicated to providing that reliable, high-quality clean you deserve, giving you back valuable time and a sparkling home. It’s all about finding what

Deep Cleaning vs Regular Cleaning Cost
Blog

Deep Cleaning vs Regular Cleaning Cost – Budget Breakdown

It’s a common question, and understanding the difference in deep cleaning vs regular cleaning cost is crucial for making the right choice for your home and your wallet. You know how it is – you want a clean space, but you also need to be mindful of your budget. So, let’s break down the factors that influence the deep cleaning vs regular cleaning cost and help you navigate this decision with confidence. Think of it like this: deciding between a deep clean and regular cleaning is similar to choosing between a major car detailing and a regular car wash. Both get your vehicle clean, but one involves a much more intensive and time-consuming process, which naturally affects the price. The same principle applies to our homes. The Investment of Time and Effort: Deep Cleaning Cost When you opt for a deep clean, you’re essentially asking for a top-to-bottom, meticulous scrubbing of your entire living space. This isn’t just your standard tidy-up; it involves tackling all those areas that often get overlooked during regular cleaning. Think about: Reaching the Unreachable: Cleaning ceiling fans, light fixtures, high shelves, and the tops of cabinets. Deep Scrubbing: Getting into grout lines in bathrooms and kitchens, scrubbing away built-up grime in showers and ovens. Detail Work: Wiping down baseboards, door frames, window sills, and cleaning inside cabinets and drawers (if requested and emptied). Appliance Deep Clean: Often includes cleaning inside the refrigerator and oven. Thorough Floor Care: This might involve more intensive vacuuming under furniture, deep mopping, or even carpet cleaning in some cases. Because of the sheer amount of time, effort, and often specialized products and equipment involved, the regular cleaning vs deep cleaning cost will always see deep cleaning on the higher end. Cleaning professionals need to dedicate significantly more time to achieve this level of cleanliness. Read Also: A comprehensive Residential deep cleaning checklist The Value of Maintenance: Regular Cleaning Cost Regular cleaning, on the other hand, is about maintaining a certain level of cleanliness on an ongoing basis. It typically includes the essential tasks needed to keep your home tidy and comfortable. This usually involves: Surface Cleaning: Dusting accessible surfaces, wiping down countertops and tables. Floor Care: Vacuuming carpets and rugs, mopping hard floors. Bathroom Basics: Cleaning toilets, sinks, and showers/tubs. Kitchen Essentials: Wiping down the exterior of appliances, cleaning the sink, and wiping down kitchen surfaces. Trash Removal: Emptying wastebaskets. Because regular cleaning focuses on the more frequently used areas and doesn’t involve the same level of deep scrubbing or detail work, the deep cleaning vs regular cleaning cost is generally lower per session compared to a deep clean. The idea is that by maintaining a consistent cleaning schedule, you prevent the buildup of heavy grime and dirt, making each subsequent cleaning less intensive. Key Factors Influencing the Cost Difference Several factors contribute to the difference in deep cleaning vs regular cleaning cost: Time Required: Deep cleaning inherently takes much longer than a regular clean due to the increased tasks and level of detail involved. Labor costs are a significant part of cleaning service pricing. Scope of Work: The specific tasks included in a deep clean are more extensive than those in a regular clean. Condition of the Home: If a home hasn’t been cleaned thoroughly in a while, even a “regular” clean might take longer and cost more initially. For a deep clean, a very dirty home will require significantly more time and effort, increasing the price. Size of the Home: Larger homes naturally take longer to clean, regardless of whether it’s a deep clean or a regular clean. This will impact the overall cost for both types of services. Number of Cleaners: Some cleaning services send a team of cleaners, which can reduce the overall time but might affect the hourly rate. Specialized Products and Equipment: Deep cleaning might require the use of specialized cleaning solutions or equipment that regular cleaning doesn’t. Typical Cost Breakdown (General Estimates for Calgary) While prices can vary depending on the cleaning company, the size of your home, and its condition, here are some general estimates to give you an idea of the deep cleaning vs regular cleaning cost in Calgary: Regular Cleaning For a standard-sized apartment or small house, a regular cleaning might range from $100 to $200 per session. For larger homes, it could be $200 to $350 or more, depending on the frequency (weekly, bi-weekly, monthly often have different rates). Hourly rates for regular cleaning in Calgary can range from $30 to $60 per cleaner. Deep Cleaning Due to the extra time and effort, a deep clean for the same apartment or small house could range from $200 to $400 or more. For larger homes, the cost of deep cleaning Calgary could easily climb to $400 to $700 or higher. Some companies in Calgary might quote deep cleaning based on an hourly rate that’s higher than their regular cleaning rate, perhaps in the $40 to $100+ per hour range per cleaner, or by a flat fee based on the size and condition of the home. When to Choose Which Service Understanding the deep cleaning vs regular cleaning cost helps you decide which service best fits your needs: Choose Deep Cleaning If You’re a first-time client of a cleaning service. Many companies recommend a deep clean for the initial service to bring your home up to a manageable baseline. Your home hasn’t been professionally cleaned in a long time. You’re moving in or out of a property. You’ve just completed renovations. You need a thorough spring cleaning or a one-time intensive clean. Choose Regular Cleaning If Your home is generally in good condition and you want to maintain that cleanliness. You’re looking for ongoing help with routine cleaning tasks. You want to save time and reduce the stress of regular housework. Conclusion For those in the Calgary area considering consistent home care, Swift Maids offers reliable recurring cleaning services tailored to your needs and budget. We focus on providing a

Blog

Best Time to Power Wash Your House | Smart Homeowner Tips

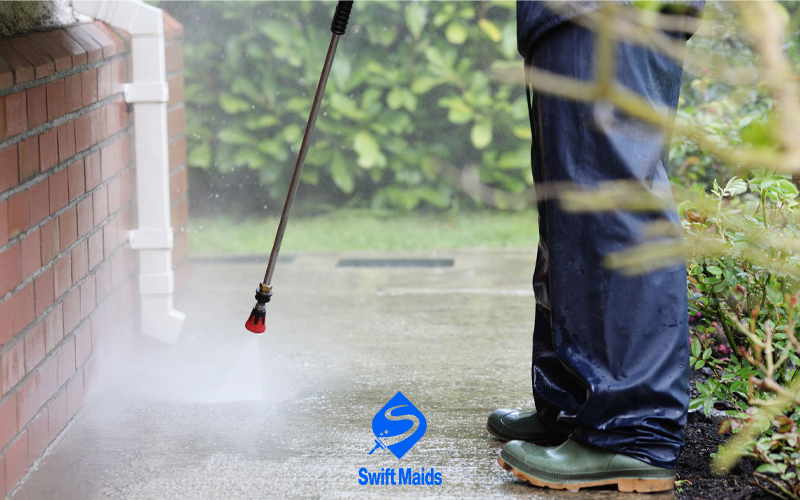
You know how our weather can be – from dusty summers to snowy winters, our homes’ exteriors really take a beating. So, when is the best time to power wash your house? It’s a question I get asked a lot, and the answer isn’t always as straightforward as you might think. Think of power washing like giving your house a really, really good scrub. It blasts away all that built-up dirt, mildew, algae, and whatever else the Calgary winds have decided to stick to your siding. But just like you wouldn’t choose the middle of a blizzard to wash your car, there are definitely optimal times to break out the power washer. So, let’s dive into the details and figure out the best time to power wash your house to get the most effective and long-lasting clean. Spring Awakening: A Popular Choice   For many Calgary homeowners, spring emerges as a prime contender for the best time to power wash your house. Think about it – winter has finally released its icy grip, and you’re probably starting to notice all the dirt and grime that accumulated over the colder months. Salt stains, general winter muck, and maybe even the beginnings of mold or mildew growth from damp conditions can leave your house looking a little worse for wear. Power washing in the spring allows you to tackle all that buildup before the warmer months really kick in. The weather is usually milder, which is ideal for working outdoors, and it gives your home a fresh, clean look just in time for outdoor entertaining and enjoying your yard. Plus, getting rid of any mold or mildew early can prevent it from spreading and causing more significant issues later in the year. The Gentle Transition: Fall’s Appeal Fall is another excellent window for the best time to power wash your house. As the leaves change and the temperatures cool down, it’s a great opportunity to prepare your home for the upcoming winter. Think about all the leaves, dirt, and other debris that might have accumulated on your siding and around your foundation over the summer. Power washing in the fall gets rid of all that, preventing potential damage from moisture and freezing temperatures over the winter months. Plus, just like spring cleaning, a fall power wash can give your home a nice refresh before the darker days of winter set in. It’s a way to ensure your house looks its best heading into the colder season. Weather Wisdom: Key Considerations   Regardless of whether you choose spring or fall, there are some crucial weather-related factors to keep in mind when deciding on the Best Time to Power Wash Your House: Temperature Avoid power washing when temperatures are near freezing. The water can freeze on surfaces, potentially causing damage, and it’s certainly not a comfortable task for you! Similarly, avoid extremely hot days, as the water can evaporate too quickly, leaving behind streaks and making it harder to rinse away the cleaning solutions effectively. Aim for mild temperatures, ideally between 40°F and 75°F (around 4°C and 24°C). Wind A windy day is not your friend when power washing. The wind can blow the spray around, making it difficult to target the dirt and grime effectively, and it can also cause the cleaning solution to dry unevenly. Wait for a calm day. Rain Obviously, power washing in the rain is counterproductive. Not only will the rain wash away the cleaning solution before it has a chance to work, but it also creates slippery conditions, making the task more dangerous. Choose a dry day for your power washing project. Sunlight While a sunny day might seem ideal, direct, intense sunlight can cause cleaning solutions to dry too quickly and leave streaks. If possible, opt for a cloudy day or choose to power wash in the early morning or late afternoon when the sun isn’t as harsh. Beyond the Seasons: Other Times to Consider While spring and fall often emerge as the best time to power wash your house, there are definitely other instances where grabbing that power washer (or calling in the pros!) makes perfect sense. Think about it – if your Calgary home has just weathered after major storms, leaving behind significant amounts of dirt, mud, or other debris clinging to your siding, a good power wash is often the most efficient way to restore its clean look. Furthermore, if you’re planning on giving your house a fresh coat of paint or stain, power washing before painting or staining is absolutely crucial. It provides a clean, sound surface, ensuring that the new paint or stain adheres properly and lasts longer. And finally, if you happen to notice visible mold or mildew growth on your siding, please don’t wait for the traditional spring or fall cleaning window. Addressing this promptly with a power wash can prevent further damage to your home’s exterior and, more importantly, help protect your family’s health. So, while seasonal cleaning is great, keep these other situations in mind too! Read Also: Fine-Tuning Your Power Washing Techniques for Success Preparing Your Calgary Home for Power Washing   No matter when you decide is the Best Time to Power Wash Your House, a little preparation can go a long way in ensuring a successful and safe cleaning: Clear the Area: Remove any outdoor furniture, potted plants, decorations, and other items from the areas you plan to power wash. Protect Plants: Cover any delicate plants or shrubs near the house with tarps or plastic sheeting to shield them from the force of the water and any cleaning solutions. Close Windows and Doors: Ensure all windows and doors are tightly closed and latched to prevent water from getting inside your home. Cover Electrical Outlets: Protect any outdoor electrical outlets from water by covering them with plastic or using weatherproof covers. Inspect Siding: Check your siding for any loose or damaged areas before power washing, as the high pressure could exacerbate these issues. Inform Neighbors:

How to Clean Outdoor Furniture Covers
Blog

How to Clean Outdoor Furniture Covers

Calgary summers are precious. We wait all year for those glorious days when we can fire up the BBQ, relax on the patio, and soak up the sunshine. But all that outdoor enjoyment can take a toll on your furniture, especially the covers. Dirt, grime, bird droppings – it’s all part of the outdoor experience. But don’t despair! Answering to the question How to Clean outdoor furniture covers is easier than you think, and it can make a world of difference in the look and longevity of your patio set. Why Clean Your Outdoor Furniture Covers? More Than Just Aesthetics Sure, clean furniture looks better. But cleaning outdoor furniture covers is about more than just aesthetics. Regular cleaning: Extends the life of your covers: Dirt and grime act like sandpaper on fabric, breaking down the fibers over time, causing it to fade, tear, or become brittle. Regular cleaning removes these abrasive particles, preserving the integrity of the fabric and preventing premature wear and tear. Prevents mold and mildew: Moisture trapped in dirty covers, especially after rain or spills, can create a breeding ground for mold and mildew, which can be both unsightly and unhealthy. Mold and mildew can also damage the fabric and create unpleasant odors. Cleaning and thoroughly drying your covers prevents these issues. Keeps pests at bay: Food crumbs, spills, and other debris that accumulate on outdoor furniture can attract insects and other pests, like ants, flies, and even rodents. Regular cleaning removes these attractants, creating a more pest-free environment for you to enjoy your patio. Creates a healthier environment: Regular cleaning removes allergens, like pollen and dust mites, and other irritants that can accumulate on outdoor furniture, contributing to a healthier outdoor space for you, your family, and your guests, especially those with allergies or sensitivities. Read Also: How to Remove Mold Off Wood Furniture Know Your Fabric: The Key to Successful Cleaning Before you start scrubbing, it’s crucial to know what your outdoor furniture covers are made of. Different fabrics require different cleaning methods, and using the wrong approach can damage your covers. Understanding the properties of your fabric will help you choose the best cleaning products and techniques. Polyester: Durable, water-resistant, and relatively easy to clean, polyester is a popular choice for outdoor furniture covers. It’s resistant to shrinking and stretching, making it a practical option. Acrylic: Highly resistant to fading and mildew, making it a good choice for sunny climates like Calgary, where the sun can be intense. Acrylic fabrics are also known for their vibrant colors and soft texture. Olefin: Strong, stain-resistant, and comfortable, olefin is a good option for high-traffic areas. While it’s less resistant to fading than acrylic, it’s still a durable and practical choice. Canvas: A sturdy and classic material, canvas offers a traditional look for outdoor furniture. However, it can be prone to shrinking and fading if not properly cared for. Special care should be taken with canvas to prevent water damage and maintain its appearance. Check the care label on your furniture covers for specific cleaning instructions. If you can’t find the label, it’s always best to err on the side of caution and use a gentle cleaning method, starting with a small, inconspicuous area to test the cleaning solution. Read Also: What is the Best Way to Clean a Fabric Couch? Gathering Your Supplies: The Cleaning Arsenal Having the right tools on hand will make the cleaning process much smoother and more efficient. A well-stocked cleaning arsenal will save you time and frustration. Mild detergent: Choose a detergent that’s specifically designed for outdoor fabrics or a gentle dish soap. Avoid harsh chemicals or bleach, which can damage the fabric, causing discoloration, weakening the fibers, or even destroying the water-resistant properties of your covers. Soft-bristled brush: A brush with soft bristles will help loosen dirt and grime without scratching the fabric or damaging any special coatings. A stiff brush can tear the fabric or pill it. Bucket or basin: For mixing your cleaning solution and soaking smaller covers or cushion covers. Having a large enough container makes the cleaning process easier. Garden hose: For rinsing the covers thoroughly after cleaning. A strong spray can help remove all soap residue. A gentle spray is better for delicate fabrics. Clean towels: For blotting excess water and helping the covers dry more quickly. Microfiber towels are especially good at absorbing moisture. Optional: Washing machine: Some covers can be machine-washed, but always check the care label first. If machine washing is recommended, use a gentle cycle and cold water to prevent shrinking or damage. Even if machine washing is allowed, you may still need to spot-clean heavily soiled areas beforehand. Step-by-Step Guide: Cleaning Outdoor Furniture Covers Now that you’re prepared, let’s get down to the cleaning! Here’s a general guide for cleaning outdoor furniture covers: Remove loose dirt: Use a brush or vacuum cleaner to remove any loose dirt, leaves, or debris from the covers. Prepare the cleaning solution: Mix a small amount of mild detergent with water in a bucket or basin. Spot clean: If there are any stubborn stains, pre-treat them with a stain remover or a paste of baking soda and water. Wash the covers: If the care label allows, you can machine-wash the covers. Use a gentle cycle and cold water. If machine-washing isn’t recommended, hand-wash the covers using the cleaning solution and a soft-bristled brush. Rinse thoroughly: Rinse the covers thoroughly with a garden hose to remove any soap residue. Dry the covers: Allow the covers to air dry completely in a shaded area. Avoid putting them in the dryer, as this can cause them to shrink or damage the fabric. Tips and Tricks for Sparkling Clean Covers Here are some additional tips to keep your outdoor furniture covers looking their best: Clean regularly: The more often you clean your covers, the easier it will be to remove dirt and grime. Aim to clean them at least once a month during the summer months. Protect your

How to Clean a Neglected House
Blog

How To Clean A Neglected House | Detailed Breakdown

We’ve all seen them: homes where life, or perhaps a lack of it, has taken its toll. Maybe it’s a relative’s property, a recent purchase, or even your own space that’s simply gotten out of hand. The task of cleaning a neglected house can feel overwhelming, like staring up at a mountain you have to climb. But trust me, it’s doable. And you’re not alone. How To Clean A Neglected House: Where Do You Even Start? First things first, breathe. Don’t try to do everything at once. It’s a marathon, not a sprint. Break the house into manageable zones. Think room by room, or even smaller sections within a room. And, honestly, if you can, bring a friend or family member. Moral support and extra hands are invaluable. Before you even touch a cleaning supply, take a walk through the house. What are the biggest issues? Is it just dust and grime, or are there more serious problems like mold or pest infestations? Make a list. This list will be your roadmap. Sometimes, no matter how much you try, how to clean a neglected house can be too much. If you’re overwhelmed, don’t hesitate to call in the professionals. Cleaning services like Swift Maids, operating in Calgary, can take over the heavy lifting, giving you back your time and peace of mind. Gear Up: What You’ll Need For a truly neglected space, you’ll need more than your standard cleaning supplies. Think heavy-duty. Protective gear: Gloves (thick ones), masks (especially if there’s mold), and perhaps even safety goggles. Trash bags: Lots of them. Heavy-duty ones are best. Cleaning solutions: All-purpose cleaner, disinfectant, mold and mildew remover, and something for those stubborn stains. Tools: Sponges, scrub brushes, a sturdy mop, a vacuum with a HEPA filter, and maybe even a scraper for those stuck-on messes. Deodorizers: Baking soda, vinegar, or commercial odor eliminators. The Decluttering Phase: Digging Out from Under Let’s be real, you can’t effectively clean a house that’s buried under a mountain of stuff. That’s why the decluttering phase is absolutely non-negotiable. It’s the essential first step, the groundwork upon which the entire cleaning project rests. Imagine trying to scrub a countertop hidden beneath piles of old mail and forgotten trinkets – it’s simply impossible. Begin by tackling the obvious culprits: anything that’s undeniably trash. We’re talking expired food festering in the fridge, broken appliances gathering dust, stacks of newspapers from a decade ago, and anything else that’s clearly reached the end of its lifespan. Get those garbage bags ready, and don’t hold back. Once the obvious trash is gone, it’s time to sift through the remaining belongings. This is where the real decision-making begins. Create distinct piles: one for items you’re absolutely keeping, another for items you’ll donate, and a “maybe” pile for those things you’re still on the fence about. You’ll likely be astonished by just how much you can part with. Be ruthless in your evaluations; ask yourself if you truly need each item, or if it’s simply taking up space. Remember, this is about more than just cleaning; it’s about reclaiming your space and creating a fresh start. Every item you remove is a step towards a more organized and manageable home. Embrace the liberation that comes with letting go. Deep Cleaning: The Nitty-Gritty Alright, with the clutter banished, it’s time to roll up your sleeves and get down to the serious business of deep cleaning. This is where you’ll really start to see the transformation take place, bringing your neglected home back to life. The key here is to work systematically, starting from the top and working your way down. Begin with those often-overlooked high areas: ceiling fans, light fixtures, and any high shelves that have likely accumulated layers of dust. A good dusting from above will prevent debris from falling onto surfaces you’ve already cleaned. Next, move onto the walls. A thorough wipe-down with an all-purpose cleaner will work wonders in removing surface grime. For those stubborn stains that resist the initial cleaning, don’t be afraid to bring out a stronger, more specialized solution. Remember to test any strong cleaners in an inconspicuous area first, to avoid any potential damage. Finally, it’s time to tackle the floors. Begin with a thorough vacuuming to remove any loose debris, dust, and dirt. This will make the mopping process much more effective. When mopping, use a disinfectant cleaner to kill any lingering germs and leave your floors sparkling. If your home has carpets, especially if they’re stained or harboring unpleasant odors, consider investing in a professional carpet cleaning. This will not only improve the appearance of your carpets but also contribute to a healthier indoor environment. By following this systematic approach, you’ll ensure that every nook and cranny of your neglected home receives the attention it deserves, leaving you with a clean and refreshed space. The Kitchen: A Battleground Let’s face it, in a neglected house, the kitchen often resembles a battleground, a testament to forgotten meals and accumulated grime. Start with the refrigerator, the epicenter of forgotten leftovers and expired goods. Empty it completely, discarding anything that’s past its prime. Then, armed with disinfectant, meticulously clean the shelves and drawers, restoring them to a hygienic state. Next, turn your attention to the oven and stove, where years of baked-on grease and grime may have taken hold. A heavy-duty oven cleaner is your ally here, capable of dissolving even the toughest stains. Once the oven and stove are gleaming, move on to the countertops and sink. Scrub away any accumulated residue and disinfect thoroughly. Finally, don’t neglect the cabinets. Wipe them down inside and out, removing any dust, grease, or spills that may have accumulated over time. By systematically addressing each area, you can transform your neglected kitchen into a clean and functional space, ready for new culinary adventures. The Bathroom: Restoring Sanity The bathroom, often a haven of relaxation, can quickly become a source of stress in a neglected home. But fear not, restoring its

How to Clean Stains from Vinyl Flooring
Blog

How to Clean Stains from Vinyl Flooring

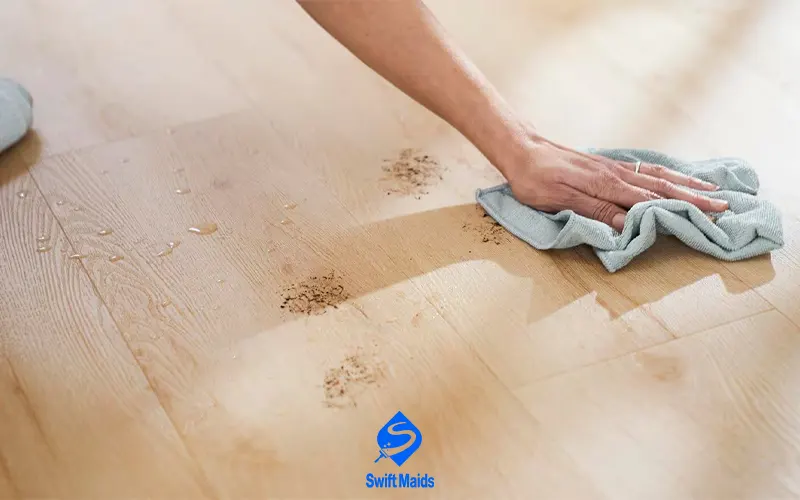
Vinyl flooring is a popular choice for many homeowners – and for good reason! It’s durable, affordable, and comes in a wide variety of styles that can mimic the look of wood, tile, or stone. But let’s face it, life happens. Spills occur, messes get tracked in, and before you know it, you’re wondering how to clean stains from vinyl flooring. Fear not, fellow vinyl floor enthusiast! While vinyl flooring is relatively resilient, knowing how to tackle stains effectively is key to keeping it looking its best. In this comprehensive guide, we’ll dive deep into the nitty gritty of vinyl flooring stain removal, equipping you with the knowledge and tools to conquer any mess that comes your way. Before You Dive In: Understanding Your Vinyl Flooring   The first step to successfully removing stains from vinyl flooring is understanding the type of vinyl flooring you have. There are two main types: Composit Vinyl Tile (CVT): This is the most common type of vinyl flooring. It consists of multiple layers, including a wear layer on top that protects the design and color. Luxury Vinyl Tile (LVT): This type of vinyl flooring is designed to mimic the look of natural materials like wood or stone. It can be thicker and more durable than CVT and may have a textured surface. Knowing your vinyl flooring type will help you choose the right cleaning products and techniques to avoid damaging the wear layer. Here’s a quick trick to identify your vinyl flooring type: Locate a remnant piece of flooring, or look for the installation instructions somewhere inconspicuous (like under a cabinet or appliance). These may indicate the type of vinyl flooring. If you’re unsure about the type of vinyl flooring you have, err on the side of caution and use gentle cleaning methods. You can also consult the flooring manufacturer’s recommendations for specific care instructions. Now that you’ve identified your vinyl flooring type, let’s get down to the nitty-gritty of how to clean stains from vinyl flooring! Read Also: How to Stain Grout |Giving Tile a Whole New Look The Basic Steps for Clean Stains from Vinyl Flooring   Act Quickly Prompt action is crucial when dealing with spills on vinyl flooring. The sooner you address a stain, the easier it will be to remove and the less likely it is to penetrate deeply into the vinyl. Respond quickly to spills. Immediately blot up any excess liquid with a clean, absorbent cloth such as a paper towel or a microfiber cloth. Avoid rubbing or scrubbing the spill, as this can spread the stain and make it more difficult to remove. The quicker you address the spill, the less time the staining agent has to penetrate the vinyl flooring. Prompt action can prevent the stain from setting and causing permanent damage to your flooring. Read Also: Home Cleaning  Calgary Identify the Stain Knowing the source of the stain will help you choose the most effective cleaning solution and approach. Common vinyl flooring stains include food spills such as coffee, wine, juice, and sauces; grease from cooking or pet accidents; and marker or ink. Observe the color, texture, and any distinctive odor of the stain. This information will help you determine the best cleaning method and avoid using harsh chemicals that may damage the vinyl flooring. Choose Your Weapon (Cleaning Solution) For most everyday messes, a mild cleaning solution is usually sufficient. A mild dish soap solution mixed with warm water is often effective for removing general dirt, grime, and light food spills. You can also use a commercially available vinyl floor cleaner specifically designed for use on vinyl flooring. Always test any cleaning solution on an inconspicuous area of the flooring first to ensure it doesn’t discolor or damage the vinyl. Choose a small, hidden area, such as a corner or under a piece of furniture. Apply a small amount of the cleaning solution to the test area and allow it to dry completely. Check for any discoloration, fading, or other signs of damage before proceeding with cleaning the stain. Gently Does It When cleaning the stained area, use gentle techniques to avoid damaging the vinyl flooring surface. Use a soft microfiber cloth to clean the stained area. Avoid abrasive scrubbers or scouring pads, as these can scratch the surface of the vinyl flooring. Gently blot or wipe the stain with the damp cloth, working from the edges inwards to prevent spreading the stain. Rinse the cloth frequently with clean water to prevent the spread of the stain. By following these steps and using the appropriate cleaning methods, you can effectively remove most stains from your vinyl flooring and maintain its beauty and longevity. Tackling Tougher Stains   For stubborn stains that require a little more muscle, you may need to adjust your cleaning approach. Here are some tips for specific stain types: Grease and Oil Stains: Sprinkle baking soda on the stain and let it sit for 15 minutes. The baking soda will absorb the grease. Then, use a damp microfiber cloth with a mild dish soap solution to clean the area. Pet Accidents: Blot up any excess mess immediately. Then, mix equal parts white vinegar and water in a spray bottle. Lightly spritz the affected area and wipe clean with a damp microfiber cloth. Important Note: Always dilute vinegar with water before using it on vinyl flooring. Marker or Ink Stains: Use rubbing alcohol on a cotton swab to dab at the stain. Work from the outside of the stain inwards to prevent spreading. Be gentle and avoid scrubbing, as this can push the ink deeper into the vinyl. Remember: Always test any cleaning solution on an inconspicuous area before applying it directly to the stain. When in Doubt, Call in the Professionals Sometimes, life gets busy, or you may encounter a stain that you’re just not comfortable tackling yourself. That’s where professional cleaning services can come in handy. Swift Maids offers a range of cleaning services in Calgary, Alberta, including vinyl

Blog

How to Clean Black Shower Tiles | Quick Tips & Fixes

Black shower tiles – oh how they add a touch of drama, luxury, and modern sophistication to your bathroom! But let’s be honest, those same dark surfaces that turn heads can also turn into cleaning nightmares. Water spots, soap scum, and hard water stains seem to magically appear on black shower tiles, leaving you wondering how to clean black shower tiles and restore their gleam. Fear not, we’ve all been there. The good news is that with the right knowledge and cleaning routine, you can keep your black shower tiles looking their best. In this comprehensive guide, we’ll go over black shower tile cleaning in detail, equipping you with the tips and tricks to banish grime and keep your shower looking sleek and stylish. Understanding the Enemy: Why Black Shower Tiles Show Everything   Before we dive into cleaning solutions, let’s understand why black shower tiles present a unique cleaning challenge. Black surfaces are simply more adept at revealing imperfections. Here’s the science behind it: Light Reflection: Lighter surfaces reflect light, diffusing water spots and mineral deposits. Black surfaces, on the other hand, absorb light, making those imperfections stand out more. Water Spots: Water spots are essentially mineral deposits left behind after water evaporates. On lighter tiles, these deposits may be less noticeable. Black tiles, however, create a stark contrast, making water spots very apparent. Read Also: How to Clean Bathroom Mirror Stains | Save Your Reflection from Grime The Importance of Regular Cleaning The key to maintaining beautiful black shower tiles is regular cleaning. By incorporating a simple cleaning routine into your shower schedule, you can prevent the buildup of soap scum, hard water stains, and mildew. Think of it as preventative maintenance for your shower’s glamorous facade. Here’s a quick tip: After each shower, squeegee the excess water off the black shower tiles. This simple step helps prevent water spots and makes your next cleaning session a breeze! Now that we understand the challenges and the importance of regular cleaning, let’s get down to the nitty-gritty of how to clean black shower tiles. Gathering Your Cleaning Arsenal   Before you embark on your black shower tile cleaning mission, assemble your cleaning supplies: Microfiber cloths: These are essential for gentle cleaning and buffing without scratching the tile surface. Natural bristle brush (optional): A soft-bristled brush can be helpful for scrubbing stubborn grime, but use it with caution to avoid scratching the tiles. Cleaning solution: Here, you have a few options, depending on the severity of the grime: For everyday cleaning: A simple solution of warm water and dish soap is often sufficient. For tougher stains: A vinegar and water solution (equal parts) can be a natural and effective cleaning agent. For stubborn hard water stains: Commercial cleaning products specifically designed for hard water removal may be necessary. Always test any cleaning solution on an inconspicuous area of the tiles first to ensure it doesn’t discolor or damage the surface. Read Also: How to Stain Grout |Giving Tile a Whole New Look The Cleaning Process Prepare the Shower: Start by removing any bath products or clutter from the shower. Rinse the Tiles: Use warm water to rinse the entire shower surface. This will help loosen dirt and debris. Apply Cleaning Solution: Using your chosen cleaning solution and a microfiber cloth, clean the black shower tiles in sections. Work from top to bottom to avoid streaking. Scrub Stubborn Areas (Optional): For tougher grime or soap scum buildup, use a soft-bristled brush to gently scrub the affected area. Apply light pressure and avoid scrubbing in circles, as this can scratch the tiles. Rinse Thoroughly: After cleaning each section, rinse the tiles thoroughly with clean water to remove any cleaning solution residue. Buff and Dry: Use a clean, dry microfiber cloth to buff the tiles and remove any remaining water spots. Pro Tip: For a streak-free finish, use a squeegee to remove excess water from the shower walls after cleaning. Deep Cleaning for Neglected Showers   If your black shower tiles haven’t been cleaned in a while, you may need a more intensive cleaning approach. Here’s what you can do: For Soap Scum Buildup Soap scum is a common problem in showers, especially with black tiles where it becomes highly visible. A paste made of baking soda and water can be an effective natural solution for removing soap scum buildup. Mix baking soda with water to form a thick paste. Apply the paste generously to the affected areas. Allow the paste to sit for 15-20 minutes to allow the baking soda to work its magic and loosen the soap scum. Gently scrub the affected areas with a soft-bristled brush. Rinse thoroughly with clean water. Repeat the process if necessary. Removing Hard Water Stains Hard water stains can be stubborn and unsightly on black shower tiles. Commercial hard water removers are available at most hardware stores. Choose a product specifically designed for removing hard water stains from tile and grout. Always follow the manufacturer’s instructions carefully. Apply the product to the affected areas and allow it to sit for the recommended time. Rinse thoroughly with clean water. Addressing Mold and Mildew Mold and mildew can thrive in damp, dark environments like showers. Use a commercial mold and mildew remover specifically designed for use in bathrooms. Always wear appropriate safety gear, such as rubber gloves and eye protection, when using strong cleaning chemicals. Apply the mold and mildew remover according to the product instructions. Allow it to sit for the recommended time. Rinse thoroughly with clean water. Ensure proper ventilation during and after application. Read Also: A Thorough and Ultimate Deep Clean Bathroom Checklist Conclusion By following our guide on how to clean black shower tiles, you can effectively clean your black shower tiles and maintain their luxurious appearance. Remember, regular cleaning is key to preventing grime buildup and maintaining the shine of your black tiles. If you’re feeling overwhelmed by the thought of tackling deep cleaning or simply prefer to leave it to

DIY washing machine cleaning
Blog

How to Make DIY Washer Cleaner

We all love the convenience of tossing our dirty clothes into a machine and expecting them to emerge magically clean. But here’s a little secret: washing machines themselves can get pretty grimy over time. Ever noticed a funky smell coming from your laundry, even though you know you used detergent and softener? Or maybe your towels just aren’t coming out feeling quite as fluffy as they used to? These could be signs that your washing machine needs a little TLC – a DIY washing machine cleaning, to be precise! Don’t worry, you don’t need to call in a professional (although, if you’re in the Calgary area and feeling super swamped, Swift Maids offers amazing cleaning services that can include your washing machine!). Believe it or not, with a few common household ingredients and a little elbow grease, you can restore your washing machine’s cleanliness and efficiency. Read Also: Essential Cleaning Dishwasher Tips | Maintain a Sparkling & Fresh Dishwasher Why Does My Washing Machine Need Cleaning?   Think about it: your washing machine handles a lot of dirt, grime, and even leftover body soil from your clothes. Over time, this buildup can accumulate in hidden areas of the machine, creating a breeding ground for mold, mildew, and bacteria. Not only can this lead to unpleasant odors in your laundry, but it can also: Reduce the cleaning effectiveness of your detergent Clog hoses and filters Shorten the lifespan of your washing machine You may need: Home Cleaning Calgary The Benefits of a Clean Washing Machine By performing a DIY washing machine cleaning regularly, you can reap several benefits: Fresher-smelling laundry: No more funky odours clinging to your clothes! Improved cleaning performance: Your detergent will work more effectively with a clean machine. Reduced risk of mold and mildew growth: A clean machine means a less hospitable environment for these unwelcome guests. Extended washing machine lifespan: Regular cleaning helps prevent breakdowns and keeps your machine running smoothly for longer. So, how often should you clean your washing machine? It depends on several factors, such as the frequency of use, water hardness, and the types of clothes you wash. A good rule of thumb is to perform a DIY washing machine cleaning every 1-2 months, or more often if you notice any of the signs mentioned earlier. Now that you know the why and the what, let’s dive into the exciting world of DIY washing machine cleaning solutions! The Classic Vinegar Cleanse   Vinegar is a natural disinfectant and deodorizer, making it an excellent choice for cleaning your washing machine. For Front-Load Washers For front-load washing machines, add 2 cups of white vinegar directly to the drum. Run the machine on the hottest water setting with no detergent. The hot water will help to activate the cleaning power of the vinegar and ensure thorough cleaning. This cycle will help to remove any soap residue, mildew, and musty odors from the drum and door seal. For Top-Load Washers For top-load washing machines, add 4 cups of white vinegar to the drum. Run the machine on the highest water level and the hottest water setting. This will ensure that the vinegar solution reaches all areas of the washing machine, including the sides of the drum and the agitator. After the cycle is complete, wipe down the inside of the drum and the door seal with a clean cloth. This will remove any remaining vinegar residue and help to dry the machine thoroughly. The Baking Soda Boost After the vinegar wash, you can further enhance the cleaning by adding a boost of baking soda. Baking soda is a powerful cleaning agent that can help remove odors and eliminate any remaining residue. Add 1 cup of baking soda to the drum. Run another short cycle with hot water. This will help neutralize any lingering vinegar smell, leaving your washing machine sparkling clean and ready for its next laundry duty. Don’t Forget the Dispenser Drawer   The detergent dispenser drawer is often overlooked during washing machine cleaning, but it can accumulate detergent residue, mold, and mildew over time. This buildup can lead to unpleasant odors and even affect the performance of your detergent. To clean the dispenser drawer, remove it from the washing machine and soak it in a solution of warm water and vinegar for 30 minutes. This will help to loosen and dissolve any accumulated residue. After soaking, use an old toothbrush to gently scrub away any stubborn residue from the corners and crevices of the drawer. Pay close attention to areas where detergent residue tends to build up. Rinse the drawer thoroughly with clean water to remove all traces of the cleaning solution and vinegar. Allow the drawer to air dry completely before replacing it in the washing machine. Maintaining a Clean Washing Machine Wipe down the exterior of the machine: Regularly wipe down the exterior of your washing machine with a damp cloth to remove dust and fingerprints. Leave the door slightly ajar: After each wash cycle, leave the washing machine door slightly ajar to allow air to circulate and prevent the growth of mold and mildew. Clean the lint trap after each load: This will prevent lint buildup and ensure optimal machine performance. Conclusion By incorporating these simple yet effective DIY washing machine cleaning methods into your laundry routine, you can ensure your washing machine remains clean, efficient, and odor-free. A clean washing machine not only ensures that your clothes come out sparkling clean but also helps to prolong the lifespan of your appliance. Remember to perform these cleaning cycles regularly – at least once a month – to maintain optimal washing machine performance. By taking proactive steps to care for your washing machine, you can enjoy fresh, clean laundry and a more efficient laundry routine for years to come.

Scroll to Top