Blog

Blog

A Comprehensive Guide on How to Clean Rattan Furniture

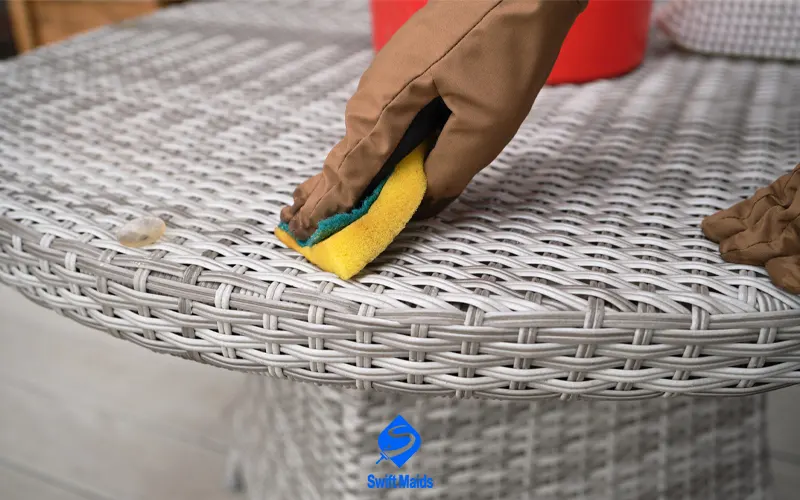
Rattan furniture! It instantly conjures up images of sunny patios, relaxed conversations, and that undeniable touch of bohemian chic. But let’s be honest, those gorgeous natural fibers can also feel a bit intimidating when it comes to cleaning. Fear not, fellow enthusiast! This guide will be your one-stop shop for how to clean rattan furniture, keeping it looking its best for years to come. First things first, let’s talk about what exactly rattan furniture is. It’s a common misconception that rattan and wicker are interchangeable terms. While they’re both natural materials used in furniture making, they come from different sources. Rattan is derived from the vines of palm trees, while wicker is a weaving technique that can be used with rattan, but also with other materials like bamboo or even synthetic fibers. The cleaning methods for rattan furniture will depend on whether you have natural rattan or a wicker piece made with another material. Here’s a quick tip: Look for the furniture’s care label or consult the manufacturer’s instructions for specific cleaning recommendations. Now, let’s delve into the details of cleaning rattan furniture. Read Also: How to Remove Mold Off Wood Furniture How to Clean Rattan Furniture: Everyday Cleaning   The key to maintaining the beauty of your rattan furniture is regular, gentle cleaning. Here’s how to tackle everyday dust and debris: The Mighty Microfiber Cloth Microfiber cloths are your best friend when it comes to everyday cleaning of rattan furniture. They are incredibly soft and gentle, minimizing the risk of snagging or scratching the delicate rattan fibers. Their fine, interwoven fibers effectively trap dust, dirt, and debris, leaving your furniture clean and dust-free. Simply dampen a clean microfiber cloth with water and gently wipe down the entire surface of your rattan furniture, following the natural curves and contours. For stubborn dirt, you can slightly dampen the cloth with a mild solution of water and a gentle cleaner specifically designed for rattan furniture. The Power of the Vacuum For those hard-to-reach areas, a vacuum cleaner can be a valuable tool in your rattan furniture cleaning arsenal. However, it’s crucial to use the appropriate attachments and settings to avoid damaging the delicate fibers. Use a vacuum cleaner with a brush attachment specifically designed for upholstery. Set the suction to low power to prevent the strong suction from pulling on the rattan and causing damage. Gently glide the brush attachment over the surface of the furniture, paying close attention to the spaces between the woven parts and along the frame. Read Also: How to Clean Sofa at Home Without Vacuum Cleaner Incredibly Sunlight, But Not Too Much While a little sunlight can brighten the appearance of your rattan furniture, excessive exposure to direct sunlight can have detrimental effects. Prolonged exposure to strong UV rays can cause the rattan fibers to dry out, become brittle, and fade in color. This can weaken the structure of the furniture and shorten its lifespan. Therefore, it’s crucial to position your rattan furniture in a location that receives indirect sunlight. This will allow you to enjoy the natural light while protecting your furniture from the damaging effects of direct sunlight. Consider placing your rattan furniture under a pergola, awning, or umbrella for added protection. Dealing with Spills and Stains: Your Rattan Rescue Plan Even with the best intentions, spills can happen. Here’s how to address them on your rattan furniture: Act Fast The key to successful stain removal is to act quickly. The longer a spill sits on your rattan furniture, the more difficult it will be to remove. As soon as a spill occurs, blot up any excess liquid immediately with a clean, absorbent cloth. Avoid rubbing the stain, as this can spread it further and make it more difficult to remove. Water-Based Spills For water-based spills like juice, coffee, or soda, a simple solution of mild soap and water is usually effective. Mix a few drops of mild dish soap with warm water in a small bowl. Dip a clean microfiber cloth into the solution and wring it out thoroughly so it’s only slightly damp. Gently wipe the affected area with the damp cloth, working from the outside of the stain towards the center to prevent spreading. Rinse the cloth frequently and repeat until the stain is removed. Spot Treatment for Stubborn Stains For tougher stains, such as grease, oil, or food stains, you may need to employ a slightly more aggressive approach. Create a paste by mixing baking soda with a small amount of water. Apply the paste generously to the stained area and allow it to sit for 15-20 minutes. The baking soda will help to absorb the oil and loosen the stain. After allowing the paste to sit, gently scrub the area with a soft brush dipped in a mild soap solution. Rinse the area thoroughly with a clean, damp cloth and allow the rattan furniture to air dry completely. Remember: Always test any cleaning solution on an inconspicuous area of the rattan furniture first to ensure it doesn’t cause discoloration. Now that we’ve covered everyday cleaning, let’s tackle some deeper cleaning methods and special care tips on how to clean rattan furniture. Deep Cleaning Your Rattan Furniture   The Power of the Steam Cleaner For a deeper clean, consider using a handheld steam cleaner. The steam cleaning upholstery helps to loosen dirt and grime, while the gentle pressure can help to lift stubborn stains. Remember to use the steam cleaner on a low setting to avoid damaging the rattan. The Vinegar Solution For a natural and effective cleaning solution, mix equal parts warm water and white vinegar. Dip a soft cloth into the solution and wring it out thoroughly. Gently wipe down the entire surface of your rattan furniture. This solution helps to remove dirt, grime, and even mild mildew. Rattan Furniture Cleaner If you prefer a commercial cleaner, look for a product specifically designed for rattan or wicker furniture. These cleaners are often gentle on natural fibers and can


Cleaning Tips for New Homeowners
Blog

Cleaning Tips for New Homeowners | Your Guide to a Sparkling Start

Congratulations on becoming a homeowner! It’s a significant occasion, filled with excitement, possibility, and maybe just a touch of overwhelm. Owning a home is a fantastic achievement, but it also comes with a whole new set of responsibilities – including cleaning chores that might seem endless at times. Fear not, this guide is here to equip you with the knowledge and essential cleaning tips for new homeowners to keep your house sparkling and make those chores a little less daunting. In this post on Swift Maids, we will cover everything from dealing with everyday messes to creating a sustainable cleaning routine. Here are some key things to keep in mind. Understanding Your Cleaning Domain   Every home is unique, and so are its cleaning needs. Before diving headfirst into cleaning supplies, take a moment to assess your space. Consider factors like: The Size and Layout of Your Home The size and layout of your home significantly impact your cleaning needs. A small apartment will require less cleaning time and effort than a large house with multiple levels. Similarly, an open-concept floor plan will require different cleaning strategies than a home with many rooms and hallways. Consider factors like the number of rooms, the size of each room, and the overall layout of your home. The Type of Flooring Different types of flooring require different cleaning methods. Hardwood floors, for example, require regular sweeping and mopping, while carpets require vacuuming and occasional deep cleaning. Tile floors are generally easier to clean but may require more frequent mopping. Assess the flooring in each room and choose appropriate cleaning methods and products. The Number of Occupants The number of people living in your home will significantly impact the amount of mess generated. A household with children and pets will require more frequent cleaning than a single-person household. Consider factors like foot traffic, pet activity, and the amount of cooking and entertaining you do. Your Lifestyle Your lifestyle plays a significant role in determining your cleaning needs. If you enjoy cooking elaborate meals, your kitchen will require more frequent and thorough cleaning. If you have pets, you’ll need to vacuum more often and address pet hair and dander. Consider your daily routines and activities to identify areas that require more attention. Equipping Yourself for Success Now that you have a better understanding of your cleaning landscape, it’s time to gather your cleaning arsenal. Here are some essential cleaning tips for new homeowners when it comes to stocking your cleaning cabinet: Multi-purpose Cleaner A good multi-purpose cleaner is a versatile and essential cleaning product for any homeowner. Look for a cleaner that is effective on a variety of surfaces, such as countertops, appliances, and bathroom fixtures. Always check the product label for specific instructions and safety precautions. Glass Cleaner A dedicated glass cleaner is essential for achieving streak-free results on windows, mirrors, and glass tabletops. Choose a glass cleaner that dries quickly and leaves no residue. Disinfectant Disinfectant is crucial for killing germs and bacteria in high-traffic areas like bathrooms and kitchens. Look for a disinfectant that is effective against a wide range of germs and is safe to use on various surfaces. Baking Soda and Vinegar Baking soda and vinegar are natural and effective cleaning agents that can be used for a variety of tasks. Baking soda can be used to deodorize carpets, absorb spills, and scrub tough stains. Vinegar can be used to clean windows, disinfect surfaces, and remove mineral deposits. Read More: Clean Carpet with Baking Soda Microfiber Cloths Microfiber cloths are highly absorbent and effective at cleaning various surfaces. They are gentle on surfaces and won’t scratch or damage them. Microfiber cloths are also reusable and machine washable, making them an eco-friendly and cost-effective cleaning option. Essential Cleaning Tools Invest in high-quality cleaning tools, such as brooms, mops, and sponges. Choose a broom with soft bristles that won’t scratch floors. Select a mop with a durable head and an easy-to-wring mop bucket. Choose sponges that are absorbent and durable. Remember, quality over quantity is key! Invest in a few good cleaning products rather than a cluttered cabinet of half-used bottles. Developing a Cleaning Routine that Works for You   Here’s the golden rule of cleaning tips for new homeowners: consistency is key! Spontaneous cleaning bursts are great, but establishing a regular cleaning routine will help you stay on top of the mess and prevent it from snowballing. Daily Tasks: Dedicate a few minutes each day to quick cleaning tasks like wiping down countertops, picking up clutter, and emptying trash cans. Weekly Tasks: Schedule a weekly cleaning session to tackle more in-depth tasks like mopping floors, vacuuming carpets, and cleaning bathrooms. Monthly Tasks: Once a month, dedicate some time to those often-overlooked areas like dusting blinds, cleaning ceiling fans, and wiping down baseboards. Read Also: Regular Cleaning vs Deep Cleaning Face-off | Clean and Mean The Power of Planning and Prioritization Feeling overwhelmed by your cleaning to-do list? Here are some cleaning tips for new homeowners to help you stay organized and conquer those chores: Create a cleaning schedule: Write down your daily, weekly, and monthly cleaning tasks and stick it somewhere visible. Prioritize ruthlessly: Not all cleaning tasks are created equal. Learn to identify what needs immediate attention and what can wait. Break down big tasks: Large cleaning projects can feel daunting. Break them down into smaller, more manageable steps. Embrace the power of short bursts: Don’t have a lot of time? Even a 15-minute cleaning session can make a big difference. Now that you have a solid foundation for your cleaning routine, let’s dive deeper into some specific cleaning tips for new homeowners to help you keep your home sparkling clean and inviting. Room-by-Room Cleaning Strategies   Kitchen Clean as you go! Wipe down countertops after each meal preparation. Wash dishes promptly to prevent a pileup. Empty the dishwasher daily. Clean the stovetop and oven regularly to prevent grease buildup. Wipe down the refrigerator shelves and drawers weekly. Read

Pet Cleaning Hacks
Blog

Pet Cleaning Hacks | Keep Your Home Fur-Free and Fresh

Let’s face it, our furry companions bring a whole lot of love into our lives. They greet us with wagging tails, purrs that melt your heart, and cuddles that chase away any bad day. But let’s be honest, they can also be little fur (or feather, or scale) factories, leaving trails of chaos in their wake. If you’re a pet owner, you know the struggle is real. Between the never-ending shedding, muddy paw prints, and the occasional “gift” left on the carpet, keeping your home clean with pets can feel like a never-ending battle. But fear not, fellow pet lovers! There’s hope for a harmonious co-existence between a clean home and your cherished companions. This guide is here to arm you with some fantastic pet cleaning hacks that will make your life easier and your home a little less like a fur tumbleweed convention. We’ll explore clever solutions for everything from shedding to doggy drool, leaving you with a clean home and a happy pet. Read Also: The Ultimate Guide to Pet-Friendly Cleaning Shedding Season SOS: Containing the Fur Fallout   Ah, shedding season. It’s a rite of passage for every pet owner, a time when fur seems to magically appear on every surface imaginable. From clothes to furniture, carpets to curtains, no place is safe from the relentless onslaught of fur. But don’t despair! Here are some pet cleaning hacks to help you combat the furminator fallout: Brush Up on Brushing Regular brushing is your first line of defense against furpocalypse. Brushing your pet removes loose fur before it has a chance to take over your home. Aim to brush your pet at least a few times a week, and more frequently during shedding seasons. The Squeegee Solution For stubborn fur on furniture, a squeegee can be your new best friend. Run a squeegee over furniture cushions, rugs, and even clothes to collect large amounts of fur quickly and easily. Lint Roller Rescue Lint rollers are a lifesaver for keeping clothes fur-free. Keep a lint roller on hand and use it regularly to remove fur from clothes before you wear them. The Magic of the Rubber Glove Ever notice how fur seems to cling to your hands like a furry magnet? Here’s a neat trick: dampen a rubber glove and run it over furniture or clothes. The damp rubber attracts fur like nobody’s business! Embrace the Power of the Vacuum Invest in a good quality vacuum cleaner with a pet hair attachment. Vacuuming regularly is essential for removing fur from carpets, rugs, and upholstery. Saying “No Way” to Paw Print Paranoia   Paws track in dirt, mud, and who knows what else from their outdoor adventures. Here are some pet cleaning hacks to keep those muddy paw prints at bay: Welcome Mat Magic A strategically placed welcome mat can be your first line of defense against muddy paw prints. Choose a high-quality, absorbent mat such as a coir mat or a rubber-backed mat. Place the mat just inside your entryway to ensure your pet steps on it before entering the house. Train your pet to pause on the mat and allow their paws to be wiped before proceeding further. Regularly shake out or vacuum the mat to remove accumulated dirt and debris. Replace the mat when it becomes worn or saturated, as it will no longer be effective at trapping dirt. Pawsitive Towel Techniques Keeping a designated towel by the entryway is a simple yet effective way to remove dirt and moisture from your pet’s paws. Choose a durable and absorbent towel, such as a microfiber towel or a dedicated pet paw towel. After each walk, gently wipe each of your pet’s paws with the towel to remove dirt, mud, and moisture. Wash the towel frequently to prevent the buildup of dirt and bacteria. Consider keeping a dry towel on top of a slightly damp towel for extra absorption. DIY Paw Cleaner Station For a more thorough paw cleaning, consider creating a DIY paw cleaner station. Fill a shallow tray or bin with a few inches of lukewarm water. Add a small amount of pet-safe shampoo to the water. Gently dip your pet’s paws into the water and swish them around to remove dirt and debris. Rinse your pet’s paws with clean water and dry them thoroughly with a clean towel. Embrace the Power of Mush For stubborn dirt and grime, a baking soda paste can be effective. Mix a small amount of baking soda with water to create a thick paste. Gently apply the paste to your pet’s paws, avoiding the pads. Allow the paste to sit for a few minutes to absorb the dirt. Use a damp cloth to wipe away the paste. Rinse your pet’s paws with clean water and dry them thoroughly. Regular Nail Trims Regular nail trims are essential for maintaining paw hygiene and minimizing dirt tracking. Keeping your pet’s nails short prevents them from picking up excessive amounts of dirt and debris. Use a pet nail grinder or clippers to trim your pet’s nails regularly, being careful not to cut the quick. Now let’s tackle some of the more challenging pet-related messes and how to keep your home smelling fresh and inviting despite the presence of furry friends. Conquering the “Gifts” Accidents happen! Whether it’s a playful puppy or a senior kitty, occasional accidents are a reality of pet ownership. Here are some pet cleaning hacks to deal with those unexpected messes: Act Fast: The key to removing pet stains and odors is to act quickly. Blot up any liquid immediately with a clean absorbent cloth. Enzyme Cleaners: Invest in an enzyme cleaner specifically designed to break down pet urine and feces. These cleaners contain enzymes that digest the organic matter, eliminating odors and stains at the source. Baking Soda Power: Sprinkle baking soda generously over the affected area. Let it sit for several hours to absorb odors before vacuuming it up. Vinegar Solution: For tough stains, mix equal parts water and

Blog

Holiday Cleaning Checklist | Get Your Home Ready

The holidays! A time for joy, family, friends, and…frantic cleaning? Don’t worry, you’re not alone. Between decorating, shopping, and planning elaborate meals, the thought of cleaning can feel like adding another ornament to an already overflowing tree. But fear not, with a well-planned holiday cleaning checklist, you can transform your home into a festive wonderland without sacrificing your sanity (or precious time with loved ones). Before the Festivities Begin: A Deep Clean Mission   Before the holiday rush begins, it’s crucial to give your home a thorough deep clean. This will create a fresh and inviting space for your guests and help you maintain a clean and organized home throughout the holiday season. Here’s a step-by-step guide to a pre-holiday deep clean: The Great Declutter Start by decluttering your home. Go through each room and sort through your belongings. Donate or discard items you no longer need or use. This will not only create more space but also make cleaning easier. Focus on areas that tend to accumulate clutter, such as closets, drawers, and countertops. Kitchen Conquest The kitchen is often the heart of holiday gatherings, so it’s important to give it a deep clean. Start by cleaning out your refrigerator and pantry, discarding any expired food or items you no longer need. Clean the stovetop, oven, and microwave, removing any grease or food residue. Wipe down countertops, cabinets, and backsplashes. Don’t forget to clean the small appliances like the toaster, blender, and coffee maker. Read Also: Conquer the Kitchen | Powerful Stovetop Cleaning Hacks for Every Surface Bathroom Bliss Clean and disinfect all surfaces in your bathrooms, including the sink, countertops, toilet, and bathtub or shower. Scrub away any soap scum, mildew, or hard water stains. Clean the mirrors and disinfect doorknobs and light switches. Don’t forget to clean the grout between tiles and around the bathtub or shower. Living Room Love Give your living room a thorough cleaning to create a cozy and inviting atmosphere. Vacuum carpets and rugs, dust furniture, and polish any wooden surfaces. Clean the windows and mirrors to let in natural light. Don’t forget to dust and clean any decorative items, such as picture frames, vases, and sculptures. Pro Tip: Feeling overwhelmed? Break down the deep clean into smaller, more manageable tasks. Tackle one area or room at a time, and reward yourself with a cup of hot cocoa or a festive playlist to keep things fun! Whew, that deep clean feels good! Now, let’s talk about making the actual holiday decorating and hosting process a breeze. Holiday Cleaning Checklist: Maintaining the Magic   Now that you’ve laid the groundwork with a deep clean, it’s time to focus on maintaining your home’s sparkle throughout the holiday season. Here’s a holiday cleaning checklist to keep your home looking its best: Daily Quick Cleans Kitchen: Wipe down counters, stovetops, and sinks after each use. Wash dishes promptly to prevent a pileup. Bathroom: Give the bathroom a quick once-over each day. Wipe down the sink, mirror, and toilet. Living Areas: Tidy up living areas by putting away clutter and straightening pillows and throws. Weekly Deep Cleans Vacuum and Mop: Give your floors a thorough cleaning to remove dirt and debris tracked in from outside. Dust and Polish: Dust all surfaces, including furniture, electronics, and decorative items. Polish any wooden surfaces to keep them looking their best. Bathroom Blitz: Scrub the bathtub, shower, and toilet to remove soap scum and grime. Clean the sink and mirror, and don’t forget to disinfect frequently touched surfaces. Holiday-Specific Cleaning Christmas Tree Care: Regularly sweep up fallen needles and water your tree to keep it fresh. Check for any water spills and clean them up immediately. Decorative Dusting: Dust ornaments, garlands, and other decorations regularly to prevent dust buildup. Post-Party Cleanup: Tackle post-party cleanup promptly. Wipe down surfaces, wash dishes, and take out the trash. Read Also: Get Your Home Clean by Christmas Cleaning Tips Guide Conclusion By following this holiday cleaning checklist and incorporating regular cleaning habits into your routine, you can enjoy a stress-free and festive holiday season. Remember, a clean and organized home can help create a warm and inviting atmosphere for you and your guests. If you’re feeling overwhelmed with the holiday cleaning, consider hiring a professional cleaning service like Swift Maids Calgary. Our team of experienced cleaners can help you maintain a clean and tidy home throughout the holiday season. So, roll up your sleeves, put on your favorite holiday tunes, and get cleaning! With a little effort and planning, you can create a festive and welcoming home for all to enjoy.

How to Clean Apartment Windows
Blog

How to Clean Apartment Windows | Step-by-Step Guide

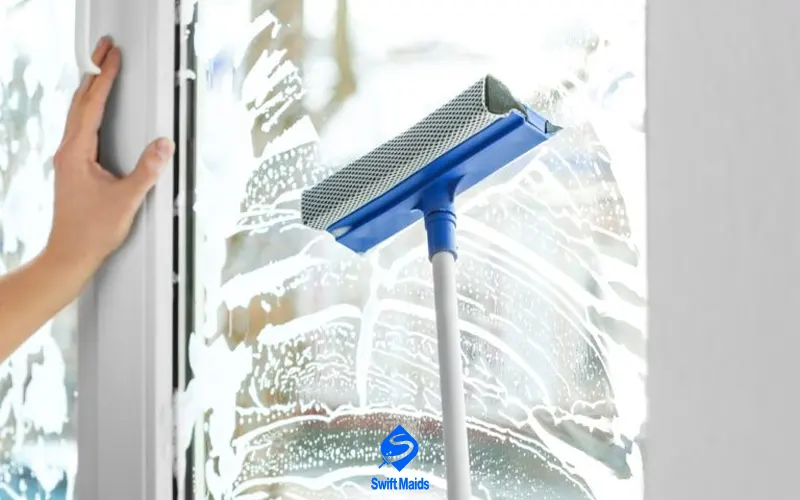
Let’s face it, cleaning windows isn’t exactly the most thrilling chore. But who doesn’t love basking in the natural light that streams through sparkling clean glass? Not to mention the sense of accomplishment that comes with a job well done (and the stunning view you get to reclaim!). If you’re an apartment dweller, you might be thinking, “hold on a minute, how do I even clean apartment windows when half of them are out of reach?” Fear not! This guide is here to equip you with all the knowledge and tricks you need to conquer even the highest panes. Before We Dive In: Safety First! Safety should always be your top priority. Here are some ground rules, especially for those high-up windows: Avoid Risky Climbing Resist the temptation to climb on furniture, window sills, or other unstable surfaces to reach high windows. Such actions can be dangerous and increase the risk of accidents. Instead, use a sturdy stepladder or extendable ladder to safely reach the windows. Use a Reliable Step Stool Invest in a sturdy and stable step stool that can support your weight safely. Ensure that the step stool has non-slip feet and handrails for added stability. Avoid using unstable furniture like chairs or boxes as makeshift step stools. Secure Open Windows If your apartment windows open outward, make sure they are securely locked before cleaning the exterior. This will prevent accidents and ensure your safety. Work with a Partner For high-rise apartments or windows that are difficult to reach, consider working with a partner. Having someone hold the ladder or spot you can significantly reduce the risk of accidents. Read Also: How to Clean Tall Windows | A Guide for Hard-to-Reach Window Cleaning How to Clean Apartment Windows: Gathering Your Cleaning Arsenal Now that safety is covered, let’s assemble your window-cleaning dream team: Microfiber Cloths Microfiber cloths are ideal for cleaning glass surfaces due to their exceptional cleaning properties. They are soft, absorbent, and highly effective at removing dirt, grime, and streaks. Microfiber cloths can be used both dry and damp, making them versatile for various cleaning tasks. Squeegee A squeegee is a must-have tool for efficient window cleaning. It helps remove excess cleaning solution and water from the glass, leaving a streak-free finish. When choosing a squeegee, opt for one with a durable rubber blade that can effectively glide across the glass. Ensure the blade is clean and free of debris to prevent streaks. Spray Bottle A spray bottle is convenient for applying your cleaning solution to the glass surface. It allows you to control the amount of solution dispensed, preventing excessive moisture buildup. Choose a spray bottle with a fine mist setting to avoid over-wetting the glass. Soft-Bristled Brush A soft-bristled brush is useful for cleaning dirt and grime from window frames, tracks, and corners. Avoid using harsh brushes that could scratch the glass or damage the window frames. Opt for a brush with soft, synthetic bristles that can effectively remove dirt without causing damage. Bucket A bucket is essential for holding your cleaning solution and rinsing your cleaning cloths. Use warm water and a mild cleaning solution to clean your cloths. Rinse the cloths thoroughly to remove any dirt or debris. The All-Important Cleaning Solution   Here comes the fun part: choosing your cleaning formula! You have two options: DIY Cleaning Solution A simple and effective DIY cleaning solution can be made using readily available household ingredients. Mix equal parts white vinegar and distilled water in a spray bottle. White vinegar is a natural cleaning agent that can dissolve dirt and grime. Distilled water helps to prevent water spots and streaks, especially in areas with hard water. Read Also: DIY Window Cleaning tools and equipment Commercial Window Cleaner For a convenient and effective solution, you can opt for a commercial window cleaner. Look for a product specifically designed for glass cleaning, as these cleaners are formulated to remove dirt, grease, and grime without leaving streaks. When choosing a commercial cleaner, consider factors like its environmental impact, effectiveness, and any specific cleaning needs you may have. Now that you’re armed with the right tools and cleaning solution, let’s get down to the nitty-gritty of cleaning apartment windows. We’ll tackle both the inside and outside panes, offering tips for those tricky high-up windows. Cleaning the Inside Dust and Wipe Start by removing any loose dirt or dust from the window sills, frames, and the glass surface. Use a soft, lint-free cloth or a microfiber cloth to gently wipe away the dust. Pay attention to the corners and crevices of the window frames, as these areas can accumulate dirt and grime. Apply Cleaning Solution Spray your preferred cleaning solution onto the glass surface. Whether you’re using a DIY solution or a commercial cleaner, make sure to apply it evenly. Avoid over-spraying, as excessive moisture can lead to streaks. Wipe and Clean Use a clean microfiber cloth to wipe the glass in a circular motion. This helps to remove dirt, smudges, and fingerprints. For stubborn stains or dried-on dirt, you can use a soft-bristled brush to gently scrub the area before wiping it clean. Dry and Polish Once you’ve removed the dirt and grime, use a dry microfiber cloth to buff the glass to a sparkling finish. This will help to remove any streaks or watermarks left behind by the cleaning solution. For extra shine, you can use a glass polish or a newspaper. Cleaning the Outside Low-Rise Windows For windows that are easily reachable, the process is similar to cleaning the inside. Spray the glass with your cleaning solution, wipe it clean, and then dry it with a microfiber cloth or squeegee. High-Rise Windows If you have high-rise windows, safety should be your top priority. Consider hiring a professional window cleaning service, especially for those living in high-rise apartments. However, if you’re determined to tackle the task yourself, use a sturdy ladder and ensure someone is spotting you. Apartment Window Cleaning Tips   Clean on a Cloudy

Removing Paint from Windows
Blog

Removing Paint from Windows | Your Complete Guide to Clear, Spotless Glass

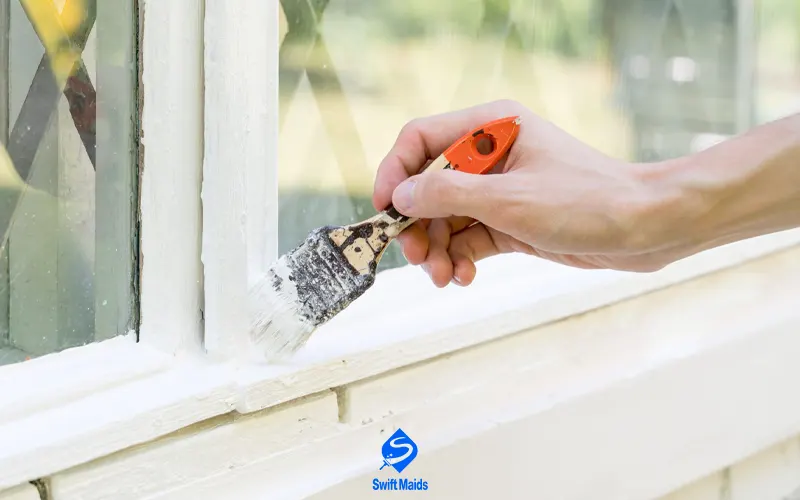
We’ve all been there. You’re meticulously painting your living room, humming along to your favorite tunes, lost in a creative trance. Suddenly, a rogue brush stroke splatters across your sparkling clean window, shattering your artistic zen. “How do I remove paint from windows?” you groan, staring at the unwelcome splash of color. Fear not, fellow DIY enthusiasts! Removing paint from windows doesn’t have to be a nightmare. With the right approach and a little elbow grease, you can banish those pesky paint spots and restore your windows to their crystal-clear glory. But before we dive into the nitty-gritty of paint removal, let’s understand why it’s crucial to act fast. Fresh paint is much easier to remove than dried paint. Dried paint can form a stronger bond with the glass, making the removal process more laborious and potentially increasing the risk of damaging the window itself. Read Also: Cleaning Moldy Windows | Reclaim Your View and Breathe Easy Again Understanding the Paint Type   Before you start the cleaning process, it’s important to identify the type of paint that has stained your window. This will help you choose the most effective cleaning method and avoid damaging the glass. Latex Paint Latex paint is a water-based paint that is commonly used for interior painting. It’s relatively easy to remove from glass surfaces, especially when it’s still wet. However, dried latex paint can be more stubborn and may require additional effort to remove. Oil-Based Paint Oil-based paints are more durable and resistant to water damage than latex paints. However, they can be more difficult to remove from glass surfaces. Oil-based paint often requires stronger solvents to break down and remove. Spray Paint Spray paint can be particularly challenging to remove from glass surfaces, especially if it has dried completely. The fine mist of spray paint can penetrate into tiny pores in the glass, making it difficult to remove without damaging the surface. Safety First! Gear Up for Paint Removal   Before you embark on your window-cleaning mission, prioritize safety. Here’s your essential gear: Safety glasses: Protect your eyes from splashes of paint remover or cleaning solutions. Rubber gloves: Gloves shield your hands from harsh chemicals and keep them clean. Drop cloths or newspaper: Lay down a protective barrier to prevent paint drips from staining your floors or furniture. Ventilation: Open windows or use a fan to ensure proper ventilation, especially when using strong solvents. Removing Fresh Paint Spills If you’re lucky enough to catch the paint spill before it dries, you can often remove it with relatively simple methods. Here’s a step-by-step guide: Gentle Scraping Use a plastic scraper or putty knife to gently scrape off the excess wet paint. Be careful not to apply too much pressure, as this could scratch the glass surface. The goal is to remove as much of the wet paint as possible without damaging the glass. Warm Water and Soap Create a warm, soapy solution using mild dish soap and warm water. Dip a soft cloth or sponge into the solution and gently wipe away the remaining paint. Avoid using abrasive materials or excessive scrubbing, as this can scratch the glass. Window Cleaner Once the majority of the paint has been removed, use a commercial window cleaner to remove any remaining residue and restore the glass to its original clarity. Spray the cleaner onto the glass and wipe it clean with a microfiber cloth or newspaper. Tackling Dried Paint Stains For dried paint, you’ll need a bit more elbow grease and some specialized cleaning products: Razor Blade Technique For thick, stubborn layers of dried latex paint, a razor blade can be a helpful tool. Use a sharp razor blade at a shallow angle to carefully scrape off the paint. Be cautious not to apply too much pressure, as this can scratch the glass surface. Paint Thinner For more stubborn stains, a small amount of paint thinner can be applied to a soft cloth and gently rubbed over the affected area. However, it’s important to use paint thinner in a well-ventilated area and avoid prolonged skin contact. Commercial Paint Remover Commercial paint removers specifically designed for glass can be effective in removing stubborn latex paint stains. Always follow the manufacturer’s instructions and test the product on a small, inconspicuous area first. Oil-Based Paint Removal   Mineral Spirits: Mineral spirits are effective at dissolving oil-based paint. Apply a small amount to a soft cloth and gently rub the stain. Be cautious as mineral spirits can damage certain surfaces. Commercial Paint Remover: A commercial paint remover specifically designed for oil-based paint can be a more powerful solution. Follow the manufacturer’s instructions and test it on a small area first. Important Tips: Patience is Key: Removing paint can be a time-consuming process. Don’t rush and risk damaging the glass. Test on a Small Area: Before applying any cleaning solution or technique, test it on a small, inconspicuous area of the glass to ensure it doesn’t cause damage. Professional Help: If the paint stain is particularly stubborn or extensive, consider consulting a professional window cleaning service. They have the expertise and tools to handle even the toughest paint removal jobs. Conclusion Removing paint splatters from your windows can be a frustrating task, but with the right approach, it can be done effectively. By identifying the type of paint and using the appropriate cleaning methods, you can restore your windows to their original clarity. By following the tips provided in this article and taking a methodical approach, you can successfully remove paint from your windows and restore their pristine condition. If you’re looking for a professional cleaning service to help with your window cleaning needs, consider Swift Maids. Our team of experienced cleaners can handle a variety of cleaning tasks, including stubborn paint stains in window cleaning Calgary service.

DIY Gutter Cleaning Solution
Blog

DIY Gutter Cleaning Solution | Keep Your Gutters Flowing Smoothly

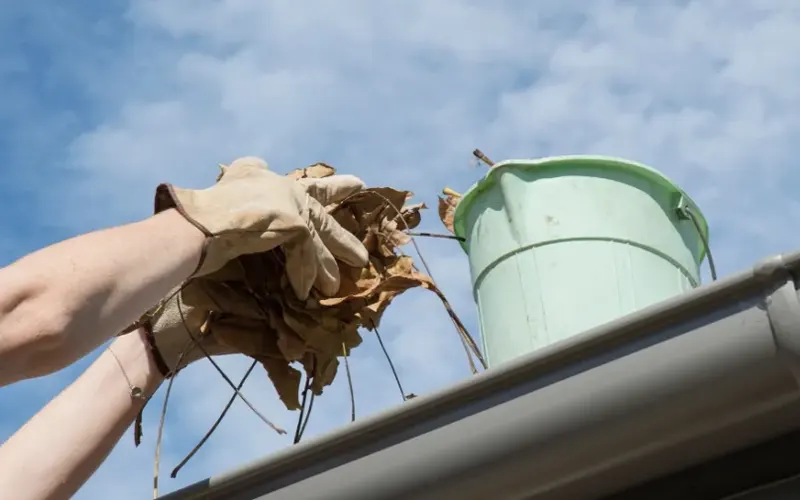
Imagine this: it’s pouring rain, and your gutters are overflowing. Leaves, twigs, and maybe even a rogue frisbee are causing a backup. This isn’t just an eyesore – it’s a potential disaster for your home. Clogged gutters can lead to water damage, foundation issues, and even attract unwanted pests. But don’t worry! Before you call in the professionals, there are some effective DIY gutter cleaning solutions you can try. These methods are perfect for tackling those seasonal clogs and keeping your gutters functioning smoothly. Understanding the Importance of Clean Gutters   Before we delve into the world of DIY cleaning solutions, let’s take a moment to appreciate the crucial role gutters play in your home’s well-being. Here’s why keeping them clean is essential: Prevents Water Damage: Clogged gutters can’t properly channel rainwater away from your home. This can lead to water pooling around the foundation, potentially causing cracks, leaks, and even basement flooding. Protects Your Roof: Overflowing gutters can cause water to back up under your roof shingles, leading to rot and deterioration. Minimizes Insect Infestation: Mosquitoes and other pests love stagnant water. Clogged gutters provide the perfect breeding ground for these unwelcome guests. Maintains Curb Appeal: Let’s face it, overflowing gutters aren’t exactly a thing of beauty. Keeping them clean contributes to your home’s overall visual appeal. Read Also: Gutter Cleaning for Pest Control | Safeguard Your Home from Unwanted Guests Safety First: Gear Up for Gutter Cleaning Now that we’ve established the importance of clean gutters, let’s talk safety. Gladder work can be risky, so it’s crucial to prioritize your safety before tackling any DIY cleaning: Sturdy Ladder: Ensure you have a sturdy, well-maintained ladder that can support your weight comfortably. Spotter: If possible, enlist the help of a friend or family member to act as a spotter while you’re on the ladder. Safety Gear: Wear work gloves to protect your hands and closed-toe shoes for better grip. Consider using safety goggles to shield your eyes from falling debris. DIY Gutter Cleaning Solutions   Now that you’re geared up and ready to tackle the task, let’s explore some effective DIY gutter cleaning solutions: Simple Tools and Techniques Garden Trowel or Scoop A simple garden trowel or scoop can be an effective tool for removing smaller debris, such as leaves, twigs, and dirt. You can use these tools to manually remove debris from the gutters, especially in areas that are difficult to reach with a hose. However, for larger clogs or gutters that are difficult to access, a longer-handled tool may be necessary. Bucket and Hose A bucket and hose can be a useful combination for flushing out debris and cleaning your gutters. Fill a bucket with water and use a hose to create a strong stream of water. Direct the water into the gutters to flush out any loose debris. While this method can be effective, be cautious not to use excessive water pressure, as it may damage your gutters or siding. Gutter Scoop A gutter scoop is a specialized tool designed to efficiently clean gutters. It typically features a long handle and a curved scoop that can reach into gutters and remove debris. Gutter scoops are particularly useful for cleaning gutters that are high up or difficult to access. They can help you remove leaves, twigs, and other debris without the need for a ladder. Natural Cleaning Solutions Vinegar Solution A simple solution of equal parts white vinegar and water can be effective in dissolving and loosening stubborn debris. Spray the solution onto the clogged areas of your gutters and let it sit for a few minutes. Then, use a hose or a pressure washer to rinse away the loosened debris. Baking Soda and Vinegar A combination of baking soda and vinegar can be used to create a gentle cleaning paste. Mix baking soda and vinegar to form a paste and apply it to the affected areas of your gutters. Let the paste sit for a few minutes, then rinse it off with water. This method can be effective in removing mildew and mold stains. Commercial Gutter Cleaning Solutions If natural cleaning solutions aren’t sufficient to tackle stubborn clogs, you may consider using commercial gutter cleaning chemicals. These products are specifically designed to dissolve and remove organic matter, grime, and other debris from gutters. Important Note: When using commercial gutter cleaning chemicals, always follow the manufacturer’s instructions carefully and wear appropriate protective gear, such as gloves and goggles. Remember to rinse the gutters thoroughly with water after using any chemical cleaner to remove any residue. Tips for Effective Gutter Cleaning   To ensure your gutters remain clean and functional, consider the following tips: Clear the Downspouts Regularly inspect and clean your downspouts to ensure that water can flow freely. Remove any debris, such as leaves, twigs, or mud, that may be blocking the downspouts. Clear any obstructions at the base of the downspouts to prevent water from pooling around your foundation. Inspect for Damage Take the time to inspect your gutters for any signs of damage, such as cracks, leaks, or loose joints. Repair or replace damaged sections promptly to prevent water damage to your home. Additionally, check for any sagging or misalignment issues that may affect the proper functioning of your gutters. Regular Maintenance To keep your gutters in optimal condition, it’s recommended to clean them at least twice a year, ideally in the spring and fall. Spring cleaning can help remove debris accumulated over the winter, while fall cleaning can prepare your gutters for the winter months and prevent ice dams. Read Also: Winter Gutter Cleaning | Keep Your Gutters Flowing and Your Home Safe Consider Gutter Guards Gutter guards can be a valuable investment to reduce the frequency of gutter cleaning. These protective covers help prevent leaves, twigs, and other debris from entering your gutters, minimizing the need for manual cleaning. However, it’s important to choose high-quality gutter guards that are effective in preventing debris buildup without compromising water flow. When to Call

Gutter Cleaning for Pest Control
Blog

Gutter Cleaning for Pest Control | Safeguard Your Home from Unwanted Guests

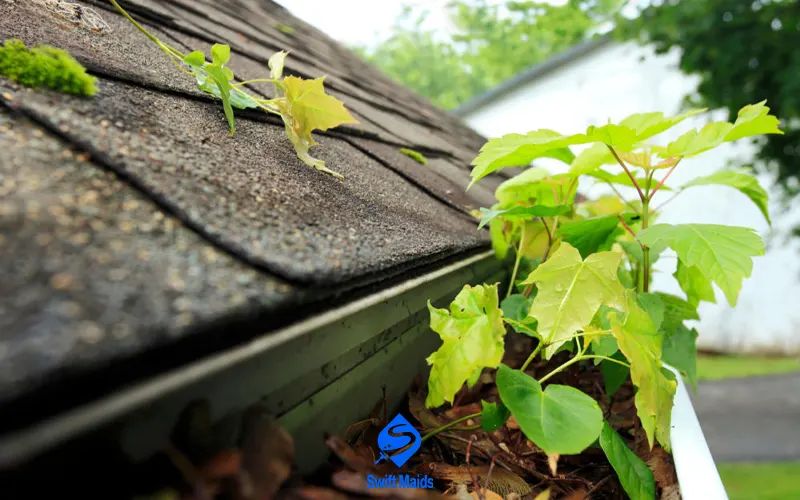
Imagine this: you’re relaxing in your cozy home in Calgary, enjoying a cup of coffee and the view from your window. Suddenly, a flash of movement catches your eye – a spider scurries across the windowsill, followed by a sudden flutter as a curious bird tries to snatch it. “Ugh, not again!” you groan. Pests can be a real nuisance, disrupting your peace of mind and potentially causing damage to your property. But what if we told you there’s a simple, yet often overlooked, way to deter these unwelcome visitors? The answer lies right above your head – gutter cleaning for Pest Control. Read Also: Gutter Cleaning Benefits | Shield Your Home from Top to Bottom Gutter Cleaning for Pest Control | Why It Matters   Clogged gutters can create a haven for pests and pose significant risks to your home. Here’s why gutter cleaning Calgary is essential for effective pest control: A Breeding Ground for Pests Clogged gutters provide the ideal environment for pests to thrive. The accumulation of water, debris, and organic matter creates a moist and nutrient-rich habitat that attracts a variety of pests, including mosquitoes, flies, cockroaches, rodents, and birds. These pests can then find their way into your home, causing damage and spreading diseases. A Pathway for Pests Clogged gutters can act as a bridge for pests to access your home. Overflows from clogged gutters can saturate the soil around your foundation, attracting pests like termites and carpenter ants. Additionally, the debris and moisture in clogged gutters can provide a pathway for rodents to climb onto your roof and enter your attic or walls. Water Damage and Structural Issues Clogged gutters can lead to serious water damage to your home. When water cannot drain properly, it can pool around your foundation, seep into your basement, and damage your roof and walls. Water damage can weaken the structural integrity of your home and create ideal conditions for mold and mildew growth, which can exacerbate indoor air quality issues. Read Also: Effective Methods on How to Unclog a Gutter Downspout Signs You Need Gutter Cleaning (Besides Creepy Crawlies) In addition to a visible infestation of pests, several other signs can indicate that your gutters need cleaning: Visible Overflow: One of the most obvious signs of clogged gutters is visible overflow. When gutters cannot handle the volume of rainwater, water spills over the edges, often leading to water damage on your home’s exterior. This stagnant water can also attract mosquitoes and other pests. Water Stains on Exterior Walls: Dark streaks or stains on your home’s exterior walls are a clear indication of water damage caused by clogged gutters. When water overflows from gutters, it can run down the walls, leaving behind unsightly stains and potentially damaging the paint or siding. Damaged or Sagging Gutters: Clogged gutters can become heavy and cause damage to your gutters themselves. Sagging or detached gutters not only compromise the aesthetic appeal of your home but also create potential entry points for pests. Increased Pest Activity: If you notice an increase in pest activity around your home, such as mosquitoes, flies, or rodents, it’s likely that your clogged gutters are contributing to the problem. These pests are attracted to the damp, debris-filled environment created by clogged gutters. DIY Gutter Cleaning for Pest Control | A Risky Proposition?   While DIY gutter cleaning may seem like a cost-effective option, it’s important to consider the potential risks and challenges involved: Safety Concerns Climbing ladders, especially tall ones, can be dangerous. A misstep or slip could lead to serious injuries, such as broken bones or head trauma. It’s essential to have the proper safety equipment and skills to avoid accidents. Physical Demanding Gutter Cleaning for Pest Control can be physically demanding, requiring bending, reaching, and lifting. This can be particularly challenging for individuals with limited mobility or strength. Prolonged physical exertion can lead to muscle strain and fatigue. Time-Consuming Cleaning gutters can be a time-consuming task, especially for larger homes with complex gutter systems. It may require several hours to complete the job, depending on the amount of debris and the height of the gutters. Limited Reach and Effectiveness Reaching into narrow gutters can be difficult, and it may be challenging to remove all the debris effectively. Some areas of your gutters may be inaccessible, leaving them prone to clogs and potential water damage. Read Also: How to Clean Gutters Without Ladder in Smart Way? Professional Gutter Cleaning | A Safer and More Efficient Option   If you’re not comfortable with the risks and challenges associated with DIY Gutter Cleaning for Pest Control, consider hiring a professional gutter cleaning service. Here are some of the advantages of choosing professional cleaning: Safety First Professional gutter cleaners have the necessary training and equipment to safely access and clean your gutters, even those on high roofs. They understand the potential hazards involved and take the necessary precautions to minimize the risk of accidents. Time-Efficient and Effective Professional cleaners can quickly and efficiently clean your gutters, saving you time and effort. They have the tools and experience to remove stubborn debris and ensure thorough cleaning. Expert Inspection and Maintenance Professional gutter cleaners can identify potential issues with your gutter system, such as damage, misalignment, or leaks. They can recommend necessary repairs or maintenance to prevent future problems. Peace of Mind Knowing that your gutters are clean and well-maintained can provide peace of mind. Clean gutters help protect your home from water damage, mold growth, and pest infestations. By hiring a professional, you can ensure that your gutters are in optimal condition. Tips for Choosing a Professional Gutter Cleaning Service When selecting a professional Gutter Cleaning for Pest Control service, consider the following: Experience and Reputation: Look for a company with a proven track record and positive reviews. Insurance: Ensure the company is fully insured to protect you from liability in case of accidents. Licensing: Check if the company is licensed and complies with local regulations. Free Estimates: Obtain quotes from

How to Clean Tall Windows
Blog

How to Clean Tall Windows | A Guide for Hard-to-Reach Window Cleaning

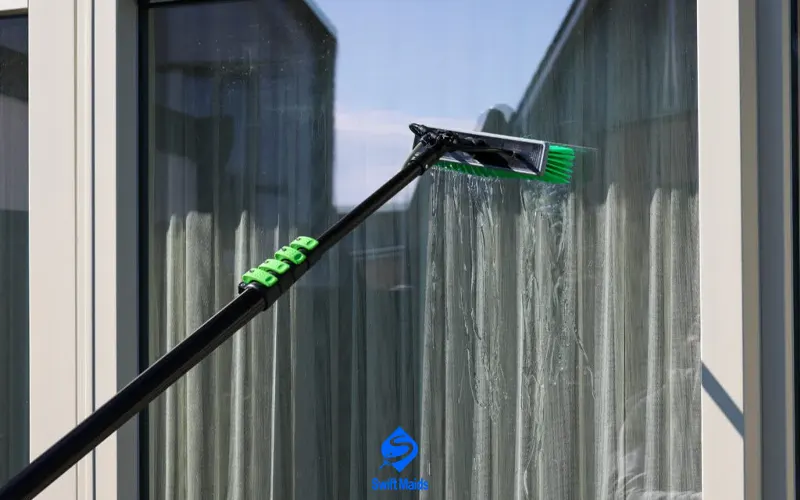
Ah, tall windows. They bathe our homes in glorious sunlight, offering stunning views and a sense of openness. But let’s face it: keeping them sparkling clean can feel like a daunting task, especially when they’re so high up. Don’t worry—you’re not alone. This guide will equip you with the knowledge and tools to find the solution to cleaning tall windows. And if you stick with us until the end, we’ll answer your question: How to Clean Tall Windows? Read Also: Mastering the Art of Window Cleaning Techniques | Crystal Clear The Pre-Clean Prep   Before you launch yourself into a window-cleaning odyssey, a little preparation goes a long way. Here’s what you’ll need: Safety First A sturdy ladder that reaches all your high windows is essential. Invest in a ladder with a wide base and secure footing. Don’t forget – safety first! If you’re not comfortable using a ladder, or your windows are particularly high, consider calling in a professional cleaning service. The Cleaning Arsenal Gather your cleaning supplies. Opt for a microfiber cloth – these lint-free wonders trap dirt and grime without leaving streaks. You’ll also need a spray bottle filled with a cleaning solution. You can either use a commercial window cleaner or a DIY solution of distilled water and a few drops of dish soap. Weather Watch Don’t attempt high window cleaning on a scorching hot day or in direct sunlight. The heat can cause the cleaning solution to dry too quickly, leaving streaks. Aim for a cool, cloudy day. Ladder Up and Let’s Clean! – How to Clean Tall Windows   Now that you’re prepped and ready, let’s get those windows gleaming! The Secure Climb Ensure your ladder is positioned firmly on level ground. Secure the ladder base against a sturdy wall, and make sure all locking mechanisms are engaged. Remember, safety always comes first. The Cleaning Dance Start from the top of the window and work your way down. This way, any drips or spills won’t stain the already-cleaned sections. Spray a light mist of your cleaning solution on the windowpane. Don’t drench it – a light application is key. The Microfiber Magic Use your microfiber cloth to wipe the cleaning solution in a circular motion. Work in small sections, ensuring you cover the entire window surface. Flip the cloth to a clean side as needed. The Squeegee Shuffle (Optional) If you prefer a squeegee for a streak-free finish, go for it! Use a clean, rubber squeegee and hold it at a slight angle against the glass. Start at the top of the window and pull the squeegee downwards, applying gentle pressure to remove excess cleaning solution. Wipe the squeegee blade after each stroke with your microfiber cloth to prevent streaks. High Window Cleaning Hacks for the Adventurous Feeling a little acrobatic? Here are some additional techniques for those who want to master the art of high-window cleaning: The Extension Pole Extravaganza If your windows are extremely high or you’re not comfortable using a ladder, consider an extension pole with a cleaning attachment. These poles come in various lengths and offer a safe way to reach high windows. The Bucket Brigade (Two-Person Job) For a two-person cleaning party, you can try the bucket brigade method. One person stands on the ground with a bucket filled with cleaning solution and a microfiber cloth. The other person climbs the ladder with another bucket to collect dirty water. This allows for a continuous cleaning process without needing to refill or empty the bucket constantly. Safety Always Comes First   Remember, safety is paramount when it comes to tall window cleaning. Your well-being is more important than a spotless window. If at any point you feel uncomfortable, dizzy, or unsteady, stop what you’re doing and reassess the situation. Never overreach or climb on unstable surfaces, such as ladders that are not properly secured or leaning against objects that might shift. Always follow the manufacturer’s instructions for your ladder and use it on a stable, level surface. If you’re not confident in your ability to reach high windows safely, don’t hesitate to seek professional help. There are many window cleaning services like Swift Maids that specialize in high window cleaning Calgary and can provide a safe and efficient solution. Remember, a clean window is not worth risking your safety. Always prioritize your well-being and choose a safe approach to window cleaning. Pro Tip | Don’t Forget the Frames! While the glass is the most visible part of your windows, don’t neglect the frames. Window frames can accumulate dust, grime, and cobwebs, detracting from the overall appearance of your windows. Take the time to clean your window frames regularly. Use a damp cloth to wipe down the frames, removing any dirt or grime. Pay attention to the corners and edges, where dirt can accumulate. For stubborn stains or mold, you might need to use a stronger cleaning solution or a soft-bristled brush. However, be cautious not to damage the paint or finish on your window frames. Maintaining the Sparkle: Once your high windows are gleaming, here are some tips to keep them sparkling longer: Minimize Dust During windy or dusty days, keep your windows closed to prevent dust from entering your home and settling on the glass. This will help reduce the frequency of cleaning and keep your windows looking their best for longer. Install high-quality window screens to further protect your windows from dust, pollen, and insects. Regular Cleaning Aim to clean your high windows at least twice a year – once in the spring and again in the fall. This schedule will help prevent excessive dirt buildup and ensure your windows remain clean and clear. If you live in a particularly dusty or polluted area, you might need to clean your windows more frequently. Conclusion The answer to the question “How to Clean Tall Windows” can be a daunting task, but with the right approach and a bit of effort, it’s definitely achievable. Remember to prioritize safety, gather

winter gutter cleaning
Blog

Winter Gutter Cleaning | Keep Your Gutters Flowing and Your Home Safe

Winter in Calgary can be a breathtaking spectacle, with its snowy landscapes and cozy fireplaces. However, beneath the beauty lies a potential threat: clogged gutters. While often overlooked, gutter maintenance is crucial, especially during the winter months. Clogged gutters in winter can lead to a cascade of problems, from ice dams to water damage. But fear not, with a little knowledge and preparation, you can safeguard your home from these winter woes. Let’s dive into the importance of winter gutter cleaning and how to keep your home protected. Read Also: Gutter Cleaning Benefits | Shield Your Home from Top to Bottom Why Gutter Cleaning in Winter Matters (Even When It Seems Crazy)   While it might seem counterintuitive to tackle gutter cleaning during Calgary’s colder months, it’s actually a crucial step in protecting your home. Here’s why: Ice Dams and Backups As winter temperatures fluctuate, snow melts and refreezes, creating ice dams along your roof’s edge. These ice dams can prevent water from draining properly, causing it to back up under the shingles and potentially leak into your home. Clogged gutters exacerbate this problem by hindering the flow of melted snow and water. This can lead to water damage in your attic, ceilings, and walls, as well as mold and mildew growth. Hidden Dangers of Snow Buildup Heavy snow accumulation on top of clogged gutters can put a significant strain on your gutter system. The weight of the snow can cause gutters to sag, bend, or even detach from your home. This can lead to water damage, structural issues, and costly repairs. Additionally, clogged gutters can prevent proper drainage of rainwater, leading to foundation damage and erosion. Spring Mayhem: The Aftermath of Winter Neglect Leaving clogged gutters through the winter sets you up for potential problems in the spring. When the snow finally melts, the sudden influx of water can overwhelm clogged gutters, leading to overflowing and potential water damage to your foundation, basement, or landscaping. This can result in costly repairs and landscaping restoration. Read Also: Maintaining Clean Gutters with Seasonal Gutter Cleaning Convincing Yourself (and Maybe Your Grumbling Housemates) About Gutter Cleaning in Winter   Let’s face it, bundling up for outdoor tasks isn’t exactly our idea of a good time, especially during Calgary’s harsh winter months. However, neglecting winter gutter cleaning can lead to serious problems. Here are some tips to motivate yourself and make the task more manageable: Choose the Right Time Keep an eye on the weather forecast and choose a day with mild temperatures and clear skies. Avoid cleaning on windy days, as debris can be blown into your eyes or face. Early mornings or late afternoons are often the best times for gutter cleaning, as the sun’s rays can help soften any ice buildup. Gather Your Gear Wear appropriate clothing, including gloves, a hat, and sturdy footwear. Consider using a safety harness if you’re working at a significant height. Prepare a ladder, a sturdy bucket, a garden hose, and a gutter scoop or cleaning tool. Enlist a Helper Ask a friend, family member, or neighbor to help you with the task. Not only will it make the job more enjoyable, but it will also help you work more efficiently. If you’re not comfortable with heights or the physical demands of gutter cleaning, consider hiring a professional cleaning service like Swift Maids to handle the job safely and effectively. Safety First: Prioritize Your Well-being Never attempt to clean gutters during icy conditions or when the roof is wet. Wait for safer conditions or hire a professional. Ensure your ladder is stable and securely placed before climbing. Avoid overreaching and always have someone supervise you. In addition to that, wear protective gear, such as gloves and goggles, to prevent injuries from debris, chemicals, or harsh weather conditions. Beyond the Basics | Winter Gutter Cleaning Hacks   Now that you’re (hopefully) on board with winter gutter cleaning, here are some additional tips to make the process smoother: Pre-Cleaning Prep: Clearing the Obvious Before you dive into the full gutter cleaning process, take a moment to remove any large debris that’s easily visible, such as fallen leaves, twigs, or even toys that might have found their way into the gutters. You can use a long-handled tool or a leaf blower to clear these larger obstructions from a safe distance. Taming Ice Dams: The Gentle Approach Ice dams can be a major headache during winter. To safely remove them, avoid using boiling water, as this can damage your roof shingles. Instead, consider using a roof de-icing solution or a roof rake. A roof rake is a specialized tool designed to break up ice dams from a safe distance. If you’re unsure about using these methods, consult with a professional roof cleaning service. Gutter Guards: A Proactive Approach Installing gutter guards can significantly reduce the frequency of gutter cleaning, especially during winter. These protective covers prevent leaves, twigs, and other debris from entering your gutters. However, it’s important to note that gutter guards may still require occasional cleaning, particularly after heavy snowfall or storms. Regular inspections and maintenance of gutter guards will ensure optimal performance and longevity. When to Call in the Winter Gutter Cleaning Cavalry (Swift Maids to the Rescue!) Let’s be honest, sometimes winter throws us a curveball. Maybe the snow is coming down sideways, or the thought of climbing a ladder in the cold makes your teeth chatter. That’s where professional gutter cleaning Calgary services like Swift Maids come in handy. Our experienced team is equipped to handle even the toughest winter gutter cleaning jobs safely and efficiently. We have the right tools, the know-how, and most importantly, the courage to brave the Calgary winter to ensure your gutters are clear and your home is protected. Final Word By taking proactive steps to clean your gutters during the winter months, you can protect your home from potential water damage, ice dams, and other winter-related issues. While it may seem like a daunting task, with the right

Scroll to Top