Blog

How to Unclog a Gutter Downspout
Blog

Effective Methods on How to Unclog a Gutter Downspout

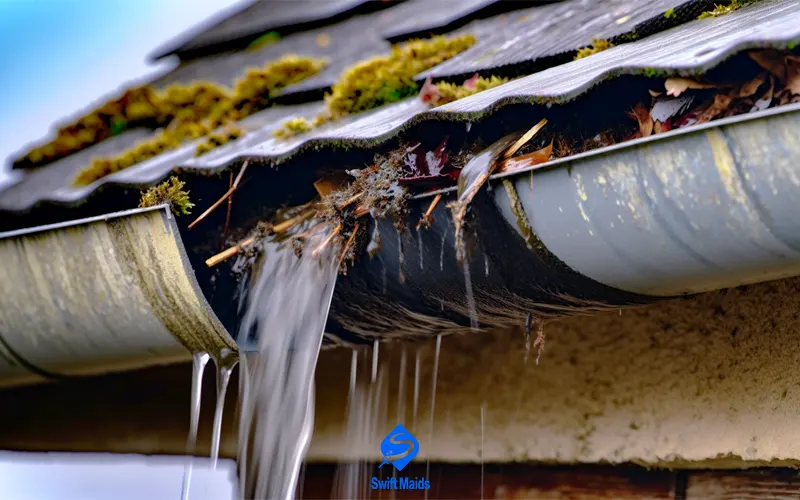
It’s that time of year again. Leaves are changing, there’s a crispness in the air, and… your gutters are overflowing! But wait, there’s more! The rainwater isn’t flowing freely – it’s backing up, pooling around your foundation, and maybe even leaking into your basement. Yikes! The culprit? A clogged gutter downspout. Don’t despair, fellow homeowner! Clogged downspouts are a common problem, but they’re also a solvable one. In this guide of Swift Maids, we’ll teach you how to unclog a gutter downspout and keep your home safe from water damage. Read Also: How Often Should I Clean My Gutters? | Tips for Every Homeowner Before You Dive In   Safety first! Depending on your comfort level and the severity of the clog, you might decide to tackle this project yourself or call in a professional. If you’re planning to DIY, make sure you have a sturdy ladder, work gloves, safety glasses, and possibly a mask to protect yourself from dust and debris. Diagnosing the Clog The first step is to identify the location of the clog. Is it near the top of the downspout, where leaves and debris often collect? Or is it further down, potentially caused by a buildup of sediment or a disconnected pipe? Here’s a quick trick: pour a bucket of water down the top of the gutter. If it flows freely, the clog is likely lower down. If it backs up, the clog is closer to the top. How To Unclog A Gutter Downspout – The Walkthrough   Now, let’s get to the good part – unclogging that pesky clog! Here are a few methods you can try, depending on the severity and location of the blockage: The Low-Tech Approach Garden Hose Power: Sometimes, a simple blast of water from your garden hose can dislodge a minor clog. Start by spraying water down the top of the downspout. If that doesn’t work, try feeding the hose up from the bottom, aiming the water stream upwards to break up the blockage. Get Physical (Safely!): With work gloves on, carefully reach into the top of the downspout and see if you can pull out any large leaves or debris by hand. Be gentle – you don’t want to damage the downspout itself. Tools of the Trade Plumbing Snake: This handy tool, also known as an auger, is a long, flexible metal cable with a corkscrew-like tip. Feed the snake down the downspout, turning the handle to loosen and break up the clog. Once you feel resistance, pull the snake back slowly, removing debris as you go. Leaf Blower: If you have a leaf blower, you can try using it to blast air up the downspout and dislodge the clog. Be careful not to use too much force, as this could damage the downspout. For Stubborn Clogs If the clog persists, it might be time for more heavy-duty solutions. Here are a few options to consider: Shop-Vac Attack: If you have a powerful shop vacuum, you can try sucking out the clog from the bottom of the downspout. Make sure to use a wet/dry vacuum that can handle water and debris. Chemical Drain Cleaner: This should be a last resort, as harsh chemicals can damage your downspout. Use only as directed and be sure to wear proper safety gear, like gloves and eye protection. Preventing Future Clogs   Once you’ve successfully unclogged your downspout, it’s important to take preventive measures to avoid future blockages. Regular Gutter and Downspout Cleaning Schedule regular cleanings for your gutters and downspouts, ideally twice a year – once in the spring and again in the fall. This will remove leaves, debris, and other obstructions that can lead to clogs. Depending on your comfort level and the severity of the clog, you can choose to clean your gutters and downspouts yourself or hire a professional cleaning service. Gutter Guards Gutter guards can act as a barrier, preventing leaves, twigs, and other debris from entering your gutters. This can significantly reduce the risk of clogs and make gutter cleaning easier. There are various types of gutter guards available, including mesh guards, foam guards, and micro-mesh guards. Consider your specific needs and the type of debris common in your area when selecting gutter guards. Downspout Extensions If your downspouts don’t extend far enough away from your foundation, rainwater can pool around your home, leading to potential water damage. Ensure that your downspouts extend at least 6 feet away from your foundation. This will help direct rainwater away from your home and prevent it from seeping into the ground. Feeling Overwhelmed? Call in the Pros! There’s no shame in admitting that DIY isn’t your cup of tea, especially when it comes to heights or working with potentially messy clogs. If you’re feeling overwhelmed or simply don’t have the time, consider calling in a professional cleaning service like Gutter Cleaning Calgary in  Swift Maids. We offer gutter and downspout cleaning services along with various other cleaning solutions to keep your home sparkling and safe. Conclusion Clogged downspouts can be a frustrating and potentially costly problem. By understanding how to unclog a gutter downspout, you can protect your home from water damage and ensure your gutters and downspouts are functioning properly. Remember to schedule regular cleanings, consider gutter guards, and ensure your downspouts extend far enough away from your foundation. By taking care of your gutters and downspouts, you’re investing in your home’s long-term health and well-being. So, roll up your sleeves, tackle those clogs, and enjoy a worry-free rainy season!    

Steam Cleaning vs. Traditional Methods for Windows
Blog

Steam Cleaning Windows vs. Traditional Methods

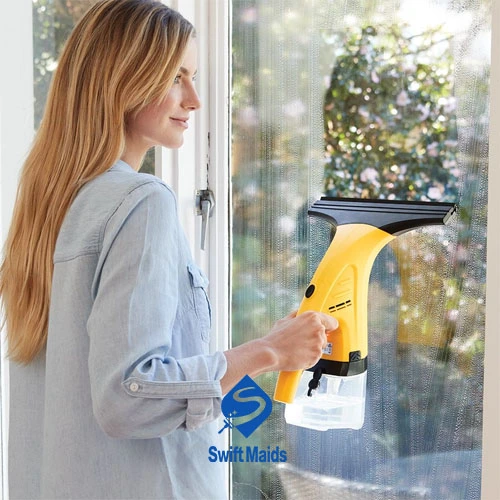
We’ve all been there. You spend ages cleaning your house, feeling good about your accomplishment, only to walk over to a window and see – oh no! Streaks, smudges, and a general lack of sparkle. Cleaning windows can feel like a thankless task, especially with traditional methods leaving behind unwanted residue. But fear not, fellow cleaning enthusiasts! Steam cleaning windows has emerged as a powerful contender, promising sparkling results without the harsh chemicals. So, is steam cleaning the ultimate window-cleaning solution? Let’s dive into today’s article and see how it stacks up against traditional methods. Read More: Window Cleaning Tips | A Comprehensive Window Cleaning Tutorial Traditional Methods: The Tried and True For generations, we’ve relied on tools like squeegees, buckets of soapy water, and maybe even a trusty newspaper (remember those days?). But are these methods all they’re cracked up to be? Pros: Low Cost: The good news? You likely already have everything you need for traditional window cleaning at home. No fancy equipment to buy! Readily Available: No need to wait for a special delivery. Simply grab your favorite cleaning solution, a squeegee, and get started. Cons: Streaky Results: The bane of a window cleaner’s existence! Traditional methods can leave behind unsightly streaks, especially if the cleaning solution isn’t properly diluted. Chemical Concerns: Many commercial window cleaners contain harsh chemicals that can irritate the skin and eyes, and aren’t exactly eco-friendly. Labor Intensive: Washing windows with buckets and squeegees can be a time-consuming and physically demanding process. Enter the Steam Cleaner: A Modern Marvel? Steam cleaning windows has become increasingly popular, promising a faster, more effective cleaning. But does it live up to the hype? Pros: Streak-Free Shine: The high heat of steam cuts through dirt and grime without leaving behind any residue, resulting in a sparkling, streak-free finish. This is because the steam softens the dirt and grime, making it easier to remove with a squeegee. Chemical-Free Cleaning: Embrace a greener clean! Steam cleaning relies on the power of pure water vapor, making it safe for kids, pets, and the environment. This is especially beneficial for those with allergies or sensitivities to harsh chemicals. Disinfects and Sanitizes: Steam cleaning reaches high temperatures, killing bacteria and germs on your window surfaces. This is a great way to keep your home clean and healthy, especially during cold and flu season. Time-Saving Efficiency: Steam cleaning is a faster process compared to traditional methods. The high heat loosens dirt quickly, requiring less scrubbing. This means you can spend less time cleaning and more time enjoying your sparkling clean windows. Cons: Initial Investment: Purchasing a steam cleaner can be a cost upfront. However, the cost can be offset by the time and money you’ll save on cleaning supplies and labor. Not for All Surfaces: While safe for most glass surfaces, check your window manufacturer’s recommendations before cleaning with steam, especially on older or delicate windows. Some delicate window frames or coatings might not be compatible with high-temperature steam. So, Which Method Reigns Supreme? Feature Traditional Methods Steam Cleaning Cost Low Higher upfront cost, cost-effective in the long run Chemicals Use harsh chemicals Chemical-free cleaning Streak-free results Can be difficult to achieve Guarantees streak-free results Time-consuming Labor-intensive Faster and more efficient Disinfection Limited Kills bacteria and germs Safety Potential for skin and eye irritation   Safe for kids, pets, environment The truth is, both traditional methods and steam cleaning windows have their place, depending on your needs and priorities. Here’s a quick guide to help you decide: Choose Traditional Methods if: You’re on a budget and already have the necessary DIY Window Cleaning tools and equipment tools. You’re cleaning a small number of windows (think bathroom mirror). Choose Steam Cleaning if: You prioritize a streak-free shine and a chemical-free clean. You want to disinfect your windows while cleaning. You’re cleaning a large number of windows, or windows with high nooks and crannies. The Final Verdict: A Winning Combination Ultimately, the best approach might be a combination of both methods. For regular maintenance, traditional window cleaning may suffice. However, for a deeper cleaning or tackling particularly dirty or grimy windows, steam cleaning windows can be a game-changer. Bonus Tip: Feeling overwhelmed by cleaning? Consider professional cleaning services like Swiftmaids Window Cleaning Calgary and surrounding areas. Our team can tackle your window cleaning woes, allowing you to focus on other things (like enjoying the sparkling view!).

Window Sills and Tracks
Blog

How to Clean Window Sills and Tracks

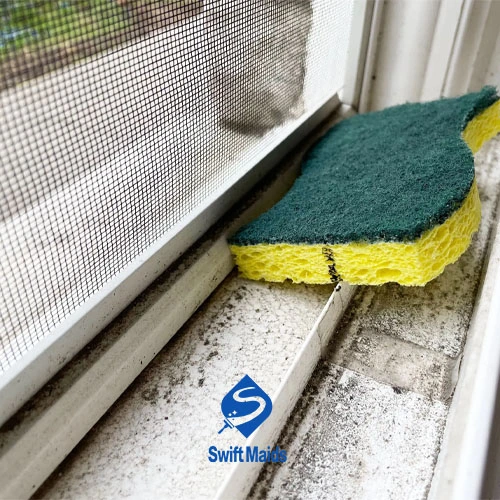
Imagine this: you spend a glorious afternoon cleaning your windows, taking in the sparkling results. But as you step back to admire your handiwork, a dark truth emerges – the window sills and tracks! They’re caked in grime, dust bunnies are having a party, and the whole scene screams “unfinished business.” No need to worry though, this guide will equip you with the knowledge and window cleaning tools and equipment to banish the grime and reclaim your window sills and tracks. Why Clean Window Sills and Tracks? It’s not just about aesthetics (although, let’s be honest, gleaming window sills and tracks elevate any room). Here’s why regular cleaning is crucial: Improved Air Quality: Dust and debris trapped in window tracks can circulate throughout your home, aggravating allergies and respiratory issues. Smoother Window Operation: When tracks are clogged with dirt, windows can stick or become difficult to open and close. Preserving Your Windows: Grime can wear down the window seals and frames, leading to costly repairs or replacements down the line. Enhanced Curb Appeal: Sparkling window sills and tracks create a clean and inviting look for your home, both inside and out. Understanding the Enemy: Types of Grime Before we dive into window cleaning techniques, let’s identify the culprits behind the grime: Dust and Dirt Dust and dirt are constant companions in our homes. They settle on surfaces, including window sills and tracks, from air currents, foot traffic, and other activities. While dust might seem harmless, it can contribute to respiratory issues, allergies, and a musty odor. Dead Bugs Window tracks, with their narrow crevices and dark corners, can be a haven for insects. Dead bugs can accumulate, adding to the grime and creating an unpleasant sight. Also, dead bugs can decompose, releasing unpleasant odors and potentially attracting other pests. Pollen and Allergens Pollen, a fine powder released by plants, is a common allergen. During allergy season, pollen can settle on window sills and tracks, making its way indoors and triggering allergic reactions Exposure to pollen can cause sneezing, runny nose, itchy eyes, and other allergy symptoms. Mold and Mildew Mold and mildew thrive in damp environments. Window tracks, especially in bathrooms or kitchens, can accumulate moisture, creating ideal conditions for these organisms to grow. Mold and mildew can release spores into the air, leading to respiratory problems, allergies, and potential health risks. Grime and Grime Buddies Over time, dust, dirt, and other particulates can mix with moisture and oil, forming a stubborn, sticky mess. This grime can be difficult to remove and can make it challenging to open and close your windows. Grime can provide a breeding ground for bacteria and other microorganisms, contributing to a less-than-ideal indoor environment. The Arsenal of Cleaning Supplies You’ll Need Now, let’s gather our cleaning arsenal! Here’s what you’ll need to tackle window sills and tracks: Vacuum Cleaner: Your trusty vacuum with a crevice attachment is your first line of defense, sucking up loose dirt and debris. All-Purpose Cleaner or Dish Soap: Opt for a gentle, all-purpose cleaner or dish soap diluted with warm water. For tougher grime, consider a vinegar solution (1 part white vinegar to 3 parts water). Microfiber Cloths: These gentle yet effective cloths are perfect for wiping down surfaces without leaving streaks. Opt for different colors to avoid cross-contamination (one for the sills, one for the tracks). Toothbrush: An old toothbrush is a champion for reaching tight spaces in window tracks, especially the corners. Paper Towels (Optional): Handy for wiping up spills or stubborn grime. Baking Soda (Optional): A natural cleaning agent, baking soda can help tackle tough stains on window sills. Bucket (Optional): If using a vinegar solution, you might need a bucket to dilute and hold the cleaning solution. Rubber Gloves (Optional): For those with sensitive skin or who prefer extra protection. The Battle Plan: Cleaning Window Sills   Step 1: Remove any plants, décor, or window treatments that might obstruct your cleaning. Step 2: Using the crevice attachment on your vacuum, suck up any loose dirt and debris from the window sill. This helps prevent spreading dust when you wipe down the surface. Step 3: Dip your microfiber cloth in your cleaning solution and wring it out well to avoid oversaturating the surface. Wipe down the window sill in a circular motion, paying attention to corners and edges. Step 4: For stubborn grime, sprinkle baking soda on the stain and dampen your microfiber cloth. Gently scrub the area using a circular motion. Rinse the cloth and wipe away any remaining baking soda residue. Step 5: Use a clean, dry microfiber cloth to dry the window sill completely. Moisture left behind can promote mold and mildew growth. The War on Grime: Cleaning Window Tracks Step 1: Lay down a newspaper or cloth under the window to catch any drips or debris. Step 2: Use the crevice attachment on your vacuum to remove as much loose dirt and debris as possible from the window track. Step 3: Grab your toothbrush and dip it into your cleaning solution. Gently scrub the window track, reaching into the nooks and crannies to dislodge stubborn grime. For really stubborn dirt, use a small, soft-bristled brush. Step 4: Use a microfiber cloth to wipe away any remaining dirt and grime. For a thorough clean, rinse the track with clean water. Step 5: Use a clean, dry microfiber cloth to dry the window track completely. This will help prevent moisture buildup and mold growth. The Final Touches: Maintaining Your Clean Windows To keep your windows looking their best, incorporate a regular cleaning routine: Weekly Wipe-Downs A weekly wipe-down can prevent dust and grime buildup, making deep cleaning less time-consuming and effort-intensive. Regular cleaning can help prevent stubborn stains from forming and reduce the risk of mold and mildew growth. Deep Clean Monthly A monthly deep clean ensures that your windows are thoroughly cleaned, removing any stubborn grime or stains that might have accumulated. Pay special attention to areas where grime tends to build up,

Signs Your Upholstery Needs Cleaning
Blog

Signs Your Upholstery Needs Cleaning | How to Spot the Warning Signs

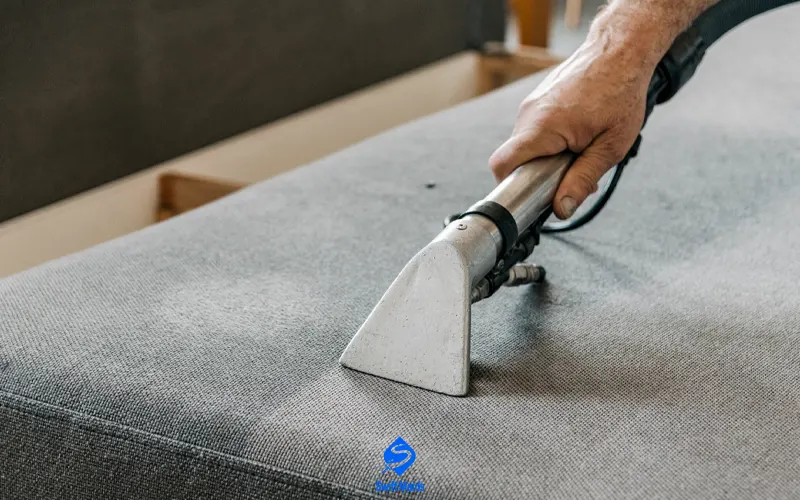
Let’s be honest, our furniture takes a beating. We sprawl out on the couch after a long day, our beloved pets leave behind furry souvenirs, and sometimes, life just happens (think spilled drinks or muddy paw prints). But here’s the thing: while we might regularly dust our shelves and vacuum the carpets, upholstery cleaning often gets relegated to the back burner. However, just like any other surface in your home, your upholstery needs some care too. Here’s the catch: unlike a dusty bookshelf, your furniture doesn’t always scream for attention. So what are the signs your upholstery needs cleaning? Worry not, furniture enthusiasts! Today, we’ll go deep into the silent screams of your sofa, revealing the telltale signs that your upholstery needs a refresh. The Visual Clues | When Your Eyes Tell the Story   Sometimes, the signs are as clear as day (well, maybe not quite as clear, but definitely noticeable). Here are some visual clues that your upholstery needs a cleaning: Visible Stains Stains are often the most obvious sign that your upholstery needs cleaning. Food spills, pet accidents, and everyday grime can leave behind unsightly marks that can be difficult to remove. Ignoring these stains can lead to permanent discoloration and damage to the fabric. Read More: Beyond Spots and Dots |Upholstery Stain Removal Demystified Dullness and Faded Colors Over time, dirt, dust, and oils can accumulate on your upholstery, causing it to lose its vibrancy. Your once-bright and colorful furniture may appear dull and faded. This can significantly impact the overall appearance of your home and make your living space feel less inviting. Fuzzy Fabric If your furniture feels fuzzy or rough to the touch, it’s likely due to accumulated dust, pet hair, or other debris. While a quick vacuuming can help remove some of this surface-level dirt, a deeper cleaning is often necessary to address the underlying issues. Remember: Early intervention is key! Addressing stains and dirt promptly will prevent them from setting in and becoming more difficult to remove later. When Your Nose Knows Best   We all know that “new furniture smell,” right? Fresh and inviting. Now, imagine the opposite end of that spectrum. Here’s where your nose can become a valuable tool: Unpleasant Odors If your furniture has developed a persistent unpleasant odor, even after airing it out, it’s definitely a sign that it needs cleaning. Food spills, pet accidents, or even just accumulated body odor can contribute to these unpleasant smells. Musty or Mildewy Smells These can indicate moisture buildup or mold growth, which requires immediate attention. Professional cleaning with appropriate disinfectants can help eliminate these smells and address the underlying issue. Pro Tip: Regularly sprinkle baking soda on your furniture, leave it for 30 minutes, and then vacuum it thoroughly. This can help absorb mild odors. However, for persistent smells, professional cleaning is recommended. The Tactile Test | When Your Touch Tells the Truth We interact with our furniture physically, so it makes sense that our sense of touch can also reveal clues: Gritty Feeling A gritty or rough texture on your upholstery is a clear sign that dirt and dust have accumulated. These particles can become embedded in the fabric fibers, making the surface feel unpleasant to the touch. A thorough cleaning can remove this buildup and restore the original softness and texture of your furniture. Sticky Residue Spills, sugary treats, and other substances can leave behind sticky residues on your upholstery. While a quick wipe with a damp cloth might remove some of the surface-level residue, it often fails to penetrate deeper into the fabric fibers. Professional cleaning techniques can effectively remove sticky substances and prevent them from becoming permanent stains. Remember: Don’t experiment with harsh chemicals on your furniture! Consult a professional cleaning service like Swift Maids Calgary to ensure your upholstery is treated safely and effectively. Beyond the Obvious | When Prevention is Key   Frequency of Use The more frequently you use your furniture, the more likely it is to accumulate dirt, dust, and other contaminants. High-traffic areas, such as your living room couch or dining room chairs, are particularly susceptible to wear and tear. Regular cleaning is essential to maintain the appearance and freshness of these pieces. Pets Pets can significantly contribute to the accumulation of dirt, dander, and allergens in your upholstery. Their fur, saliva, and body oils can leave behind stains and odors. If you have pets, it’s important to clean your upholstery regularly to prevent these issues and maintain a healthy home environment. Allergies Dust mites, pollen, and other allergens can become trapped in your upholstery fabric. If you or someone in your household suffers from allergies, regular cleaning can help reduce the presence of allergens and improve indoor air quality. By keeping your furniture clean, you can create a more comfortable and allergy-friendly living space. Remember: By being proactive and addressing the signs your upholstery needs cleaning, you can extend its lifespan, maintain a healthy and inviting living space, and enjoy the comfort of your furniture for years to come. Read Also: Upholstery Cleaning Tips for Spotless Furniture | Ultimate Guide Conclusion By recognizing the signs that your upholstery needs cleaning and taking proactive steps to address them, you can maintain a healthy and inviting living space. Regular cleaning will not only improve the appearance of your furniture but also help to remove allergens, dust, and other harmful particles. If you’re unsure about how to clean your upholstery or prefer to leave it to the professionals, consider contacting Swift Maids . Our team of experienced cleaners in upholstery cleaning Calgary service, restoring its freshness and beauty. Remember, a clean and fresh home is a happy home. So, don’t let your upholstery get neglected. Take action today and enjoy the benefits of a clean and healthy living space.

Carpet Cleaning Mistakes
Blog

Common Carpet Cleaning Mistakes and How to Avoid Them

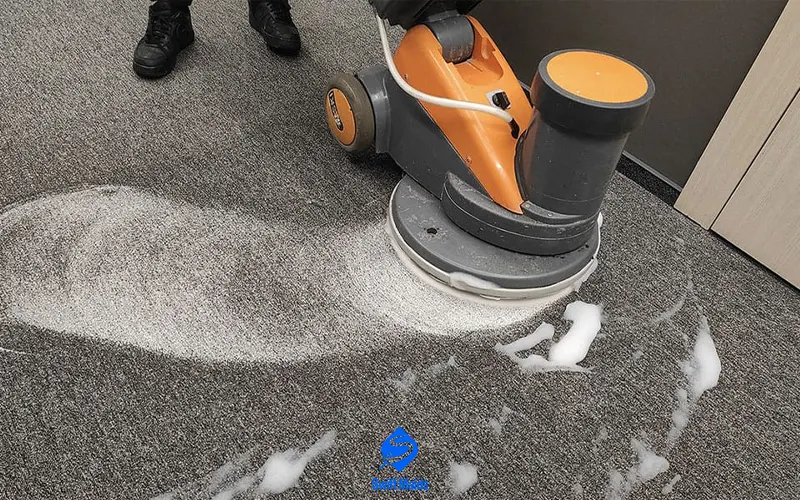
Let’s face it, carpets take a beating. Crumbs, spills, muddy paw prints – they see it all. But despite their best efforts (seriously, who else traps dust bunnies with such dedication?), keeping them clean can feel like a never-ending battle. Here’s the thing: sometimes, in our haste to remove those pesky stains, we end up making carpet cleaning mistakes that can actually make things worse. Keeping that in mind, today, we’re spilling the tea on common carpet cleaning blunders and how to avoid them. Read Also: Revitalize Your Carpets with the Best Carpet Cleaning Techniques Mistake #1: Going Nuclear on Stains   You see a spill, panic sets in, and you grab the first cleaning product you can find. Big mistake! Harsh chemicals can damage carpet fibers and even set stains permanently. Imagine trying to scrub a permanent marker stain out of your favorite shirt – it’s not a pretty picture. Here’s what to do instead: Act Fast: The sooner you tackle a spill, the easier it will be to remove. Blot up as much liquid as possible with a clean, absorbent cloth (think white paper towels, not your favorite silk scarf). Identify the Culprit: Knowing what you’re dealing with (coffee, red wine, mystery goo) is crucial for choosing the right cleaning method. A quick Google search can be your best friend here. DIY Solutions First: Believe it or not, some household staples can work wonders on stains. Baking soda, vinegar, and even club soda (for those sticky messes) can often do the trick. Remember, always test any cleaning solution on an inconspicuous area of the carpet first! Pro Tip: Feeling overwhelmed? Don’t hesitate to call in the professionals! Swift Maids offers top-notch carpet cleaning Calgary services that are gentle on your carpets and tough on stains. Read Also: Carpet Stain Removal | Best Guide for You Mistake #2: Scrubbing Frenzy Scrubbing a stain might seem like the logical way to remove it, but it can actually spread the stain and damage the carpet fibers. Imagine taking a paintbrush to a watercolor painting – not a good look. Here’s what to do instead: Blot, Don’t Scrub: As mentioned earlier, blotting is your best friend here. Use a clean, absorbent cloth and gently press down on the stain to absorb the liquid. Work from the Outside In: Always start blotting from the outside of the stain and work your way inwards. This prevents the stain from spreading further. Patience is a Virtue: It might take some time and repeated blotting to remove the stain completely. Don’t get impatient and start scrubbing – you’ll only make things worse. Mistake #3: Ignoring the Power of Vacuuming   Vacuuming regularly is like giving your carpets a massage – it removes dirt, dust, and allergens before they have a chance to settle in and cause problems. Think of it as preventative maintenance for your precious floors. Here’s what to do instead: Vacuum Regularly: Aim to vacuum your carpets at least once or twice a week, more if you have pets or high traffic areas. Go Deep: Don’t just skim the surface! Use the appropriate vacuum setting for your carpet type and make sure to get into all the nooks and crannies. Pay Attention to Details: Don’t forget to vacuum under furniture and along baseboards. These areas are dust magnets and can contribute to overall carpet wear and tear. Mistake #4: Letting Your Pets Be Little Carpet Critters We love our furry friends, but let’s be honest, they can be a nightmare for carpets. Accidents happen, muddy paws leave tracks, and fur tumbleweeds roam free. But fear not, there are ways to combat the pet-related carpet chaos. Here’s what to do instead: Train Your Pet: The best way to avoid pet-related carpet cleaning mistakes is to train your pet from the beginning. Accidents happen, but a well-trained pet will minimize the mayhem. Regular Brushing: Brushing your pet regularly removes loose fur before it has a chance to shed all over your carpets. Immediate Action: When accidents do happen, clean them up immediately! The longer a stain sits, the harder it will be to remove. Use a pet-friendly cleaning solution and blot the stain gently. Professional Carpet Cleaning: For stubborn pet stains or odors, don’t hesitate to call in a professional carpet cleaning service like Swift Maids. Our specialized cleaning techniques can remove even the most stubborn pet messes. Mistake #5: Over-Shampooing Your Carpets   Shampooing your carpets is important for removing deep-down dirt and stains. However, over-shampooing can actually be harmful. Too much moisture can lead to mold and mildew growth, and it can also damage the carpet fibers. Here’s what to do instead: Follow Manufacturer’s Instructions: Your carpet manufacturer will have specific recommendations for cleaning frequency and cleaning solutions. Follow these guidelines to avoid damaging your carpets. Professional Cleaning: Consider scheduling professional carpet cleaning every six months to a year. This will help maintain the quality of your carpets and remove deep-down dirt and stains that you might miss with regular cleaning. Mistake #6: Ignoring the Importance of Ventilation After cleaning your carpets, it’s crucial to ensure proper ventilation. Wet carpets can take a long time to dry, and moisture can create a breeding ground for mold and mildew. Here’s what to do instead: Open Windows and Doors: Increase air circulation in the room to help your carpets dry quickly. Use Fans: Place fans near the wet carpets to speed up the drying process. Avoid Walking on Wet Carpets: Foot traffic can trap moisture in the carpet fibers, making it take even longer to dry. Conclusion By avoiding these common carpet cleaning mistakes, you can keep your carpets looking and feeling their best for years to come. So, the next time you’re faced with a carpet stain or a particularly stubborn patch of dirt, remember these tips and take action before the problem gets worse.

Seasonal Window Cleaning Tips
Blog

Seasonal Window Cleaning Tips | Keeping Your Windows Sparkling All Year Round

Picture this: you’re curled up on the couch with a steaming mug of pumpkin spice latte, a cozy blanket wrapped around you. You peek out the window, eager to enjoy the vibrant colors of Calgary’s changing leaves. But instead of a breathtaking autumn scene, you’re met with a blurry mess of dirt and grime. Ugh! Not exactly the fall vibes you were hoping for, right? Fear not, fellow Calgarians! Autumn might bring its own set of challenges for window cleaning, but with a few seasonal window cleaning tips, you can transform your windows from grimy to crystal-clear, showcasing the beauty of the season. Think of it this way: clean windows let in more natural light and offer an unobstructed view of the amazing fall foliage, making your home feel more connected to the outdoors. So, grab your cleaning supplies, and let’s conquer those autumn window blues! Read Also: Maintaining Clean Gutters with Seasonal Gutter Cleaning The Leaf Fall Frenzy | Seasonal Window Cleaning Tips   Fall’s beautiful blanket of leaves is a feast for the eyes – unless they’re clinging to your windows, that is! Here’s how to handle this seasonal challenge: Leaf-Sweeping Make a habit of regularly sweeping or brushing away leaves from your window sills and outside windowpanes. This simple step prevents leaves from staining the glass and makes cleaning easier later. Think of it as a quick fall ritual to embrace the changing season! Leaf Blower Brigade For larger areas, especially on multi-story houses, consider using a leaf blower to remove leaves from around your windows quickly. Just be mindful of the wind direction and avoid blowing leaves towards your neighbors’ windows. Nobody wants to be a leaf-blowing villain! Rain and Wind | The Autumn Duo     Calgary autumns often bring a mix of rain and wind, which can further complicate the task of keeping your windows clean. But fret not, with some planning and these tips, you can conquer the weather: Time Your Cleaning Wisely Avoid cleaning your windows during heavy rain or high winds. Wait for a calmer day with lighter rain or a break from the wind. Nobody wants to be battling the elements while cleaning windows! Imagine the wind whipping your cleaning solution all over the place – not exactly the relaxing fall activity you were hoping for. Rain Repellent to the Rescue Consider applying a rain-repellent solution to your windows. This invisible shield helps water bead up and roll off, minimizing water stains and making future cleaning easier. Think of it like a raincoat for your windows! Imagine the next rain shower effortlessly washing away dirt and grime, leaving your windows sparkling clean. Safety First Remember, safety is paramount when cleaning windows, especially on higher floors. If you’re not comfortable climbing a ladder, consider hiring professional window cleaners like Swift Maids in Calgary. Our team of experts will ensure your windows are sparkling clean while you stay safe and enjoy the fall season. Winter Prep | A Cozy Clean   As autumn transitions into winter, it’s essential to prepare your windows for the colder months. Here’s how to ensure your windows remain clean and crystal clear throughout the season: Prevent Condensation Excessive condensation can lead to foggy windows, obscuring your view and making them appear dirty. Ensure your home has adequate ventilation, especially in the bathroom and kitchen. Consider using a dehumidifier to reduce moisture levels and prevent condensation from forming. Avoid Cleaning on Freezing Days Avoid cleaning your windows on excessively cold days to prevent the cleaning solution from freezing. Wait for a milder day when the temperature is above freezing. Nobody wants to deal with frozen cleaning solutions! Read More: Winter Window Cleaning Solution Window Cleaning Hacks and Tips In addition to the seasonal window cleaning tips mentioned above, here are some additional hacks and tips to help you achieve sparkling clean windows: Start from the Top: Begin cleaning your windows from the top down to prevent streaks. This way, any dirt or streaks that drip down will be wiped away as you clean. Use a Microfiber Cloth: Microfiber cloths are ideal for window cleaning as they are soft, absorbent, and don’t leave lint behind. DIY Cleaning Solutions: If you prefer to use natural cleaning solutions, try a mixture of white vinegar and water. This solution is effective at removing dirt and grime without harsh chemicals. Avoid Harsh Chemicals: Harsh chemicals can damage the glass and leave streaks. Opt for gentle cleaning solutions that are safe for both your windows and the environment. Clean Both Sides: Don’t forget to clean the inside of your windows as well! Inside grime can accumulate over time and affect the overall appearance of your home. By incorporating these additional tips into your window cleaning routine, you can achieve sparkling clean windows that enhance the beauty of your home. Professional Window Cleaning in Calgary If you’re overwhelmed by the task of window cleaning or simply prefer to leave it to the professionals, Swift Maids offers reliable and efficient window cleaning Calgary services. Our team of experts will ensure your windows are sparkling clean, allowing you to enjoy the beautiful Calgary scenery to the fullest. Conclusion Autumn in Calgary offers a stunning display of colors and cozy vibes. By following the above seasonal window cleaning tips, you can ensure your windows remain sparkling clean, allowing you to fully appreciate the beauty of the season. Remember, clean windows enhance your home’s appearance and contribute to a brighter and more inviting atmosphere. So, grab your cleaning supplies, put on your favorite cozy sweater, and get ready to tackle your autumn window cleaning chores. With a little effort, you’ll be rewarded with a crystal-clear view of Calgary’s breathtaking fall foliage.

How Often Should I Clean My Gutters?
Blog

How Often Should I Clean My Gutters? | Tips for Every Homeowner

Let’s face it, gutters aren’t exactly the most glamorous part of your house. They’re tucked up there under the eaves, silently doing their duty – which is basically super important for your home’s health. But just like everything, gutters need a little care every now and then. The question one might ask is, how often should I clean my gutters? The answer, however, isn’t a simple one-size-fits-all. It depends on a few factors, and we’re here to break it all down for you. Why Cleaning Your Gutters Matters   Before we dive into the nitty-gritty of cleaning schedules, let’s talk about why cleaning your gutters is so important. Imagine a heavy downpour. Rain rushes off your roof, and your gutters are there to catch it, channeling the water away from your foundation. If your gutters are clogged with leaves, twigs, or debris, they can’t do their job effectively. Water can overflow, causing a cascade of problems: Foundation Issues: Excess water pooling around your foundation can lead to cracks and leaks, causing serious structural damage. Basement Flooding: If your gutters are clogged and overflowing, that water can seep into your basement, creating a watery mess and potentially damaging belongings. Roof Damage: Standing water near your roof can lead to rot and deterioration of the shingles. Mosquito Magnet: Clogged gutters with stagnant water can become a breeding ground for pesky mosquitoes. Nobody wants to deal with any of that, right? So, keeping your gutters clean is an essential part of home maintenance. How Often Should I Clean My Gutters? Now, back to the big question: how often should I clean my gutters? Here are some key factors to consider: Trees, Trees, Glorious Trees Do you have a majestic maple shading your house? Or maybe a towering oak keeps you cool in the summer? While trees are wonderful additions to any landscape, they also shed leaves. The more trees you have around your house, the more frequently you’ll need to clean your gutters, especially in the fall when the leaves come cascading down. Your Local Climate Your local climate plays a significant role in determining how often you need to clean your gutters. Areas with heavy rainfall or frequent storms are more prone to clogged gutters, as the increased water flow can quickly overwhelm the gutters and lead to overflow. The Debris Situation The type and amount of debris in your gutters can also influence the cleaning frequency. Trees like pine and oak shed a significant amount of leaves and needles, which can quickly clog gutters. Additionally, squirrels, birds, and other animals might build nests or store food in your gutters, leading to further debris buildup. Read Also: Maintaining Clean Gutters with Seasonal Gutter Cleaning A General Rule of Thumb (with wiggle room)   Based on these factors, here’s a general guideline to get you started: Twice a Year For most homeowners, cleaning their gutters twice a year is a good starting point. This typically involves cleaning them once in the spring after the winter mess has melted and again in the fall after the leaves have fallen. However, this can vary depending on your specific circumstances. More Frequent Cleaning If you have a lot of trees around your home or live in a region with heavy rainfall, you might need to clean your gutters more frequently. Consider cleaning them every three months or even more often to prevent clogs and ensure proper water flow. Less Frequent Cleaning If you live in a dry climate with minimal rainfall and few trees, you might be able to get away with cleaning your gutters once a year. However, it’s still a good idea to inspect them periodically to ensure they are clear of any debris that might have accumulated. The Ultimate Test | The Gutter Glove Test Here’s a quick and easy way to gauge if your gutters need cleaning: Grab a trusty glove. Carefully reach up and scoop some debris out of your gutter. If the glove comes out overflowing with leaves, twigs, and other debris, it’s time to schedule a cleaning. Cleaning Your Gutters | Safety First! Cleaning your gutters can be a great DIY project, but safety is paramount. If you’re not comfortable climbing a ladder or working at heights, it’s best to call in a professional. Here are some safety tips if you decide to tackle the task yourself: Use a sturdy ladder and secure it properly. Have a spotter hold the ladder for you. Wear work gloves and shoes with good traction. Be mindful of power lines and avoid them at all costs. Read Also: How to Clean gutters without ladder in smart way? Feeling overwhelmed? Swift Maids Can Help!   Looking for a little help with those pesky gutters? Here at Swift Maids, we offer a variety of cleaning services, including gutter cleaning Calgary. Our experienced and insured professionals can take care of this chore for you, freeing up your time and ensuring your gutters are sparkling clean. Keeping Your Gutters Happy | The Final Word So, to recap: cleaning your gutters is essential for maintaining the health of your home. The frequency of cleaning depends on factors like the amount of trees around your house, your local climate, and the amount of debris in your gutters. By following these guidelines and prioritizing safety, you can ensure your gutters are functioning properly and protecting your home from potential damage. Remember, if you’re uncomfortable climbing a ladder or prefer to leave this task to the professionals, don’t hesitate to reach out to a reputable gutter cleaning service like Swiftmaids.com.  

Warehouse Cleaning checklist
Blog

The Ultimate Warehouse Cleaning Checklist | Keep Your Space Safe, Organized and Efficient

We get it, warehouses can get messy. Between all the incoming and outgoing shipments, keeping your storage space organized and clean can feel like a never-ending battle. Don’t sweat it though! With a well-defined warehouse cleaning checklist and a little muscle, you can transform your cluttered warehouse into a space that’s both efficient and hygienic. Imagine this: you need to locate an important order for a customer in Calgary, but your aisles are overflowing with misplaced boxes and dust bunnies are rolling by your feet. Not exactly a recipe for productivity, right? A clean warehouse not only improves the overall aesthetic (think happy clients!), but it also ensures the safety and well-being of your employees. This guide will equip you with a comprehensive warehouse cleaning checklist, covering everything from daily tasks to deep cleaning procedures. Remember, a clean warehouse is a happy warehouse, so let’s get down to business! What Makes A Warehouses Dirty?   Before diving into the cleaning arsenal, let’s identify the common culprits behind warehouse mess: Dust and Debris: Unopened boxes, forklift traffic, and general activity can stir up dust and debris, settling on surfaces and creating a grimy environment. Spills and Leaks: Accidents happen, and spills from leaky containers or broken machinery can leave sticky messes on your warehouse floor. Pests: A cluttered warehouse with food scraps or forgotten packaging can be a breeding ground for unwelcome pests like rodents and insects. Knowing your enemy is half the battle! Now, let’s explore the strategies to keep them at bay. Your Warehouse Cleaning Checklist | Daily Tasks Empty Trash Cans Regularly emptying trash cans is crucial for maintaining a clean and hygienic warehouse environment. Overfilled trash cans can attract pests and create unpleasant odors, which can negatively impact employee morale and customer satisfaction. Frequency: Empty trash cans at least once a day, or more frequently in areas with high food waste. Proper Disposal: Ensure trash is disposed of in designated bins or containers to prevent littering and attract unwanted pests. Sweep and Mop Floors Daily sweeping and mopping of high-traffic areas helps remove dust, dirt, and potential spills, preventing accidents and maintaining a clean appearance. Thorough Cleaning: Pay attention to areas around loading docks, forklift pathways, and other high-traffic areas where dirt and debris tend to accumulate. Appropriate Cleaning Products: Use cleaning solutions suitable for your warehouse floor type to effectively remove dirt and stains without damaging the surface. Straighten Up A cluttered warehouse can be a safety hazard and hinder productivity. Make it a daily practice to straighten up and put misplaced items back in their designated locations. Organized Storage: Ensure that all items have their designated storage areas and that these areas are clearly labeled. Efficient Navigation: A well-organized warehouse allows for easier navigation and faster retrieval of products. Check for Spills Spills can create safety hazards and damage products. Regularly scan your warehouse floor for any spills and address them promptly. Immediate Attention: Clean up spills as soon as they occur to prevent them from spreading or causing accidents. Proper Cleaning: Use appropriate cleaning products to remove spills effectively and prevent stains. Quick Dusting Dust can accumulate quickly in warehouses, creating a grimy appearance and potentially affecting air quality. Dusting shelves, equipment, and other surfaces regularly help maintain a clean and presentable environment. Microfiber Cloths: Use microfiber cloths for effective dust removal. They are gentle on surfaces and capture dust without leaving behind lint. Focus on High-Touch Areas: Pay special attention to areas that are frequently touched, such as doorknobs, light switches, and control panels. Pro Tip: Encourage your employees to be part of the cleaning routine. A quick tidy-up at the end of each shift can make a big difference! Weekly Warehouse Cleaning Checklist   In addition to daily tasks, incorporate these cleaning activities into your weekly routine: Deep Clean High-Touch Surfaces: Focus on areas frequently touched by employees, such as doorknobs, light switches, and control panels. Use a disinfectant wipe or cleaning solution appropriate for the surface material. Clean Warehouse Lighting: Dusty light fixtures can impede proper illumination. Wipe down light fixtures to ensure optimal lighting throughout your warehouse. Organize Aisles: Take a step back and assess your aisle organization. Consider rearranging pallets and shelves for improved accessibility and efficient product flow. Inventory Check and Removal: Conduct a quick inventory check and remove any expired, damaged, or unwanted items. This helps free up space and maintain an organized storage environment. Inspect for Pests: Look for signs of pest activity like droppings or gnaw marks. If you suspect a pest problem, contact a professional exterminator right away. Remember: Consistency is key! Regularly scheduled cleaning helps prevent dust and dirt buildup and maintains a healthy work environment. Monthly Warehouse Cleaning Checklist For a truly sparkling warehouse, consider these monthly deep cleaning calgary tasks: Floor Scrubbing: Go beyond mopping – deep clean your warehouse floor using a scrubber and appropriate cleaning products. Pay special attention to areas with heavy traffic or forklift use. Wall and Ceiling Cleaning: Dust and grime can accumulate on walls and ceilings over time. Use a ladder and appropriate cleaning tools to remove dirt and cobwebs. Air Vent Cleaning: Dusty air vents can compromise air quality in your warehouse. Have your air vents professionally cleaned to ensure proper air circulation. Window Cleaning: Clean warehouse windows to allow natural light in and improve overall aesthetics. Remember, a bright and clean workspace can boost employee morale. Equipment Maintenance: Schedule regular maintenance for machinery and equipment used in your warehouse. This helps prevent breakdowns and ensures smooth operation. Safety First: When tackling deep cleaning tasks that involve heights or strong cleaning chemicals, prioritize safety! Use appropriate equipment like ladders and gloves, and ensure proper ventilation when using cleaning solutions. DIY vs. Professional Cleaning | Making the Right Choice   While a DIY approach can be effective for basic maintenance, there are times when professional commercial cleaning Calgary services can be invaluable. Consider hiring a professional cleaning company for: Deep Cleaning: For thorough cleaning

Commercial Deep Cleaning
Blog

Commercial Deep Cleaning | Elevate Your Business Environment

Let’s face it, keeping a commercial space clean can feel like a never-ending battle. Coffee spills in the breakroom, dusty shelves in retail stores, and grime buildup in office kitchens – these are just some of the everyday challenges that can make maintaining a pristine environment seem impossible. But what if there was a way to go beyond the surface clean? Enter the world of commercial deep cleaning, a powerful service designed to tackle the toughest dirt, grime, and germs lurking in your business space. Why Commercial Deep Cleaning Matters   A deep clean goes far beyond the daily wipe-down routine. It’s a comprehensive, thorough cleaning process that delves into the nooks and crannies often neglected in standard cleaning practices. Here’s why a regular commercial deep cleaning should be a priority for your business: Enhanced Appearance A deep clean removes built-up dirt, dust, and grime, leaving your business space looking fresh and professional. Imagine the impact on your customers or clients when they walk into a sparkling clean environment! Improved Hygiene Deep cleaning tackles hidden bacteria and allergens, creating a healthier and more hygienic environment for your employees and customers. This can lead to fewer sick days and a more pleasant work experience for everyone. Extended Lifespan of Equipment Regular deep cleaning removes dust and debris that can shorten the lifespan of office equipment and appliances. It can also prevent costly repairs and replacements down the line. Increased Productivity A clean and organized workspace can boost employee morale and productivity. When the environment is free from dust and clutter, it’s easier to focus and get things done. Thinking about deep cleaning your office in Calgary? Swift Maids offers a comprehensive deep cleaning service tailored to your specific needs. Read More: A Thorough Deep Cleaning Checklist| Sparkle and Shine What a Commercial Deep Cleaning Entails High-Touch Surfaces Deep cleaning goes beyond the surface-level cleaning we do daily. It focuses on disinfecting high-touch surfaces that are often overlooked but harbor a significant amount of germs. Doorknobs: These are one of the most frequently touched surfaces in any commercial space. Regular cleaning can help prevent the spread of germs. Light Switches: Another high-touch area, light switches can accumulate bacteria and dirt over time. Keyboards: Keyboards are breeding grounds for germs, especially in offices and other shared spaces. A deep clean ensures they are sanitized and free of contaminants. Phones: Phones are constantly touched throughout the day and can be a major source of germ transmission. Regular disinfection is essential. Flooring A deep clean extends beyond vacuuming or sweeping. It involves a thorough cleaning of your flooring surfaces to remove embedded dirt, grime, and stains. Stripping and Waxing: For hard floors, stripping and waxing can restore their shine and protect them from wear and tear. Carpet Cleaning: Deep carpet cleaning removes dirt, allergens, and stains from your carpets, improving their appearance and air quality. Air Ducts and Vents Dust and allergens can accumulate in air ducts, impacting the air quality in your commercial space. A deep clean includes thorough cleaning of these areas to improve indoor air quality and create a healthier environment. Windows Streaky windows can leave a negative impression on customers and employees. A deep clean includes meticulous window cleaning to ensure a clear and sparkling view. Restrooms and Kitchens These areas require special attention due to their high-traffic nature and potential for contamination. A deep clean includes: Disinfecting surfaces Removing grease build-up Tackling tough stains Behind-the-Scenes Cleaning Deep cleaning goes beyond what’s readily visible. It involves cleaning areas that are often neglected, such as: Behind appliances Under furniture In hard-to-reach corners A customized deep cleaning plan is essential to address your specific needs and ensure a thorough cleaning of your commercial space. Deep Cleaning vs. Regular Cleaning | Understanding the Difference   While regular cleaning is crucial for maintaining a clean work environment, it doesn’t go as deep as a commercial deep clean. Here’s a breakdown of the differences: Frequency: Regular cleaning is typically done daily or weekly, while deep cleaning is usually performed on a less frequent basis, perhaps quarterly or biannually. Depth of Clean: Regular cleaning focuses on surface-level dirt and grime. Deep cleaning digs deeper, tackling built-up dirt, dust, and allergens in hard-to-reach areas. Focus: Regular cleaning focuses on maintaining cleanliness, while deep cleaning focuses on restoring a neglected space or removing stubborn dirt and grime. Read More: Regular Cleaning vs Deep Cleaning Face-off | Clean and Mean Hiring a Commercial Deep Cleaning Service | The Benefits Hiring a professional commercial cleaning Calgary service for your deep cleaning needs offers several advantages: Expertise: Professional cleaners have the training and experience to tackle even the toughest cleaning challenges. Specialized Equipment: Deep cleaning often requires specialized equipment that most businesses wouldn’t have on hand. Hiring a professional ensures they have the right tools for the job. Efficiency: Experienced cleaning crews can complete a deep clean quickly and efficiently, minimizing disruption to your business operations. Peace of Mind: Knowing that your deep cleaning is handled by professionals gives you peace of mind and allows you to focus on running your business. Choosing the Right Commercial Cleaning Service   Experience When selecting a commercial cleaning service, look for a company with experience in your specific industry or type of business. This ensures they understand the unique cleaning challenges and requirements of your space. Reputation A company’s reputation is a valuable indicator of their quality of service. Read online reviews, ask for referrals, and check their references to get a sense of their reliability and customer satisfaction. Services Offered Ensure the cleaning company offers the specific services you need. Whether you require carpet cleaning Calgary, floor waxing, air duct cleaning Calgary, or a combination of services, make sure they can meet your requirements. Green Cleaning Practices If environmental sustainability is important to you, look for a company that uses eco-friendly cleaning products and practices. This not only benefits the environment but also creates a healthier and safer workspace for your employees and

DIY Window Cleaning tools and equipment
Blog

DIY Window Cleaning Tools and Equipment

Admit it, cleaning windows can feel like a chore. You spend all that time scrubbing and squeegeeing, only to be left with streaks and smudges that make you question your cleaning skills. Not to worry! With the right Essential Tools and window cleaning tools and equipment, and a little know-how, you can transform your glass panes from grimy to gleaming. This guide will equip you with the essential tools for a successful DIY window cleaning adventure, so you can enjoy the satisfaction of sparkling windows without breaking the bank. Whether you live in a cozy condo or a sprawling house in Calgary, these tips will help you achieve crystal-clear results. Understanding the Enemy: What Makes Windows Dirty? Dust and Dirt Airborne dust, pollen, and other particles can settle on windows, obscuring their clarity and creating a dull appearance. Regular cleaning is essential to remove these contaminants and maintain clear windows. Fingerprints and Smudges Our hands are constantly touching surfaces, leaving behind oily residues that can smudge windows. This is especially noticeable on frequently used windows, such as those in kitchens or near entryways. Water Spots Hard water minerals can leave behind unsightly spots on windows, particularly after cleaning or rain. These spots can be difficult to remove and can reduce the overall appearance of your windows. Knowing your enemy is half the battle! Now, let’s explore the essential window cleaning tools and equipment to tackle them effectively. The DIY Window Cleaning Arsenal: Must-Have Tools Microfiber Cloths Microfiber cloths are indispensable for window cleaning. Their unique properties make them ideal for effectively removing dirt, grime, and streaks without scratching the glass. Absorbency: Microfiber cloths are highly absorbent, quickly soaking up excess cleaning solution and water. Non-Abrasive: The soft texture of microfiber fibers prevents scratches on the glass, ensuring a streak-free finish. Durability: Microfiber cloths are durable and can be reused multiple times after washing. Squeegee A squeegee is essential for removing excess cleaning solution and achieving a streak-free finish. Rubber Blade: The rubber blade should be flexible and conform to the shape of your window for optimal cleaning. Handle: Choose a squeegee with a comfortable handle for easy maneuvering. Bucket A bucket is necessary for holding your cleaning solution. A small bucket is usually sufficient for most window cleaning calgary tasks. Spray Bottle (Optional) While not strictly necessary, a spray bottle can be convenient for applying your cleaning solution directly to the window, especially for larger windows or stubborn stains. These basic window cleaning tools and equipment are readily available and won’t break the bank. With proper care and use, they can help you achieve sparkling windows for years to come. Pro Tip: Invest in two separate microfiber cloths – one for cleaning and one for buffing. This helps prevent cross-contamination and ensures a truly streak-free finish. DIY Window Cleaning Solution: Homemade or Store-Bought? There are two main options when it comes to cleaning solutions: Homemade: A simple solution of distilled water and white vinegar can be a budget-friendly and effective cleaning agent. Mix equal parts water and vinegar in your spray bottle (if using) or bucket. Store-Bought: Many commercial window cleaning solutions are readily available. These can be convenient and often come with streak-free guarantees. The Art of the Clean: Step-by-Step Guide Prep the Area Before you start cleaning, prepare the area around the window by mastering the art of window cleaning techniques to avoid messy cleaning. Remove Obstacles: Move any blinds, curtains, or furniture away from the window to provide unobstructed access. Protect the Surroundings: Lay down newspapers or towels under the window to catch any drips or spills. Dust It Off Start by using a dry microfiber cloth to remove loose dust and cobwebs from the window frame and glass. This will prevent the dust from mixing with the cleaning solution and creating streaks. Apply Cleaning Solution Choose your preferred cleaning solution (homemade or store-bought) and apply it to the window. If using a spray bottle, apply the solution evenly to the glass. If using a damp cloth, apply the cleaning solution directly to the cloth. Scrub-a-Dub-Dub Gently scrub the entire window surface in a circular motion using your damp microfiber cloth. Pay special attention to areas with stubborn dirt, grime, or stains. Squeegee Away Starting at the top of the window, use your squeegee to remove excess cleaning solution. Work your way down the window, ensuring you overlap your strokes to prevent streaks. Wipe the squeegee blade with a dry microfiber cloth after each stroke to keep it clean. Maintain Pressure: Apply consistent pressure to the squeegee blade to ensure effective water removal. Overlap Strokes: Overlapping your squeegee strokes helps prevent streaks and ensures a smooth finish. Buff and Shine Once you’ve removed the excess cleaning solution with the squeegee, use a dry microfiber cloth to buff the window dry. This will remove any remaining streaks and restore the window’s shine. Pay Attention to Corners: Don’t forget to buff the edges and corners of the window to ensure a complete and even finish. Remember: Work in sections to prevent the cleaning solution from drying on the window, which can cause streaks. By following these steps and using the right window cleaning tools and equipment, you can achieve professional-looking results at home Beyond the Basics: Tackling Tough Window Cleaning Challenges Sometimes, windows throw curveballs. Here’s how to handle some common challenges: High Windows: For hard-to-reach windows, consider using an extension pole with a microfiber cleaning head or squeegee attachment. Window Screens: Window screens can accumulate dust and grime too. Remove them and wash them with soapy water or use a vacuum cleaner with a brush attachment. Stubborn Stains: For stubborn stains, like bird droppings or tree sap, try using a mixture of white vinegar and baking soda. Gently apply the mixture to the stain and let it sit for a few minutes before scrubbing with a soft-bristled brush. When DIY Just Won’t Cut It: Hiring a Professional Window Cleaning Service While DIY window cleaning can be a

Scroll to Top