Author name: Fatimah Alavi

Steam Cleaning vs. Traditional Methods for Windows
Blog

Steam Cleaning Windows vs. Traditional Methods

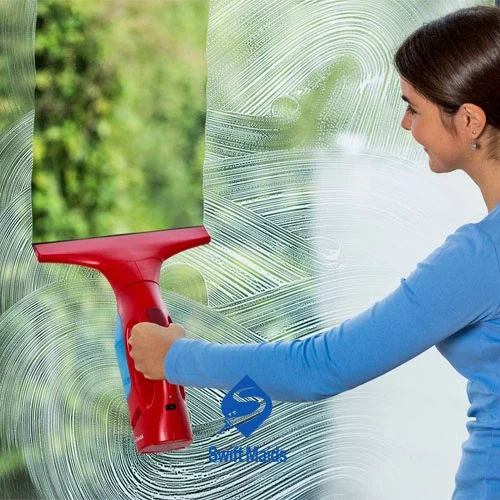
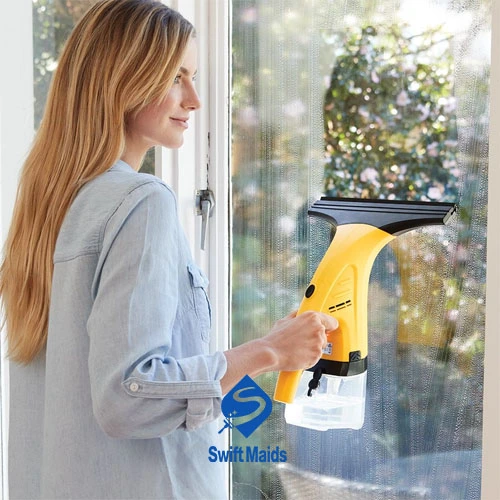
We’ve all been there. You spend ages cleaning your house, feeling good about your accomplishment, only to walk over to a window and see – oh no! Streaks, smudges, and a general lack of sparkle. Cleaning windows can feel like a thankless task, especially with traditional methods leaving behind unwanted residue. But fear not, fellow cleaning enthusiasts! Steam cleaning windows has emerged as a powerful contender, promising sparkling results without the harsh chemicals. So, is steam cleaning the ultimate window-cleaning solution? Let’s dive into today’s article and see how it stacks up against traditional methods. Read More: Window Cleaning Tips | A Comprehensive Window Cleaning Tutorial Traditional Methods: The Tried and True For generations, we’ve relied on tools like squeegees, buckets of soapy water, and maybe even a trusty newspaper (remember those days?). But are these methods all they’re cracked up to be? Pros: Low Cost: The good news? You likely already have everything you need for traditional window cleaning at home. No fancy equipment to buy! Readily Available: No need to wait for a special delivery. Simply grab your favorite cleaning solution, a squeegee, and get started. Cons: Streaky Results: The bane of a window cleaner’s existence! Traditional methods can leave behind unsightly streaks, especially if the cleaning solution isn’t properly diluted. Chemical Concerns: Many commercial window cleaners contain harsh chemicals that can irritate the skin and eyes, and aren’t exactly eco-friendly. Labor Intensive: Washing windows with buckets and squeegees can be a time-consuming and physically demanding process. Enter the Steam Cleaner: A Modern Marvel? Steam cleaning windows has become increasingly popular, promising a faster, more effective cleaning. But does it live up to the hype? Pros: Streak-Free Shine: The high heat of steam cuts through dirt and grime without leaving behind any residue, resulting in a sparkling, streak-free finish. This is because the steam softens the dirt and grime, making it easier to remove with a squeegee. Chemical-Free Cleaning: Embrace a greener clean! Steam cleaning relies on the power of pure water vapor, making it safe for kids, pets, and the environment. This is especially beneficial for those with allergies or sensitivities to harsh chemicals. Disinfects and Sanitizes: Steam cleaning reaches high temperatures, killing bacteria and germs on your window surfaces. This is a great way to keep your home clean and healthy, especially during cold and flu season. Time-Saving Efficiency: Steam cleaning is a faster process compared to traditional methods. The high heat loosens dirt quickly, requiring less scrubbing. This means you can spend less time cleaning and more time enjoying your sparkling clean windows. Cons: Initial Investment: Purchasing a steam cleaner can be a cost upfront. However, the cost can be offset by the time and money you’ll save on cleaning supplies and labor. Not for All Surfaces: While safe for most glass surfaces, check your window manufacturer’s recommendations before cleaning with steam, especially on older or delicate windows. Some delicate window frames or coatings might not be compatible with high-temperature steam. So, Which Method Reigns Supreme? Feature Traditional Methods Steam Cleaning Cost Low Higher upfront cost, cost-effective in the long run Chemicals Use harsh chemicals Chemical-free cleaning Streak-free results Can be difficult to achieve Guarantees streak-free results Time-consuming Labor-intensive Faster and more efficient Disinfection Limited Kills bacteria and germs Safety Potential for skin and eye irritation   Safe for kids, pets, environment The truth is, both traditional methods and steam cleaning windows have their place, depending on your needs and priorities. Here’s a quick guide to help you decide: Choose Traditional Methods if: You’re on a budget and already have the necessary DIY Window Cleaning tools and equipment tools. You’re cleaning a small number of windows (think bathroom mirror). Choose Steam Cleaning if: You prioritize a streak-free shine and a chemical-free clean. You want to disinfect your windows while cleaning. You’re cleaning a large number of windows, or windows with high nooks and crannies. The Final Verdict: A Winning Combination Ultimately, the best approach might be a combination of both methods. For regular maintenance, traditional window cleaning may suffice. However, for a deeper cleaning or tackling particularly dirty or grimy windows, steam cleaning windows can be a game-changer. Bonus Tip: Feeling overwhelmed by cleaning? Consider professional cleaning services like Swiftmaids Window Cleaning Calgary and surrounding areas. Our team can tackle your window cleaning woes, allowing you to focus on other things (like enjoying the sparkling view!).

Window Sills and Tracks
Blog

How to Clean Window Sills and Tracks

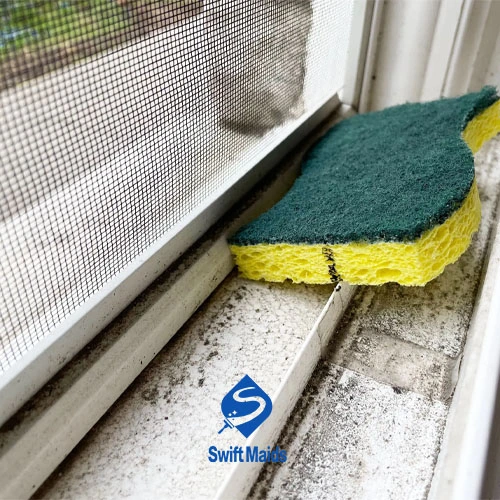
Imagine this: you spend a glorious afternoon cleaning your windows, taking in the sparkling results. But as you step back to admire your handiwork, a dark truth emerges – the window sills and tracks! They’re caked in grime, dust bunnies are having a party, and the whole scene screams “unfinished business.” No need to worry though, this guide will equip you with the knowledge and window cleaning tools and equipment to banish the grime and reclaim your window sills and tracks. Why Clean Window Sills and Tracks? It’s not just about aesthetics (although, let’s be honest, gleaming window sills and tracks elevate any room). Here’s why regular cleaning is crucial: Improved Air Quality: Dust and debris trapped in window tracks can circulate throughout your home, aggravating allergies and respiratory issues. Smoother Window Operation: When tracks are clogged with dirt, windows can stick or become difficult to open and close. Preserving Your Windows: Grime can wear down the window seals and frames, leading to costly repairs or replacements down the line. Enhanced Curb Appeal: Sparkling window sills and tracks create a clean and inviting look for your home, both inside and out. Understanding the Enemy: Types of Grime Before we dive into window cleaning techniques, let’s identify the culprits behind the grime: Dust and Dirt Dust and dirt are constant companions in our homes. They settle on surfaces, including window sills and tracks, from air currents, foot traffic, and other activities. While dust might seem harmless, it can contribute to respiratory issues, allergies, and a musty odor. Dead Bugs Window tracks, with their narrow crevices and dark corners, can be a haven for insects. Dead bugs can accumulate, adding to the grime and creating an unpleasant sight. Also, dead bugs can decompose, releasing unpleasant odors and potentially attracting other pests. Pollen and Allergens Pollen, a fine powder released by plants, is a common allergen. During allergy season, pollen can settle on window sills and tracks, making its way indoors and triggering allergic reactions Exposure to pollen can cause sneezing, runny nose, itchy eyes, and other allergy symptoms. Mold and Mildew Mold and mildew thrive in damp environments. Window tracks, especially in bathrooms or kitchens, can accumulate moisture, creating ideal conditions for these organisms to grow. Mold and mildew can release spores into the air, leading to respiratory problems, allergies, and potential health risks. Grime and Grime Buddies Over time, dust, dirt, and other particulates can mix with moisture and oil, forming a stubborn, sticky mess. This grime can be difficult to remove and can make it challenging to open and close your windows. Grime can provide a breeding ground for bacteria and other microorganisms, contributing to a less-than-ideal indoor environment. The Arsenal of Cleaning Supplies You’ll Need Now, let’s gather our cleaning arsenal! Here’s what you’ll need to tackle window sills and tracks: Vacuum Cleaner: Your trusty vacuum with a crevice attachment is your first line of defense, sucking up loose dirt and debris. All-Purpose Cleaner or Dish Soap: Opt for a gentle, all-purpose cleaner or dish soap diluted with warm water. For tougher grime, consider a vinegar solution (1 part white vinegar to 3 parts water). Microfiber Cloths: These gentle yet effective cloths are perfect for wiping down surfaces without leaving streaks. Opt for different colors to avoid cross-contamination (one for the sills, one for the tracks). Toothbrush: An old toothbrush is a champion for reaching tight spaces in window tracks, especially the corners. Paper Towels (Optional): Handy for wiping up spills or stubborn grime. Baking Soda (Optional): A natural cleaning agent, baking soda can help tackle tough stains on window sills. Bucket (Optional): If using a vinegar solution, you might need a bucket to dilute and hold the cleaning solution. Rubber Gloves (Optional): For those with sensitive skin or who prefer extra protection. The Battle Plan: Cleaning Window Sills   Step 1: Remove any plants, décor, or window treatments that might obstruct your cleaning. Step 2: Using the crevice attachment on your vacuum, suck up any loose dirt and debris from the window sill. This helps prevent spreading dust when you wipe down the surface. Step 3: Dip your microfiber cloth in your cleaning solution and wring it out well to avoid oversaturating the surface. Wipe down the window sill in a circular motion, paying attention to corners and edges. Step 4: For stubborn grime, sprinkle baking soda on the stain and dampen your microfiber cloth. Gently scrub the area using a circular motion. Rinse the cloth and wipe away any remaining baking soda residue. Step 5: Use a clean, dry microfiber cloth to dry the window sill completely. Moisture left behind can promote mold and mildew growth. The War on Grime: Cleaning Window Tracks Step 1: Lay down a newspaper or cloth under the window to catch any drips or debris. Step 2: Use the crevice attachment on your vacuum to remove as much loose dirt and debris as possible from the window track. Step 3: Grab your toothbrush and dip it into your cleaning solution. Gently scrub the window track, reaching into the nooks and crannies to dislodge stubborn grime. For really stubborn dirt, use a small, soft-bristled brush. Step 4: Use a microfiber cloth to wipe away any remaining dirt and grime. For a thorough clean, rinse the track with clean water. Step 5: Use a clean, dry microfiber cloth to dry the window track completely. This will help prevent moisture buildup and mold growth. The Final Touches: Maintaining Your Clean Windows To keep your windows looking their best, incorporate a regular cleaning routine: Weekly Wipe-Downs A weekly wipe-down can prevent dust and grime buildup, making deep cleaning less time-consuming and effort-intensive. Regular cleaning can help prevent stubborn stains from forming and reduce the risk of mold and mildew growth. Deep Clean Monthly A monthly deep clean ensures that your windows are thoroughly cleaned, removing any stubborn grime or stains that might have accumulated. Pay special attention to areas where grime tends to build up,

DIY Window Cleaning tools and equipment
Blog

DIY Window Cleaning Tools and Equipment

Admit it, cleaning windows can feel like a chore. You spend all that time scrubbing and squeegeeing, only to be left with streaks and smudges that make you question your cleaning skills. Not to worry! With the right Essential Tools and window cleaning tools and equipment, and a little know-how, you can transform your glass panes from grimy to gleaming. This guide will equip you with the essential tools for a successful DIY window cleaning adventure, so you can enjoy the satisfaction of sparkling windows without breaking the bank. Whether you live in a cozy condo or a sprawling house in Calgary, these tips will help you achieve crystal-clear results. Understanding the Enemy: What Makes Windows Dirty? Dust and Dirt Airborne dust, pollen, and other particles can settle on windows, obscuring their clarity and creating a dull appearance. Regular cleaning is essential to remove these contaminants and maintain clear windows. Fingerprints and Smudges Our hands are constantly touching surfaces, leaving behind oily residues that can smudge windows. This is especially noticeable on frequently used windows, such as those in kitchens or near entryways. Water Spots Hard water minerals can leave behind unsightly spots on windows, particularly after cleaning or rain. These spots can be difficult to remove and can reduce the overall appearance of your windows. Knowing your enemy is half the battle! Now, let’s explore the essential window cleaning tools and equipment to tackle them effectively. The DIY Window Cleaning Arsenal: Must-Have Tools Microfiber Cloths Microfiber cloths are indispensable for window cleaning. Their unique properties make them ideal for effectively removing dirt, grime, and streaks without scratching the glass. Absorbency: Microfiber cloths are highly absorbent, quickly soaking up excess cleaning solution and water. Non-Abrasive: The soft texture of microfiber fibers prevents scratches on the glass, ensuring a streak-free finish. Durability: Microfiber cloths are durable and can be reused multiple times after washing. Squeegee A squeegee is essential for removing excess cleaning solution and achieving a streak-free finish. Rubber Blade: The rubber blade should be flexible and conform to the shape of your window for optimal cleaning. Handle: Choose a squeegee with a comfortable handle for easy maneuvering. Bucket A bucket is necessary for holding your cleaning solution. A small bucket is usually sufficient for most window cleaning calgary tasks. Spray Bottle (Optional) While not strictly necessary, a spray bottle can be convenient for applying your cleaning solution directly to the window, especially for larger windows or stubborn stains. These basic window cleaning tools and equipment are readily available and won’t break the bank. With proper care and use, they can help you achieve sparkling windows for years to come. Pro Tip: Invest in two separate microfiber cloths – one for cleaning and one for buffing. This helps prevent cross-contamination and ensures a truly streak-free finish. DIY Window Cleaning Solution: Homemade or Store-Bought? There are two main options when it comes to cleaning solutions: Homemade: A simple solution of distilled water and white vinegar can be a budget-friendly and effective cleaning agent. Mix equal parts water and vinegar in your spray bottle (if using) or bucket. Store-Bought: Many commercial window cleaning solutions are readily available. These can be convenient and often come with streak-free guarantees. The Art of the Clean: Step-by-Step Guide Prep the Area Before you start cleaning, prepare the area around the window by mastering the art of window cleaning techniques to avoid messy cleaning. Remove Obstacles: Move any blinds, curtains, or furniture away from the window to provide unobstructed access. Protect the Surroundings: Lay down newspapers or towels under the window to catch any drips or spills. Dust It Off Start by using a dry microfiber cloth to remove loose dust and cobwebs from the window frame and glass. This will prevent the dust from mixing with the cleaning solution and creating streaks. Apply Cleaning Solution Choose your preferred cleaning solution (homemade or store-bought) and apply it to the window. If using a spray bottle, apply the solution evenly to the glass. If using a damp cloth, apply the cleaning solution directly to the cloth. Scrub-a-Dub-Dub Gently scrub the entire window surface in a circular motion using your damp microfiber cloth. Pay special attention to areas with stubborn dirt, grime, or stains. Squeegee Away Starting at the top of the window, use your squeegee to remove excess cleaning solution. Work your way down the window, ensuring you overlap your strokes to prevent streaks. Wipe the squeegee blade with a dry microfiber cloth after each stroke to keep it clean. Maintain Pressure: Apply consistent pressure to the squeegee blade to ensure effective water removal. Overlap Strokes: Overlapping your squeegee strokes helps prevent streaks and ensures a smooth finish. Buff and Shine Once you’ve removed the excess cleaning solution with the squeegee, use a dry microfiber cloth to buff the window dry. This will remove any remaining streaks and restore the window’s shine. Pay Attention to Corners: Don’t forget to buff the edges and corners of the window to ensure a complete and even finish. Remember: Work in sections to prevent the cleaning solution from drying on the window, which can cause streaks. By following these steps and using the right window cleaning tools and equipment, you can achieve professional-looking results at home Beyond the Basics: Tackling Tough Window Cleaning Challenges Sometimes, windows throw curveballs. Here’s how to handle some common challenges: High Windows: For hard-to-reach windows, consider using an extension pole with a microfiber cleaning head or squeegee attachment. Window Screens: Window screens can accumulate dust and grime too. Remove them and wash them with soapy water or use a vacuum cleaner with a brush attachment. Stubborn Stains: For stubborn stains, like bird droppings or tree sap, try using a mixture of white vinegar and baking soda. Gently apply the mixture to the stain and let it sit for a few minutes before scrubbing with a soft-bristled brush. When DIY Just Won’t Cut It: Hiring a Professional Window Cleaning Service While DIY window cleaning can be a

How to Make Hot Tub Water Clear
Blog

How to Make Hot Tub Water Clear

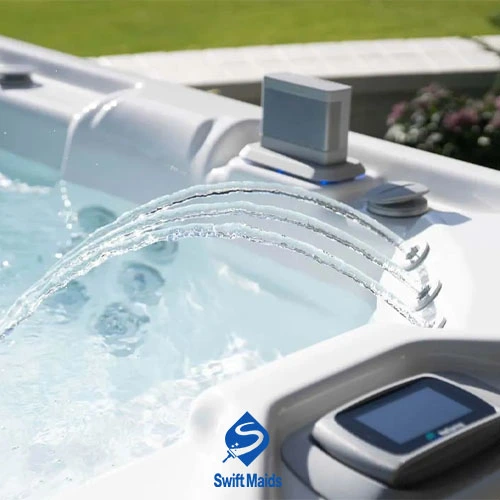
Ah, the hot tub. A haven of relaxation, a soothing escape after a long day. But what happens when that crystal-clear water you crave turns cloudy, murky, or worse? It can take the enjoyment right out of a luxurious soak. No need to panic though, we’ve got you, hot tub enthusiasts! This guide will equip you with the exact knowledge on how to make hot tub water clear so that you can reclaim your blissful bath. Why Does My Hot Tub Water Get Cloudy? Before we dive into solutions, let’s identify the culprits behind the cloudiness. There are several common reasons why your hot tub water might not be as clear as you’d like: Body Lotions and Oils: Those luxurious bath products you love leave behind a residue that can build up in your hot tub water, making it cloudy and greasy. Sunscreen: A day of basking in the sun often involves sunscreen. Unfortunately, sunscreen can also contribute to cloudy hot tub water. Improper Filtration: Your hot tub filter is the workhorse of the system, trapping debris and impurities. A clogged or dirty filter won’t function properly, leading to cloudy water. Imbalanced Water Chemistry: Maintaining the proper balance of chemicals in your hot tub water is crucial. If the pH or sanitizer levels are off, it can create an environment where algae and bacteria thrive, making your water cloudy and potentially unhealthy. Mineral Buildup: Hard water contains minerals that can build up over time, leaving a white film on your hot tub surfaces and contributing to cloudiness. Effective Strategies to Answer How to Make Hot Tub Water Clear Now that you know the enemy, let’s get down to business! Here are some effective strategies to help you achieve how to make hot tub water clear: Shock Treatment Regular shock treatments help kill bacteria and prevent algae growth, which can contribute to cloudiness. Follow the manufacturer’s instructions for dosage and frequency of shock treatments. Maintain Proper Filtration Clean your hot tub filter regularly, typically once a week. Rinse it thoroughly and replace it according to the manufacturer’s recommendations. A clean filter is key to maintaining clear water. Test and Balance Your Water Chemistry Invest in a good test kit and test your hot tub water regularly, ideally weekly. Adjust the pH level and sanitizer levels as needed to maintain the proper balance. Clear Out Debris Don’t forget to skim debris like leaves and bugs from the surface of your water regularly. This helps prevent the breakdown of organic matter, which can contribute to cloudiness. Deep Cleaning for a Sparkling Finish: For a truly deep clean and a dazzling soak, consider these additional steps: Drain and Refill While not always necessary, a complete drain and refill of your hot tub water can be a great way to remove accumulated minerals and debris. Follow the manufacturer’s instructions for draining and refilling your hot tub. Non-Chlorine Shock If you’re sensitive to chlorine, consider using a non-chlorine shock treatment to kill bacteria and clear up cloudy water. Cleaning the Shell Give your hot tub shell a good cleaning with a non-abrasive cleaner specifically designed for hot tubs. This will remove any grime or residue that might be contributing to cloudiness. Prevention is Key: Summer Cleaning Summer is prime time for hot tub fun, but it also means contending with increased body oils, sunscreen, and potential imbalances caused by higher temperatures. Here are some summer cleaning tips and preventive measures to keep your hot tub water crystal clear all summer long: Shower Before Soaking: Encourage everyone to take a quick rinse before entering the hot tub to remove any lotions, oils, or sunscreen. Limit Bathers: The more people using the hot tub, the more body products end up in the water. Limit the number of bathers at a time to help maintain water clarity. Cover When Not in Use: Keeping your hot tub covered when it’s not in use helps prevent debris, leaves, and insects from contaminating the water. Feeling Overwhelmed? Consider Professional Help Maintaining a hot tub can be a rewarding but time-consuming task. If you’re feeling overwhelmed with the constant cleaning and maintenance, consider enlisting the help of professional cleaning services like Swiftmaids (serving Calgary and surrounding areas). Our experienced cleaning technicians can take care of your hot tub cleaning needs, allowing you to focus on enjoying your relaxing soak. The Joy of a Sparkling Soak: It’s Worth the Effort Achieving crystal-clear hot tub water might seem like a daunting task, but with a little patience and the right steps, you can transform your cloudy water into a refreshing oasis. Remember, prevention is key, so regular maintenance and proper water care are essential for enjoying your hot tub to the fullest. So, grab your hot tub test kit, roll up your sleeves, and get ready to reclaim your relaxation haven! With a little effort, you’ll be back to soaking in bliss in no time. Final Word If maintaining your hot tub is becoming more of a chore than a relaxation activity, consider hiring a maid services in Calgary like Swiftmaids We know exactly how to make hot tub water clear. Our team of professional cleaners can handle all aspects of hot tub maintenance, from water care to deep cleaning. Let us take the hassle out of hot tub upkeep, so you can enjoy your oasis without the worry. Contact us today for a free quote!

Homemade Carpet Cleaning Solution
Blog

What is the Best Homemade Carpet Cleaning Solution?

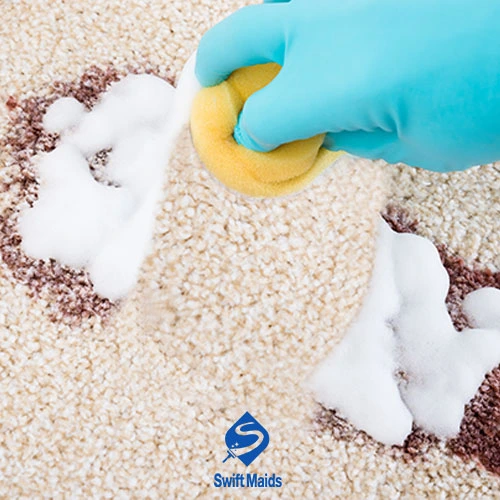
Let’s face it, carpets take a beating. They endure muddy paw prints and the occasional unfortunate spill. While professional carpet cleaning services from companies like Swiftmaids (shameless plug, but seriously, their technicians are magicians!) are a lifesaver for deep-down dirt and grime, there are times when a quick DIY solution is needed. This is where the magic of homemade carpet cleaning solutions comes in. These concoctions combined with everyday household ingredients, can be surprisingly effective at tackling everyday carpet problems. They are your carpet’s hero ready to remove stains and banish dirt. Why Consider a Homemade Carpet Cleaning Solution? There are a few reasons why a homemade carpet cleaning solution might be your best bet: Natural Power: Many DIY solutions use natural ingredients like vinegar and baking soda, which are gentler on carpets (and your nose!) than harsh chemical cleaners. Budget-Friendly: Let’s be honest, store-bought carpet cleaners can be expensive. DIY solutions leverage items you probably already have on hand, saving you a few bucks. Quick and Easy: No need for a special trip to the store! Whip up a homemade carpet cleaner in minutes with ingredients readily available in your pantry. Important Considerations Before You Dive In Here are a few things to keep in mind: Always Test First No matter how gentle you think a solution is, always test it on an inconspicuous area of your carpet first. This ensures it won’t cause discoloration or damage. Identify the Stain Knowing the culprit behind the stain (coffee? pet mess? mystery goo?) will help you choose the most effective cleaning solution. Vacuum First Before tackling any stain, give your carpet a good vacuuming. This removes loose dirt and debris, making the cleaning solution more effective. DIY Carpet Cleaner Solution Line-Up Now, if your preferences in Professional Carpet Cleaning Vs DIY contest is DYI, let’s get down to business! Here are a few tried-and-true homemade carpet cleaning solutions for most common carpet spots calamities: Vinegar For everyday cleaning and mild stains, a vinegar solution is a fantastic option. Mix equal parts white vinegar and water in a spray bottle. Lightly mist the affected area, blot with a clean, absorbent cloth, and watch the dirt disappear! Pro tip: Add a few drops of your favorite essential oil for a fresh scent. Baking Soda This wonder ingredient is a multi-tasking marvel. For clean carpet with baking soda stubborn stains or pet accidents, sprinkle baking soda on the affected area and let it sit for 30 minutes. The baking soda will absorb odors and loosen dirt. Then, vacuum it up and follow with a vinegar solution if needed. Club Soda For fresh spills (think juice or coffee), club soda can be a lifesaver. Blot up as much of the spill as possible with a clean cloth. Then, gently dab the area with club soda, working from the outside of the stain inwards to prevent spreading. Repeat until the stain is gone. Beyond the Basics These are just a few basic homemade carpet cleaning solutions. For tougher stains, you can get a little more creative: Greasy Grime For greasy spills, a paste of baking soda and dish soap can work wonders. Apply the paste to the stain, let it sit for a few hours, then scrub gently with a soft brush before vacuuming. Coffee Catastrophes For coffee stains, a mixture of equal parts white vinegar and water can be effective. However, if the stain is set, you might need a more robust solution – consider consulting a professional upholstery stain removal service like Swiftmaids.ca (another shameless plug, but we really are the best!). Remember: When in doubt, it’s always best to consult a professional. Professional carpet cleaners have the expertise and equipment to tackle even the most stubborn stains and deep-seated dirt. Homemade Solutions for Specific Carpet Types Choosing the best homemade carpet cleaner for your carpet type is vital to maintaining the appearance and durability of your carpet. While a homemade carpet cleaner can be highly effective, it is essential to customize your solution to meet the specific needs of your carpet material. Wool Carpets Wool is a natural fiber that requires gentle care. A mild vinegar solution works well for cleaning wool carpets. To prepare the solution, mix one part white vinegar with four parts water and apply sparingly to avoid over-saturation. This prevents shrinkage and keeps the wool soft and vibrant. Nylon Carpets Nylon is known for its durability, but it can still stain if not cleaned properly. A mixture of warm water, a teaspoon of dish soap, and a tablespoon of baking soda creates the best homemade carpet cleaner for nylon. Apply with a spray bottle and blot gently to remove stains. Polyester Carpets Polyester carpets are stain-resistant but can trap odors. For this type, sprinkle baking soda liberally on the carpet, let it sit for 30 minutes, and vacuum thoroughly. Follow up with a vinegar-water solution for a refreshed look and feel. Delicate or Antique Rugs For delicate or antique rugs, avoid harsh ingredients. Instead, use a solution of lukewarm water and mild dish soap. Test on an inconspicuous area first to ensure no discoloration. Keeping Your Carpets Looking Fresh Between Cleanings Here are some bonus tips to keep your carpets looking their best between cleanings: Pay extra attention to high-traffic areas like walkways and entrances. Regular vacuuming is key here. A good doormat is your first line of defense against dirt and debris. Encourage everyone to wipe their feet before entering! The quicker you address a spill, the easier the clean. So, act fast! The longer a spill sits, the harder it will be to remove. Blot up as much of the liquid as possible with a clean, absorbent cloth. Don’t rub, as this can spread the stain. For everyday odor control, sprinkle baking soda on your carpet and leave it for 15-20 minutes. Then, vacuum it up. The baking soda will absorb any lingering odors, leaving your carpets smelling fresh. For a truly deep clean, especially before a

Apartment Cleaning Move Out Checklist
Blog

Apartment Cleaning Move Out Checklist

Moving can be exciting! A fresh start, a new neighborhood (maybe even a new city!), a blank canvas to decorate…but before you get carried away by the thrill of packing boxes and picturing yourself in your new digs, there’s a not-so-exciting hurdle to jump: the dreaded apartment move out clean. Don’t worry though, this guide will provide you with a comprehensive apartment cleaning move out checklist. With this trusty list by your side, you’ll ensure you leave your old apartment sparkling clean and secure the return of that sweet security deposit. Why a Move-Out Checklist is Important Let’s face it, between the packing, the goodbyes, and the whirlwind of emotions that come with moving, it’s easy to forget things on your apartment cleaning move out checklist. A detailed move out cleaning checklist keeps you organized, ensures you don’t miss any crucial spots, and helps you avoid any last-minute cleaning scrambles. Read more: Residential Cleaning Calgary Essential Prep Preparation is key! Here are a few things to tackle before you grab your cleaning supplies: Review your lease agreement: Most lease agreements outline specific cleaning expectations for move-out. This is your cleaning bible, so take some time to read through it carefully. Schedule a cleaning day: Give yourself ample time to clean thoroughly. Ideally, aim for a full day, especially if your apartment is on the larger side. Gather your cleaning supplies: Stock up on all the essentials, like an all-purpose cleaner, disinfectant wipes, sponges, rags, a vacuum cleaner, and a mop. Your Apartment Cleaning Move Out Checklist Now, let’s get down to business! Here’s your comprehensive apartment cleaning move out checklist to conquer every corner: 1.   Kitchen Appliances: Clean inside and outside of your oven, stovetop, refrigerator (including defrosting it!), dishwasher, and microwave. Don’t forget to wipe down cupboard doors and handles. Sinks and countertops: Scrub away any grease, grime, and food residue. Floors: Sweep, mop, and remove any spills or splatters. Backsplash: Wipe down any greasy splatters on the backsplash. 2.   Bathroom Toilet: Give it a thorough scrub, don’t forget the base and behind the toilet. Shower/tub: Remove soap scum, mildew, and hard water stains. Pay attention to the showerhead, faucet, and tile grout. Sink and vanity: Clean the sink basin, faucets, and vanity surfaces. Empty and clean out drawers and cabinets. Mirrors: Wipe down mirrors to a streak-free shine. Floors: Scrub and mop the bathroom floor. 3.   Living Areas Walls: Wipe down walls for any dust or marks (be sure to check your lease agreement for any specific paint touch-up requirements). Light fixtures and ceiling fans: Remove dust and cobwebs from light fixtures and ceiling fans. Doors and windows: Clean window blinds, wash windows (inside and out if possible!), and wipe down doors and doorknobs. Floors: Vacuum carpets thoroughly, paying attention to corners and edges. Mop hard floors. You can use a professional team for carpet cleaning Calgary to take care of it. Closets and cabinets: Empty them out, wipe down shelves and surfaces, and remove any cobwebs. 4.   Extras! Garbage disposal: Run the garbage disposal with ice cubes and lemon wedges to freshen it up. Vents and air filters: Clean air vents and replace air filters if needed. Smoke detectors and carbon monoxide detectors: Smoke detectors and carbon monoxide detectors Wipe them down with a damp cloth (never use cleaning products). 5.   Finishing Touches Do a final walkthrough: Once you’ve cleaned everything, take a final walk-through of the apartment with a critical eye. Look for any missed spots and make sure everything is sparkling clean. Take pictures: Once the apartment is spotless, take pictures of each room as documentation of the cleaning condition. Considering Hiring Professional Help? Let’s be honest, moving is a LOT of work. Between the packing, the coordinating, and the goodbyes, the thought of tackling a deep apartment cleaning can feel overwhelming! That’s where SwiftMaids comes in! We understand the stress of moving, and we’re here to help you conquer your apartment move out clean in Calgary. Our professional cleaning team is experienced, efficient, and dedicated to leaving your old apartment sparkling clean so you can focus on the exciting parts of your move. Here’s what Swift Maids can offer you: Detailed cleaning: We’ll follow a comprehensive residential deep cleaning checklist to ensure every nook and cranny of your apartment is cleaned to the highest standards. Experienced cleaners: Our team is trained and experienced in all aspects of home cleaning, so you can rest assured the job will be done right. Eco-friendly cleaning products: We use safe and effective cleaning products that are gentle on the environment. Flexible scheduling: We can work around your busy moving schedule to find a convenient time to clean your apartment. Peace of mind: Knowing that your apartment is in the hands of professionals will give you one less thing to worry about during your move. SwiftMaids knows the ins and outs of your apartment move out cleaning list! Contact us today for a free quote and breathe easy knowing your apartment in Calgary will be spotless for the next tenant and your security deposit secure. Bonus: Deep Cleaning Hacks for Tough Spots Even with a great apartment cleaning move out checklist, certain areas might require some extra TLC. Here are some bonus tips for tackling tough spots in your apartment: Ovens with baked-on grease Make a paste of baking soda and water, apply it to the greasy areas, and let it sit for a few hours before scrubbing clean. Grimy stovetops A baking soda paste works wonders here too! For stubborn stains, try a commercial cooktop cleaner. Milky shower doors A vinegar and water solution is your best friend for removing hard water stains and soap scum from shower doors. Dusty blinds Instead of wiping them down one by one, use a pair of tongs to grab several slats at a time and swipe them with a damp cloth. Conclusion With this comprehensive apartment cleaning move out checklist, bonus cleaning hacks, and the option of professional help from SwiftMaids,

Cleaning Rugs With Pressure Washer
Blog

A Comprehensive Guide for Cleaning Rugs With Pressure Washer

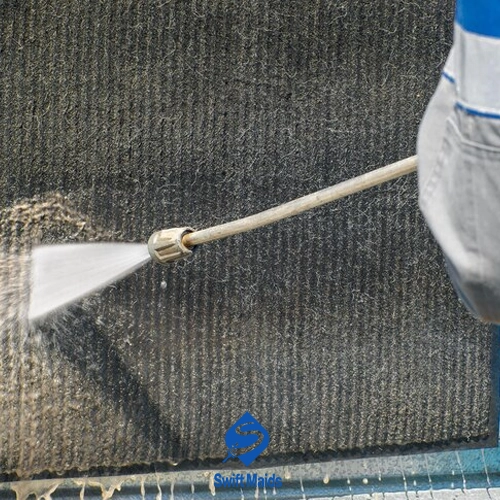
Ah, spring in Calgary! The snow melts, the days lengthen, and a fresh breeze blows through the city. It’s the perfect time to throw open the windows and give your home a good old-fashioned spring cleaning with a comprehensive home cleaning Calgary guide. But what about those once-vibrant rugs that have taken a beating from Calgary’s harsh winters? They might be begging for a deep clean. While you might be tempted to grab the pressure washer and blast away the grime, there might be a better solution. Pressure Washing: Powerful Tool, But Use With Caution Pressure washers are fantastic tools as outdoor cleaning tips for tackling tough jobs, from blasting grime off your driveway to reviving your dusty patio furniture. But should you be cleaning rugs with pressure washer? The answer is yes, but with a big ol’ BUT. Cleaning Rugs With Pressure Washer: Risky? While cleaning rugs with pressure washer can be tempting for those deep-seated stains, it’s important to remember that rugs are delicate compared to concrete driveways. The high-powered stream of water from a pressure washer can easily damage the fibers of your rug, causing them to fray, unravel, or even bleed colors. So, When IS Cleaning Rugs With Pressure Washer an Option? While it’s generally not recommended for delicate rugs or those made from natural fibers like wool or silk, pressure washing can be a viable option for certain types of rugs under the right circumstances. Here’s what to consider: Rug material Synthetic rugs, like those made from polyester or polypropylene, are generally more durable and can withstand the pressure of a washer better than natural fibers. Rug condition Heavily soiled outdoor rugs, like doormats or those used on patios, might be candidates for pressure washing if they’re extremely dirty and beyond traditional cleaning methods. Pressure washer settings Even for synthetic rugs, it’s crucial to use the lowest possible pressure setting on your washer. A gentle spray is all you need to loosen dirt and grime. Essential Tips for Pressure Washing Rugs If you’re still considering using a pressure washer on your rug, here are some essential safety tips to minimize the risk of damage for cleaning rugs with pressure washer: Before you clean area rug with a pressure washer, test the pressure washer on a small, hidden corner of the rug to see how the fibers react. Hold the pressure washer nozzle at least a foot away from the rug to avoid blasting holes or causing fraying. Start by spraying the back of the rug to loosen dirt before flipping it over and cleaning the front. After cleaning, rinse the rug thoroughly with clean water to remove any soap residue. Allow the rug to air dry completely in a shaded area out of direct sunlight. Don’t hang the rug or use a dryer, as this can damage the fibers. You can access to more rug dry cleaning for more information. The Safer Alternative: Professional Rug Cleaning For most rugs, especially those made from natural fibers or with sentimental value, professional rug cleaning Calgary is the safest and most effective option. Professional rug cleaners have the expertise and equipment to handle delicate materials and remove deep-seated dirt without damaging the fibers. Swift Maids Can Help! Here at SwiftMaids, we understand the importance of keeping your home clean and comfortable. That includes your rugs! We offer professional rug cleaning and even upholstery cleaning Calgary services etc. We employ techniques that are gentle yet effective, using eco-friendly cleaning solutions to remove dirt, stains, and allergens without harming the fibers. Our process is thorough and includes: Inspection: A trained technician will assess the type of rug, material, and the nature of the soiling. Pre-treatment: Any stains or heavily soiled areas will be pre-treated with specialized cleaning solutions. Deep cleaning: The rug will be gently deep cleaned using a safe and effective cleaning method. Rinsing and drying: The rug will be thoroughly rinsed and dried in a controlled environment. Final inspection: The rug will be inspected for any remaining dirt or stains before being returned to you. The Benefits of Professional Help By choosing professional service from SwiftMaids, you’ll enjoy several benefits: Safe and effective cleaning Our cleaning methods are gentle yet effective, ensuring your rugs are cleaned thoroughly without any risk of damage. Extended rug life Regular professional cleaning helps remove dirt and allergens that can shorten the lifespan of your rugs. Improved indoor air quality Professional cleaning removes dust mites and other allergens that can contribute to respiratory problems. Fresher, brighter rugs Professional cleaning will leave your rugs looking and feeling fresh and vibrant, revitalizing your living space. Final Word While cleaning rugs with pressure washer can be an option for very specific types of rugs under the right circumstances, it’s generally a risky proposition for delicate materials. For a safe and effective clean that will extend the life of your rugs, seeking professional help is the clear winner. So, the next time your rug is looking a little worse for wear, feel free to contact SwiftMaids  for a free quote on our services. We’ll take care of your rugs so you can enjoy their beauty and comfort for years to come!

Carpet wear with chemicals
Blog

Clean Carpet with Baking Soda

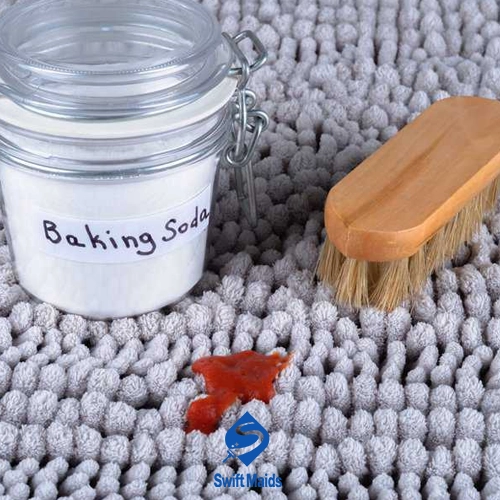
This guide from “Swift Maids” will introduce you to a powerful yet gentle weapon in your home cleaning arsenal: baking soda. That’s right, the same baking soda you use for fluffy pancakes can be a lifesaver when reviving your carpets. Regular vacuuming is a must for keeping your home clean, but sometimes carpets need a deeper clean to remove dirt, grime, and those stubborn smells that just seem to linger forever. So ditch the harsh chemicals and embrace the cleaning power of baking soda! Why should you Clean Carpet with Baking Soda Here’s why baking soda deserves a permanent spot on your cleaning shelf: Safe and gentle: Unlike some harsh cleaners, baking soda is safe for people (including kids and furry friends) when used properly. No more worrying about harmful fumes or irritated skin. baking soda for carpet odor: Baking soda gobbles up bad smells like a champ, leaving your carpets smelling fresh and clean. Say goodbye to that funky carpet odor! Cleans without hurting: Baking soda acts like a gentle scrubber, lifting dirt and grime from carpet fibers without damaging them. No more worries about wearing down your carpets with harsh chemicals. Budget-friendly and easy to find: It’s affordable and available at most grocery stores. Cleaning your carpets doesn’t have to break the bank! Read Also: Most Common Carpet Spots Baking Soda Carpet Cleaning Hacks Now that you know why baking soda is a superhero for carpets, let’s explore some easy ways to use it: Weekly Deodorizer Sprinkle: This is a quick and easy way to keep your carpets smelling fresh between cleanings. All you need is baking soda (and maybe a cheese grater, if you have a big area to cover). Here’s how: Sprinkle magic: Lightly dust baking soda over your entire carpet. If you have a lot of space to clean, using a cheese grater can help spread the baking soda evenly. Let it work its magic: Leave the baking soda on your carpet for at least 30 minutes, or even overnight for an extra deep clean. The longer it sits, the more odors it can absorb. Vacuum goodbye to dirt and smells: After waiting, thoroughly vacuum your carpet to remove the baking soda powder and any absorbed dirt and odors. Stain Stopper: Baking soda can also tackle unexpected spills and stains. Here’s what you’ll need: Baking soda White vinegar (optional) Spray bottle (optional) Soft-bristled brush (optional) Here’s how to fight a stain: Blot, don’t rub! The key to stain removal is to act fast. Grab a clean, absorbent cloth and blot up any excess liquid. Don’t rub, because that can spread the stain further. Baking soda powder: Sprinkle baking soda generously right on the stain. Vinegar boost (optional): For tougher stains, you can create a cleaning paste by mixing a little water with the baking soda. Or, you can mix equal parts white vinegar and water in a spray bottle and lightly mist the stain before applying the baking soda paste. Let it rest: Leave the baking soda (or baking soda paste) on the stain for at least 30 minutes, or longer for stubborn stains. Scrub and vacuum: If you use a baking soda paste, gently scrub the stain with a soft-bristled brush. Then, thoroughly vacuum the area to remove the baking soda powder. For greasy spills, like cooking oil, sprinkle baking soda on the stain before blotting up any excess liquid. The baking soda will help absorb the grease before it sets in. Deep Carpet Cleaning with Baking Soda: Want to give your carpets a more thorough clean? You can combine baking soda with your regular cleaning routine. Here’s what you’ll need: Baking soda Vacuum cleaner Your favorite carpet cleaning solution (check the carpet manufacturer’s instructions to make sure they work together) Here’s how to do it: Pre-vacuum: Thoroughly vacuum your carpet to remove any loose dirt and debris. Baking soda sprinkle: Generously sprinkle baking soda all over your carpet. Imagine you’re giving your carpet a light snow shower! Let it sit: Leave the baking soda on the carpet for at least 30 minutes, or longer for a deeper clean. The longer it sits, the more dirt and grime it can pull out of the carpet fibers. Cleaning solution time: Follow the instructions on your favorite carpet cleaning solution and apply it to your carpet according to the manufacturer’s recommendations. Scrub and vacuum (carefully!): We’ll get the specific instructions for this step from the cleaning solution bottle. Remember, the goal is to gently loosen the dirt and grime, so avoid over-wetting the carpet. Final vacuum: Once you’ve finished cleaning with your chosen solution, allow the carpet to air dry completely. This might take a few hours, so plan accordingly. Then, thoroughly vacuum your carpet to remove any leftover baking soda powder and cleaning residue. Additional Tips to Clean Carpet with Baking Soda Test before you tackle: Before going all out and sprinkling baking soda on your entire carpet, try it on a small, hidden area to make sure it doesn’t discolor the carpet. Better safe than sorry! Fresh is best: For the strongest cleaning power, use fresh baking soda. Old baking soda might not work as well, just like slightly stale pancakes wouldn’t be quite as delicious. Baking soda for furniture too!: While this article focuses on carpets, baking soda can also be used on furniture! Follow the same ideas as carpet cleaning, but be gentle when applying baking soda and avoid getting the fabric too wet. You don’t want to turn your favorite couch into a soaking wet mess! Read Also: Top 9 Benefits Of Carpet Cleaning Beyond Baking Soda: Keeping Your Carpets Clean While baking soda is a fantastic tool for carpet cleaning, there are other things you can do to keep your carpets looking great and needing deep cleaning less often: Regular vacuuming: Vacuum your carpets at least once a week, or more often in high-traffic areas like hallways and around the entrance. This removes dirt, dust, and allergens before they

Scroll to Top