Blog

Homemade Carpet Cleaning Solution
Blog

What is the Best Homemade Carpet Cleaning Solution?

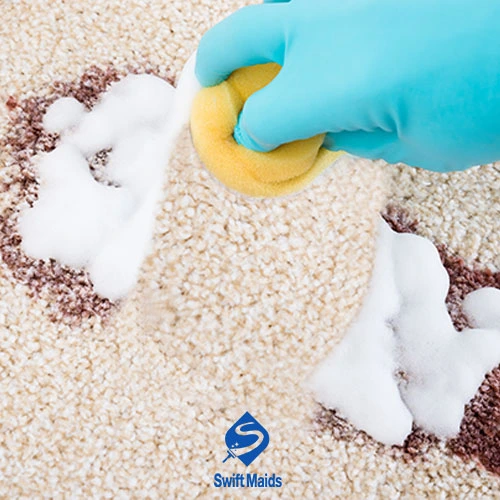
Let’s face it, carpets take a beating. They endure muddy paw prints and the occasional unfortunate spill. While professional carpet cleaning services from companies like Swiftmaids (shameless plug, but seriously, their technicians are magicians!) are a lifesaver for deep-down dirt and grime, there are times when a quick DIY solution is needed. This is where the magic of homemade carpet cleaning solutions comes in. These concoctions combined with everyday household ingredients, can be surprisingly effective at tackling everyday carpet problems. They are your carpet’s hero ready to remove stains and banish dirt. Why Consider a Homemade Carpet Cleaning Solution? There are a few reasons why a homemade carpet cleaning solution might be your best bet: Natural Power: Many DIY solutions use natural ingredients like vinegar and baking soda, which are gentler on carpets (and your nose!) than harsh chemical cleaners. Budget-Friendly: Let’s be honest, store-bought carpet cleaners can be expensive. DIY solutions leverage items you probably already have on hand, saving you a few bucks. Quick and Easy: No need for a special trip to the store! Whip up a homemade carpet cleaner in minutes with ingredients readily available in your pantry. Important Considerations Before You Dive In Here are a few things to keep in mind: Always Test First No matter how gentle you think a solution is, always test it on an inconspicuous area of your carpet first. This ensures it won’t cause discoloration or damage. Identify the Stain Knowing the culprit behind the stain (coffee? pet mess? mystery goo?) will help you choose the most effective cleaning solution. Vacuum First Before tackling any stain, give your carpet a good vacuuming. This removes loose dirt and debris, making the cleaning solution more effective. DIY Carpet Cleaner Solution Line-Up Now, if your preferences in Professional Carpet Cleaning Vs DIY contest is DYI, let’s get down to business! Here are a few tried-and-true homemade carpet cleaning solutions for most common carpet spots calamities: Vinegar For everyday cleaning and mild stains, a vinegar solution is a fantastic option. Mix equal parts white vinegar and water in a spray bottle. Lightly mist the affected area, blot with a clean, absorbent cloth, and watch the dirt disappear! Pro tip: Add a few drops of your favorite essential oil for a fresh scent. Baking Soda This wonder ingredient is a multi-tasking marvel. For clean carpet with baking soda stubborn stains or pet accidents, sprinkle baking soda on the affected area and let it sit for 30 minutes. The baking soda will absorb odors and loosen dirt. Then, vacuum it up and follow with a vinegar solution if needed. Club Soda For fresh spills (think juice or coffee), club soda can be a lifesaver. Blot up as much of the spill as possible with a clean cloth. Then, gently dab the area with club soda, working from the outside of the stain inwards to prevent spreading. Repeat until the stain is gone. Beyond the Basics These are just a few basic homemade carpet cleaning solutions. For tougher stains, you can get a little more creative: Greasy Grime For greasy spills, a paste of baking soda and dish soap can work wonders. Apply the paste to the stain, let it sit for a few hours, then scrub gently with a soft brush before vacuuming. Coffee Catastrophes For coffee stains, a mixture of equal parts white vinegar and water can be effective. However, if the stain is set, you might need a more robust solution – consider consulting a professional upholstery stain removal service like Swiftmaids.ca (another shameless plug, but we really are the best!). Remember: When in doubt, it’s always best to consult a professional. Professional carpet cleaners have the expertise and equipment to tackle even the most stubborn stains and deep-seated dirt. Homemade Solutions for Specific Carpet Types Choosing the best homemade carpet cleaner for your carpet type is vital to maintaining the appearance and durability of your carpet. While a homemade carpet cleaner can be highly effective, it is essential to customize your solution to meet the specific needs of your carpet material. Wool Carpets Wool is a natural fiber that requires gentle care. A mild vinegar solution works well for cleaning wool carpets. To prepare the solution, mix one part white vinegar with four parts water and apply sparingly to avoid over-saturation. This prevents shrinkage and keeps the wool soft and vibrant. Nylon Carpets Nylon is known for its durability, but it can still stain if not cleaned properly. A mixture of warm water, a teaspoon of dish soap, and a tablespoon of baking soda creates the best homemade carpet cleaner for nylon. Apply with a spray bottle and blot gently to remove stains. Polyester Carpets Polyester carpets are stain-resistant but can trap odors. For this type, sprinkle baking soda liberally on the carpet, let it sit for 30 minutes, and vacuum thoroughly. Follow up with a vinegar-water solution for a refreshed look and feel. Delicate or Antique Rugs For delicate or antique rugs, avoid harsh ingredients. Instead, use a solution of lukewarm water and mild dish soap. Test on an inconspicuous area first to ensure no discoloration. Keeping Your Carpets Looking Fresh Between Cleanings Here are some bonus tips to keep your carpets looking their best between cleanings: Pay extra attention to high-traffic areas like walkways and entrances. Regular vacuuming is key here. A good doormat is your first line of defense against dirt and debris. Encourage everyone to wipe their feet before entering! The quicker you address a spill, the easier the clean. So, act fast! The longer a spill sits, the harder it will be to remove. Blot up as much of the liquid as possible with a clean, absorbent cloth. Don’t rub, as this can spread the stain. For everyday odor control, sprinkle baking soda on your carpet and leave it for 15-20 minutes. Then, vacuum it up. The baking soda will absorb any lingering odors, leaving your carpets smelling fresh. For a truly deep clean, especially before a
How to Clean an Air Fryer
Blog

How to Clean an Air Fryer | A Step-by-Step Guide for a Fresh Start

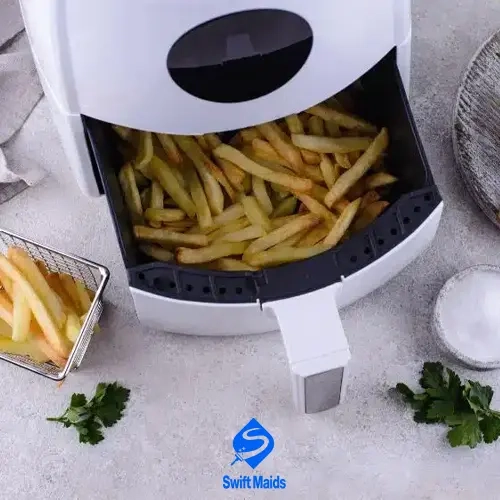
We all love our air fryers. This magical countertop machinery turns out crispy, delicious food with minimal oil. However, when you want to clean an air fryer, it can sometimes get relegated to the back burner (pun intended!). No need to worry though. This guide will be your companion to a fragrant and clean air fryer, ensuring those golden French fries and perfectly roasted veggies keep coming. Why Clean an Air Fryer Matters Think about it this way: would you keep using a pan encrusted with yesterday’s dinner? Probably not. The same goes for your air fryer. Food residue, crumbs, and grease can build up over time, affecting the taste of your food and potentially reducing the lifespan of your appliance. Regular cleaning of an air fryer keeps it functioning optimally and ensures your food tastes as good as it looks. with our following comprehensive guide its easy to clean air fryer from now on. The “I Forgot to Clean My Air Fryer” Confession We’ve all been there. Life gets busy, dinner gets hectic, and suddenly, a week (or two!) has passed since you last gave your air fryer some care. Don’t worry, you’re not alone! The good news is, even if your air fryer looks like it went a few rounds with a bag of popcorn kernels, it’s not too late to get it back in shape. This guide will cover both routine cleaning for everyday use and a deeper clean for those “oops-I-forgot” moments. The Essential Air Fryer Cleaning Checklist Here’s the nitty-gritty: a routine to keep your air fryer sparkling clean on a weekly basis. Post-Fry Wipe Down After each use, let the air fryer cool down completely. This is important to avoid burns and make cleaning easier. Once cool, grab a damp microfiber cloth and wipe down the interior, focusing on areas where splatters might have occurred. Clean the Basket Don’t forget the basket! This is where most of the food action happens, so it deserves some special attention. Remove the basket and wash it with warm, soapy water. If there are stubborn bits of food clinging on, use a soft sponge or brush to gently loosen them. Deep Dive with Dish Soap Feeling like your air fryer needs a more thorough clean? No problem! Fill a sink with warm, soapy water (dish soap comes in handy!). Submerge the basket and any detachable parts (like the crisper plate) and let them soak for 15-20 minutes. This will help loosen any baked-on grease or food residue. Cleaning Dishwasher Tips for Busy Calgary Cooks Living in Calgary, we all know the importance of efficiency, especially when it comes to household chores. Here’s a handy cleaning dishwasher tip: if your air fryer basket and accessories are dishwasher-safe (always check the manufacturer’s instructions!), feel free to toss them in the dishwasher for a deeper clean. Generally, the pan, basket, and frying insert are dishwasher-safe. Just remember to place them on the top rack for best results. Monthly Cleaning Mission: Deep Clean Dream Team Once a month, give your air fryer a deeper clean to remove any lingering grease or grime. Here’s how: The Vinegar Powerhouse For a natural cleaning solution, mix white vinegar with water in a spray bottle. This is a fantastic option for tackling light grime on the interior of your air fryer. Spray the solution on a microfiber cloth, not directly on the appliance, and wipe down the interior surfaces. Baking Soda Bonanza This wonder ingredient is another weapon in your cleaning an air fryer arsenal. If you have any stubborn grease stains, make a paste with baking soda and water. Apply the paste to the stain, let it sit for 15 minutes, then wipe it clean with a damp cloth. Don’t Forget the Exterior While we’re focusing on the inside, don’t neglect the outside of your air fryer! Wipe it down with a damp microfiber cloth to remove dust, fingerprints, and any splashes that might have occurred during your culinary adventures. Bonus Tip: For a truly sparkling clean, consider removing the heating element (if possible) and wiping it down with a damp cloth. Remember, always unplug your air fryer before attempting any cleaning involving the heating element. you can use self clean air fryer as well. Pro-Cleaning Hacks for a Sparkling Air Fryer Now that you’ve got the basics down, here are some pro tips to elevate your cleaning an air fryer game: The Foil Factor Here’s a secret weapon for minimizing cleanup: use aluminum foil! Lining the bottom of your air fryer basket with a sheet of foil can catch drips and splatters, making post-frying a breeze. Just be sure to poke a few holes in the foil to allow for proper air circulation. Remember to replace the foil after each use for optimal effectiveness. The Parchment Paper Playbook Parchment paper is another great way to minimize mess. Cut a piece of parchment paper to fit the size of your air fryer basket and use it for cooking delicate foods like fish or vegetables. This will prevent sticking and make cleaning a cinch. Keep in mind that parchment paper isn’t suitable for high-heat cooking, so check your recipe’s recommendations before using it. The Lemmony Freshness Want your air fryer to smell as good as it looks? After a deep clean, cut a lemon in half and place it (cut side down) on the bottom of the air fryer basket. Run the air fryer for 5-10 minutes on a low setting. The steam from the lemon will help neutralize any lingering odors and leave your air fryer smelling fresh and clean. Common Air Fryer Cleaning Conundrums Even the most seasoned air fryer warriors might encounter some cleaning challenges. Here’s how to tackle a couple of common issues: Burnt-On Food Nightmare Ugh, we’ve all been there. If you have stubborn burnt-on food clinging to your basket, don’t despair! Fill the basket with hot, soapy water and let it soak for 30-45 minutes. The hot water will help

Blog

The +5 Best Carpet Cleaning Calgary

Keeping your carpets clean goes beyond just aesthetics. It improves indoor air quality, reduces allergens, and extends the life of your carpets. But with so many carpet cleaning companies in Calgary, choosing the right one can be overwhelming. This article helps you navigate your options by listing some of the Best Carpet Cleaning Calgary services. We’ve considered factors like customer reviews, service offerings, and reputation to create this shortlist. How We Picked To compile this list, we considered the following criteria for best carpet cleaning Calgary: Customer Reviews: We looked at online reviews and ratings on platforms like Google and Houzz to gauge customer satisfaction. Services Offered: We considered the variety of cleaning services offered, including steam cleaning, dry cleaning, pet stain removal, and upholstery cleaning. Reputation: We factored in the company’s experience and overall reputation in the Calgary cleaning industry. 1.Dang Good Carpet and Furnace Cleaning Dang Good Carpet established in April 2016, offers professional steam cleaning to bring your carpets and furniture back to life. They combine affordable prices with superior cleaning, leaving you with fresh carpets and furniture at a great value. Check out their current deals before you book your next cleaning service! Services Carpet cleaning, upholstery cleaning Website AlbertaCarpetCleaningCalgary.ca Contact +1 825 305 5579 Our Rating 4.6 stars (based on a combination of factors including customer reviews and service offerings) Highlights Over 1500 reviews with a high score on Google. Top of three-best rated for Carpet Cleaning in Calgary and on Three-Best-Rated Airdrie too. Won the 2022 Calgary Top Choice Award for Carpet Cleaning. Won Platinum in CommunityVotes for Carpet Cleaning, Duct Cleaning and Window Cleaning. Best of award winners for the past few years on HomeStars and even won Best of the Best. Has a 99% score with a 10/10 average customer rating. 2. Alberta Carpet Cleaning Alberta Carpet Cleaning Calgary has served Southern Alberta since 1986. From small beginnings, they have grown to become one of the largest and most respected provider of award-winning professional carpet cleaning service to residential clients, new home builders, institutions, and commercial enterprises in Albarta. Services Carpet cleaning, upholstery cleaning Website AlbertaCarpetCleaningCalgary.ca Contact +1 825 305 5579 Our Rating 4.6 stars (based on a combination of factors including customer reviews and service offerings) Highlights Truck Mounted Thermorinse: Achieves deep cleaning with rapid drying times. Pre-Cleaning Treatment: Tough on dirt, yet gentle on carpet fabrics. Spot & Stain Attention: Comprehensive spot and stain treatment included at no additional cost. Fresh Water Rinse: Final rinse with clean water, ensuring no reused dirty water. Furniture Protection: Furniture placed on protective tabs to prevent carpet marks. Final Hand Grooming: Ensures your carpet looks fresh and beautiful every time. 3.Swift Maids Calgary Swift Maids, a locally owned and operated cleaning service company in Calgary, we take immense pride in our commitment to excellence and customer satisfaction. With a team of highly trained and experienced professionals, we offer a comprehensive range of cleaning solutions, including top-notch carpet cleaning services. At Swift Maids, as one the best carpet cleaning Calgary based on customers reviews, we understand that carpets are not only a significant investment but also a focal point of your living or working space. That’s why we employ the latest cleaning techniques and state-of-the-art equipment to ensure meticulous cleaning and long-lasting results. Our eco-friendly approach ensures that your carpets are not only refreshed but also treated with utmost care for the environment. What sets us apart is our dedication to convenience and flexibility. We strive to accommodate your schedule and provide personalized services tailored to your specific needs. Whether you require steam cleaning, stain removal, odor elimination, or carpet protection, our skilled technicians are equipped to handle it all with professionalism and attention to detail. Services Carpet cleaning, upholstery cleaning, rug cleaning, pet stain and odor removal, eco-friendly cleaning options etc. Website SwiftMaids.ca Contact +1 587 328 1819 Our Rating 5 stars (based on a combination of factors including customer reviews and service offerings. We prioritize exceptional customer service, meticulous cleaning, and eco-friendly solutions to ensure a healthy and fresh home environment for your family) Key Strengths of Our Carpet Cleaning Services: Locally owned and operated, ensuring a deep understanding of our community’s needs. Utilization of advanced cleaning techniques for superior results. Highly trained and experienced technicians with a commitment to excellence. State-of-the-art equipment for efficient and effective cleaning. Eco-friendly products and processes, prioritizing environmental sustainability. Flexible scheduling and personalized services to meet your unique requirements. Commitment to customer satisfaction through transparent communication and outstanding service. 4.Calgary Chem-Dry Calgary Chem-Dry is part of a group of companies and franchises that is a trusted brand in carpet cleaning. They boast an impressive track record, cleaning over 10,000 homes daily worldwide and exceeding 1 billion square feet of carpet annually. Chem-Dry uses a unique Hot Carbonating Extraction (HCE) process for a deeper and longer-lasting carpet cleaning combined with a green-certified solution that is all natural, and kid- and pet-friendly. Services Carpet cleaning, upholstery cleaning, tile and grout cleaning, pet odor removal Website Calgary.ChemDry.ca Contact +1 587 327 9660 Our Rating 4.5 stars (Customer reviews indicate high satisfaction with their fast drying, green-certified cleaning solutions.) Highlights Fast drying in 1-2 hours Green and safe for children and pets Professional, certified technicians Satisfaction guaranteed 31 years of local service Green and eco-friendly Removes 98% of allergens 5.Zerorez Founders Gaylord Karren and John Hopkins never intended to be in the carpet cleaning business, they were making a living as property managers in Texas. They managed over 3,000 apartment units, and their biggest frustration and largest expense was keeping the carpets clean for their residents. Zerorez company was able to clean the carpets well enough to avoid having to replace them Services Carpet cleaning, rug cleaning, upholstery cleaning, tile and grout cleaning Website ZerorezCalgary.ca Contact +1 866 835 1181 Our Rating 4.2 stars (Consider customer reviews when making your decision.) Highlights More Than 160,000+ 5-Star Reviews Professional, certified technicians Satisfaction guaranteed 31 years of local service Green and eco-friendly

Apartment Cleaning Move Out Checklist
Blog

Apartment Cleaning Move Out Checklist

Moving can be exciting! A fresh start, a new neighborhood (maybe even a new city!), a blank canvas to decorate…but before you get carried away by the thrill of packing boxes and picturing yourself in your new digs, there’s a not-so-exciting hurdle to jump: the dreaded apartment move out clean. Don’t worry though, this guide will provide you with a comprehensive apartment cleaning move out checklist. With this trusty list by your side, you’ll ensure you leave your old apartment sparkling clean and secure the return of that sweet security deposit. Why a Move-Out Checklist is Important Let’s face it, between the packing, the goodbyes, and the whirlwind of emotions that come with moving, it’s easy to forget things on your apartment cleaning move out checklist. A detailed move out cleaning checklist keeps you organized, ensures you don’t miss any crucial spots, and helps you avoid any last-minute cleaning scrambles. Read more: Residential Cleaning Calgary Essential Prep Preparation is key! Here are a few things to tackle before you grab your cleaning supplies: Review your lease agreement: Most lease agreements outline specific cleaning expectations for move-out. This is your cleaning bible, so take some time to read through it carefully. Schedule a cleaning day: Give yourself ample time to clean thoroughly. Ideally, aim for a full day, especially if your apartment is on the larger side. Gather your cleaning supplies: Stock up on all the essentials, like an all-purpose cleaner, disinfectant wipes, sponges, rags, a vacuum cleaner, and a mop. Your Apartment Cleaning Move Out Checklist Now, let’s get down to business! Here’s your comprehensive apartment cleaning move out checklist to conquer every corner: 1.   Kitchen Appliances: Clean inside and outside of your oven, stovetop, refrigerator (including defrosting it!), dishwasher, and microwave. Don’t forget to wipe down cupboard doors and handles. Sinks and countertops: Scrub away any grease, grime, and food residue. Floors: Sweep, mop, and remove any spills or splatters. Backsplash: Wipe down any greasy splatters on the backsplash. 2.   Bathroom Toilet: Give it a thorough scrub, don’t forget the base and behind the toilet. Shower/tub: Remove soap scum, mildew, and hard water stains. Pay attention to the showerhead, faucet, and tile grout. Sink and vanity: Clean the sink basin, faucets, and vanity surfaces. Empty and clean out drawers and cabinets. Mirrors: Wipe down mirrors to a streak-free shine. Floors: Scrub and mop the bathroom floor. 3.   Living Areas Walls: Wipe down walls for any dust or marks (be sure to check your lease agreement for any specific paint touch-up requirements). Light fixtures and ceiling fans: Remove dust and cobwebs from light fixtures and ceiling fans. Doors and windows: Clean window blinds, wash windows (inside and out if possible!), and wipe down doors and doorknobs. Floors: Vacuum carpets thoroughly, paying attention to corners and edges. Mop hard floors. You can use a professional team for carpet cleaning Calgary to take care of it. Closets and cabinets: Empty them out, wipe down shelves and surfaces, and remove any cobwebs. 4.   Extras! Garbage disposal: Run the garbage disposal with ice cubes and lemon wedges to freshen it up. Vents and air filters: Clean air vents and replace air filters if needed. Smoke detectors and carbon monoxide detectors: Smoke detectors and carbon monoxide detectors Wipe them down with a damp cloth (never use cleaning products). 5.   Finishing Touches Do a final walkthrough: Once you’ve cleaned everything, take a final walk-through of the apartment with a critical eye. Look for any missed spots and make sure everything is sparkling clean. Take pictures: Once the apartment is spotless, take pictures of each room as documentation of the cleaning condition. Considering Hiring Professional Help? Let’s be honest, moving is a LOT of work. Between the packing, the coordinating, and the goodbyes, the thought of tackling a deep apartment cleaning can feel overwhelming! That’s where SwiftMaids comes in! We understand the stress of moving, and we’re here to help you conquer your apartment move out clean in Calgary. Our professional cleaning team is experienced, efficient, and dedicated to leaving your old apartment sparkling clean so you can focus on the exciting parts of your move. Here’s what Swift Maids can offer you: Detailed cleaning: We’ll follow a comprehensive residential deep cleaning checklist to ensure every nook and cranny of your apartment is cleaned to the highest standards. Experienced cleaners: Our team is trained and experienced in all aspects of home cleaning, so you can rest assured the job will be done right. Eco-friendly cleaning products: We use safe and effective cleaning products that are gentle on the environment. Flexible scheduling: We can work around your busy moving schedule to find a convenient time to clean your apartment. Peace of mind: Knowing that your apartment is in the hands of professionals will give you one less thing to worry about during your move. SwiftMaids knows the ins and outs of your apartment move out cleaning list! Contact us today for a free quote and breathe easy knowing your apartment in Calgary will be spotless for the next tenant and your security deposit secure. Bonus: Deep Cleaning Hacks for Tough Spots Even with a great apartment cleaning move out checklist, certain areas might require some extra TLC. Here are some bonus tips for tackling tough spots in your apartment: Ovens with baked-on grease Make a paste of baking soda and water, apply it to the greasy areas, and let it sit for a few hours before scrubbing clean. Grimy stovetops A baking soda paste works wonders here too! For stubborn stains, try a commercial cooktop cleaner. Milky shower doors A vinegar and water solution is your best friend for removing hard water stains and soap scum from shower doors. Dusty blinds Instead of wiping them down one by one, use a pair of tongs to grab several slats at a time and swipe them with a damp cloth. Conclusion With this comprehensive apartment cleaning move out checklist, bonus cleaning hacks, and the option of professional help from SwiftMaids,

Dining Room Cleaning Checklist
Blog

A Comprehensive Dining Room Cleaning Checklist

We get it, life can get messy. Between work and errands, keeping your home sparkling clean can feel like a never ending struggle. Worry not, we got you because Today, we’re tackling a room that often gets the short end of the cleaning stick: the dining room. This guide will be your road to a shining dining room, complete with a dining room cleaning checklist to keep you organized. So, grab your cleaning supplies and get ready to say goodbye to those pesky crumbs and forgotten French fry wedged under the chair cushion (we’ve all been there!). Why is the Dining Room Cleaning Checklist Important? The dining room is more than just a place to chug down takeout after a long day. It’s a space for family dinners, game nights with friends, and maybe even the occasional fancy dinner party (wine spills anyone?). Keeping it clean creates a welcoming atmosphere that sets the stage for good times and happy memories. Think of it like this: would you rather gather around a table piled high with last week’s newspapers and forgotten crackers, or a clean, inviting space that sparks conversation and laughter? Yeah, we thought so. The Ultimate Dining Room Cleaning Checklist Now that we’re on the same page about the importance of a clean dining room, let’s delve into the nitty-gritty. Here’s your trusty checklist, broken down into daily, weekly, and monthly tasks, to keep your dining room in tip-top shape: Daily Dining Room Cleaning After every meal, give the table a quick wipe-down with a microfiber cloth. This will catch stray crumbs and prevent them from becoming a science experiment under the table. Don’t forget those chairs! Quickly wipe down the seats with a damp cloth to remove any food residue or sticky spills. Is your dining room table turning into a catch-all for mail, keys, and last night’s homework? Take five minutes each evening to put things back where they belong. Weekly Dining Room Cleaning Give your floors a good sweep or vacuuming to remove dust, crumbs, and any rogue Cheerios that might have escaped during breakfast. Dust those lovely chairs and tables! Use a microfiber cloth to gently remove dust and fingerprints. If your chairs have upholstered seats, vacuum them with the upholstery attachment to remove any embedded crumbs. Don’t let cobwebs become the chandelier’s tenants! Wipe down your light fixtures to remove dust and grime. Monthly Dining Room Cleaning Time for a deep clean! This is when you tackle the nooks and crannies that get neglected during your weekly cleaning routine. Yes, walls in the dining room can get splattered with rogue ketchup or the occasional pea. Use a damp cloth with a mild cleaning solution to wipe down the walls, focusing on areas prone to splashes and smudges. For deep furniture cleaning, polish your wooden furniture with a product specifically designed for wood. This will not only help remove dust and grime but also restore its shine. Those baseboards love to collect dust bunnies. Use a vacuum cleaner with a crevice attachment to suck up all the dust bunnies hiding in plain sight. Bonus Tip: While you’re at it, consider window cleaning Calgary! Sparkling windows will not only brighten up the room but also allow you to enjoy the view of that majestic (or perhaps mosquito-filled) Alberta landscape. Pro-Cleaning Hacks for a Sparkling Dining Room The Vinegar Powerhouse For a natural cleaning solution, mix white vinegar with water in a spray bottle. This is a fantastic option for cleaning windows, wiping down tables, and tackling light grime on furniture. The Magic of Microfiber Cloths Ditch the paper towels! Microfiber cloths are reusable, washable, and perfect for cleaning most surfaces in your dining room. They’re gentle enough not to scratch furniture and effective at trapping dust and grime. Never Underestimate Baking Soda This wonder ingredient can be your secret weapon for tackling tough stains. For example, if you have a stubborn coffee stain on the table, make a paste with baking soda and water. Apply it to the stain, let it sit for a few minutes, then wipe it clean. Dining Room Flooring Maintenance Checklist Maintaining dining room flooring is essential for any thorough dining room cleaning checklist. With spills, crumbs, and regular foot traffic, a little care goes a long way to keep the floor looking pristine and durable. Follow these tips as part of your dining room cleaning checklist to ensure a spotless and lasting dining room floor: Daily Sweeping: Dust and crumbs accumulate quickly, so sweep or use a soft broom daily to keep your floor free of dirt and prevent scratches. This quick daily habit helps maintain a clean, scratch-free surface for longer. Weekly Mopping: Depending on your flooring type, a weekly mop with a mild floor cleaner can remove deeper grime. This step ensures that any stubborn dirt buildup from the week is cleared, leaving your floors looking polished. Immediate Spill Cleanup: One of the best ways to avoid stains and damage is to address spills as soon as they happen. Including immediate spill cleanup in your dining room cleaning checklist is essential to prevent deep stains that may require professional cleaning. Monthly Floor Protection: Use furniture pads under chairs and tables to prevent scratches, especially on wood floors. This precaution will protect against dents and dings, helping to maintain the quality of your flooring. Maintaining a Clean Dining Room: It’s All About Consistency Let’s be honest, a weekly dining room cleaning routine might seem daunting at first. But here’s the secret: consistency is key! By incorporating these tasks into your regular cleaning routine, you’ll prevent dust and grime from building up, making cleaning sessions a breeze. Think of it like this: ten minutes of cleaning every week is much easier than spending a whole afternoon scrubbing away at a neglected dining room. Plus, a clean dining room is a joy to come home to, and it will surely impress your guests (or at least prevent them from judging your

smart cleaning technologies
Blog

Smart Cleaning Technologies | The role of technology in cleaning

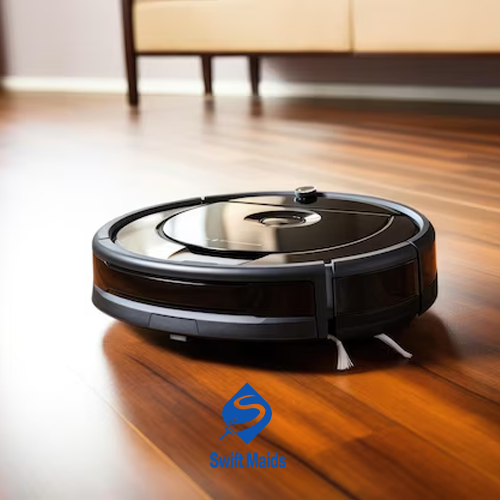
In an age that faces many technological advances, our homes are surrounded by many innovations that have taken over our lives. It is a concept that merges technology and housework and changes the way we keep our homes clean and organized. In this blog, we are at Swift Maids going to explore the world of smart cleaning technologies and tell you how they work and the benefits and challenges of smart cleaning. Read Also: Professional Home Cleaning Calgary What is Smart Cleaning? Smart cleaning refers to the integration of technology and automation into traditional cleaning routines to make them more efficient, convenient, and effective. This includes the use of various smart devices and gadgets that use connectivity, sensors, and artificial intelligence to perform cleaning tasks independently or with human intervention. How do smart cleaning technologies Work? Smart cleaning technology helps us in different ways in life and makes the cleaning process easier for us. In this section, we will express some examples of the methods that smart cleaning uses: Robotic vacuum cleaners: Robotic vacuum cleaners are the pioneers of artificial intelligence cleaning. These devices are equipped with advanced sensors and algorithms that guide your home avoid existing obstacles and vacuum all the surfaces of the house. These devices can be programmed to operate on a schedule or controlled remotely via smartphone apps. Smart Mops: These devices use a precise jet spray of vibrating cleaning pads to deal with dirt on the floor. These devices can recognize the type of surface they are cleaning and adjust their cleaning method based on that surface. Connected Appliances: Most modern appliances such as washing machines and dishwashers can now be controlled remotely through smartphone apps. You can start or schedule cleaning cycles from anywhere and make household chores easier. AI-Powered Cleaners: Some of these devices use artificial intelligence to learn and adapt to your cleaning preferences. They can optimize cleaning paths, adjust suction power, and even suggest cleaning programs based on your family’s needs. The Benefits of Smart Cleaning In addition to making the cleaning process much more efficient and easier, smart cleaning also brings other benefits to us, that’s why we intend to introduce you to other benefits of smart cleaning in this section of the blog post: Saving time One of the most important benefits of smart cleaning is saving time. You can also gain valuable time for other activities or relaxation with stand-alone devices that perform routine cleaning tasks. Improved cleaning performance These cleaning devices usually have advanced cleaning technologies, including high-performance filters, powerful suction, and precise cleaning patterns. This feature leads to the creation of cleaner and healthier living spaces. Energy efficiency Most cleaning devices are designed to be energy efficient and reduce the environmental impact in addition to reducing the electricity bill. Convenience The convenience of control and monitoring for cleaning tasks is possible through your smartphone. Whether at work or on vacation, you can easily manage your cleaning devices. Challenges in implementing smart cleaning technologies With the implementation of new technologies, there will be changes and along with the changes, there will be challenges. There is certainly normal resistance to all changes. These resistances can be in the form of questions like is this what we need? Does technology solve our problem? Will it be more efficient? If this method is implemented, how much will the capital return be? All of these are valid concerns and should be addressed by decision-makers and those directly responsible for implementing the technologies. The Future of Smart Cleaning Technologies Integration with smart homes: Along with the evolution of the smart home concept, smart cleaning devices are becoming more integrated into our daily lives. They will communicate with other smart devices including thermostats and security systems to improve overall home management. Advanced AI Capabilities: Expect AI cleaning devices to get smarter over time, and they’ll get better at recognizing different surfaces, understanding your preferences, and adapting to changing conditions. Sustainability features: The future devices will likely have biodegradable cleaning materials and promote sustainable cleaning practices, in line with the growing demand for environmentally friendly technologies. Final Words Smart cleaning is more than a trend. Smart cleaning is a revolutionary way to maintain a clean and healthy home in the age of technology. Also, integrating smart cleaning into your home is more than just making life easier. This will help you live a better and more sustainable lifestyle. Most of the smart cleaning devices are designed with efficient features in energy consumption, which, in addition to reducing your home’s environmental impact, will reduce the cost of your electricity bill. By harnessing the power of technology, you can enjoy the benefits of time savings, improved cleaning performance, energy efficiency, and unmatched convenience. As cleaning AI continues to evolve and integrate with the broader ecosystem in smart homes, the possibilities for cleaner, more efficient, and sustainable homes will become. Awareness of these innovations and simplifying your daily routine aligns with the global pressure of environmentally conscious living and makes your home cleaner and more ecologically responsible. We can expect even greater advancements such as eco-friendly cleaning solutions and improved AI capabilities that optimize the use of resources while ensuring your living space is pristine. Embrace the future of cleaning with smart cleaning and let technology take care of the chores with smart cleaning solutions.

Cleaning Rugs With Pressure Washer
Blog

A Comprehensive Guide for Cleaning Rugs With Pressure Washer

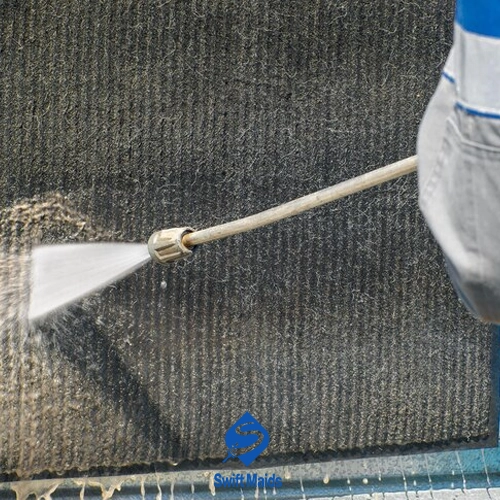
Ah, spring in Calgary! The snow melts, the days lengthen, and a fresh breeze blows through the city. It’s the perfect time to throw open the windows and give your home a good old-fashioned spring cleaning with a comprehensive home cleaning Calgary guide. But what about those once-vibrant rugs that have taken a beating from Calgary’s harsh winters? They might be begging for a deep clean. While you might be tempted to grab the pressure washer and blast away the grime, there might be a better solution. Pressure Washing: Powerful Tool, But Use With Caution Pressure washers are fantastic tools as outdoor cleaning tips for tackling tough jobs, from blasting grime off your driveway to reviving your dusty patio furniture. But should you be cleaning rugs with pressure washer? The answer is yes, but with a big ol’ BUT. Cleaning Rugs With Pressure Washer: Risky? While cleaning rugs with pressure washer can be tempting for those deep-seated stains, it’s important to remember that rugs are delicate compared to concrete driveways. The high-powered stream of water from a pressure washer can easily damage the fibers of your rug, causing them to fray, unravel, or even bleed colors. So, When IS Cleaning Rugs With Pressure Washer an Option? While it’s generally not recommended for delicate rugs or those made from natural fibers like wool or silk, pressure washing can be a viable option for certain types of rugs under the right circumstances. Here’s what to consider: Rug material Synthetic rugs, like those made from polyester or polypropylene, are generally more durable and can withstand the pressure of a washer better than natural fibers. Rug condition Heavily soiled outdoor rugs, like doormats or those used on patios, might be candidates for pressure washing if they’re extremely dirty and beyond traditional cleaning methods. Pressure washer settings Even for synthetic rugs, it’s crucial to use the lowest possible pressure setting on your washer. A gentle spray is all you need to loosen dirt and grime. Essential Tips for Pressure Washing Rugs If you’re still considering using a pressure washer on your rug, here are some essential safety tips to minimize the risk of damage for cleaning rugs with pressure washer: Before you clean area rug with a pressure washer, test the pressure washer on a small, hidden corner of the rug to see how the fibers react. Hold the pressure washer nozzle at least a foot away from the rug to avoid blasting holes or causing fraying. Start by spraying the back of the rug to loosen dirt before flipping it over and cleaning the front. After cleaning, rinse the rug thoroughly with clean water to remove any soap residue. Allow the rug to air dry completely in a shaded area out of direct sunlight. Don’t hang the rug or use a dryer, as this can damage the fibers. You can access to more rug dry cleaning for more information. The Safer Alternative: Professional Rug Cleaning For most rugs, especially those made from natural fibers or with sentimental value, professional rug cleaning Calgary is the safest and most effective option. Professional rug cleaners have the expertise and equipment to handle delicate materials and remove deep-seated dirt without damaging the fibers. Swift Maids Can Help! Here at SwiftMaids, we understand the importance of keeping your home clean and comfortable. That includes your rugs! We offer professional rug cleaning and even upholstery cleaning Calgary services etc. We employ techniques that are gentle yet effective, using eco-friendly cleaning solutions to remove dirt, stains, and allergens without harming the fibers. Our process is thorough and includes: Inspection: A trained technician will assess the type of rug, material, and the nature of the soiling. Pre-treatment: Any stains or heavily soiled areas will be pre-treated with specialized cleaning solutions. Deep cleaning: The rug will be gently deep cleaned using a safe and effective cleaning method. Rinsing and drying: The rug will be thoroughly rinsed and dried in a controlled environment. Final inspection: The rug will be inspected for any remaining dirt or stains before being returned to you. The Benefits of Professional Help By choosing professional service from SwiftMaids, you’ll enjoy several benefits: Safe and effective cleaning Our cleaning methods are gentle yet effective, ensuring your rugs are cleaned thoroughly without any risk of damage. Extended rug life Regular professional cleaning helps remove dirt and allergens that can shorten the lifespan of your rugs. Improved indoor air quality Professional cleaning removes dust mites and other allergens that can contribute to respiratory problems. Fresher, brighter rugs Professional cleaning will leave your rugs looking and feeling fresh and vibrant, revitalizing your living space. Final Word While cleaning rugs with pressure washer can be an option for very specific types of rugs under the right circumstances, it’s generally a risky proposition for delicate materials. For a safe and effective clean that will extend the life of your rugs, seeking professional help is the clear winner. So, the next time your rug is looking a little worse for wear, feel free to contact SwiftMaids  for a free quote on our services. We’ll take care of your rugs so you can enjoy their beauty and comfort for years to come!

How to Clean a Furnace
Blog

A Guide to How to Clean a Furnace

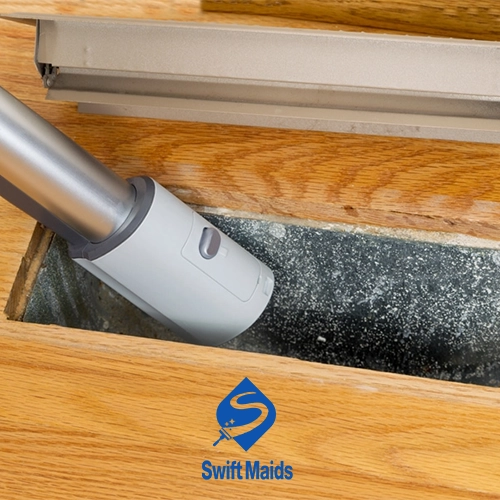
A furnace that’s not working properly can make your home uncomfortable during the winter. Even the best furnaces can lose their efficiency over time if they’re not cleaned regularly. Dust, debris, and airborne contaminants can build up in the furnace and make it work harder while providing less heat. Along with replacing air filters regularly, an annual furnace cleaning helps remove built-up gunk and ensure optimal operation. With a few simple maintenance steps, homeowners can safely clean key furnace components and avoid expensive HVAC cleaning bills. This blog post will show you how to clean a furnace and recommend techniques for accessing and cleaning the interior blower, burners, flame sensor, and air filter. While professional deep cleaning Clagry is still ideal now and then, keeping up with these tasks allows homeowners to clear away dust and debris that hamper proper furnace function. Safety Tips for How to Clean a Furnace Before you start cleaning any furnace or HVAC system, it’s important to take the right safety precautions. Turn Off the Electrical Power to the Unit The power must be turned off at the breaker before opening or accessing the furnace. Lock-out and tag-out procedures must be followed to prevent accidental starting. In addition, please ensure that the gas valves are also shut off when cleaning the burners. Let System Cool If the furnace has been in use, please allow sufficient time for all components and metal surfaces to cool fully before handling to prevent burns. Use Protective Gear When cleaning the furnace interior, it’s a good idea to wear gloves, long sleeves, closed-toe shoes, and safety goggles. You might also want to wear a particle mask to avoid inhaling loose debris particles. Maintain Adequate Ventilation When using compressed air or cleaning solutions, make sure to open windows and doors to ensure proper airflow and prevent fumes or chemicals from building up. Have an Extinguisher on Hand It’s probably not necessary, but it’s a good idea to keep a fire extinguisher handy just in case some debris catches fire while you’re cleaning. Taking it slow is the best way to keep homeowners and their heating equipment safe during furnace maintenance. It’s important to remember that you should never bypass safety or attempt to access internal components with the power still live. Steps for Cleaning the Furnace Blower One of the most important things to know about how to clean a furnace is that you need to take care of the blower motor fan. This fan is what circulates the heated air into the ductwork. When the power’s off, just follow these steps: Accessing the Blower Cabinet The blower compartment is usually located near the bottom or side of the furnace. You can usually get to the blower compartment by removing a small panel or panels that are secured with screws. Check the manual for your specific unit’s layout. Using a Vacuum Once you’re inside, use a vacuum hose with a narrow crevice attachment to gently remove any dust, lint, or debris that might be built up in the blower cabinet and intake vents. Just a heads-up: avoid scratching the blower. Wiping the Blades Use either isopropyl alcohol on a cloth or a mild soap and water solution to gently wipe each fan blade clean. Spin the blades manually to expose all sides for cleaning. Clearing Ductwork Use a vacuum and pipe cleaners to clear out any debris that might be blocking the intake or output ducts connected to the blower unit. Another thing you can try is compressed air to dislodge deposits. Replacing Covers Once cleaning is complete, replace any panels or vents removed to access the blower compartment. Restore power once reassembled. Cleaning Burners for Optimal Combustion Failure to clean furnace burners routinely can lead to decreased efficiency and heat output as debris collects. Here are tips for safely cleaning burners: Brushing Loose Particles Away Use a soft brush attachment on a vacuum to gently remove any surface dust or dirt buildup on the burners. Avoid bending or damaging thin burner components. Releasing and Removing Burners Detach any gas or fuel lines leading into the burners, making note of proper reconnection. Remove any securing screws before pulling burners out for access. Scrubbing With Wire Brush or Emery Cloth Gently wipe each burner clean using a wire brush, emery cloth, or sandpaper to remove stubborn deposits or corrosion. Avoid applying too much pressure. Rinsing and Drying Fully If needed, rinse burners with clean water then be sure components are completely dry before reinstalling to prevent issues with ignition or rusting. Reattaching Burners Carefully reconnect any gas lines or fasteners as directed in unit manuals once the clean burners are fully dry. Confirm fittings are snug. Proper burner maintenance helps ensure efficient, complete fuel combustion and maximum heat production. Keeping the Flame Sensor Clean The flame sensor is a thin rod within the burner assembly which ensures the presence of a flame for safety before gas continues flowing. As it becomes coated in grime, the flame sensor can malfunction. Cleaning it prevents shutdowns. Locating the Thin Sensor Rod The flame sensor is positioned within the burner unit. Consult manuals to identify the specific location in your furnace make and model. Gently Removing Debris Use a soft cloth, cotton swab, or pipe cleaner moistened with water or rubbing alcohol to gently wipe debris off the sensor rod. Take great care not to bend the components. Confirming Connections Ensure any wiring or connections to the flame sensor rod are still properly attached and tightened after cleaning the contacts. With the critical flame sensor restored to clean working order, the furnace can continue providing consistent comfortable heat all season long. Replacing Air Filters Frequently Another tip for how to clean a furnace is replacing air filters. Air filters stop dust and allergens from clogging furnace machinery but get dirty themselves in the process. Replacing filters prevents these accumulations from cycling back into living spaces. Accessing the Filter You’ll usually find the panel covers for

Carpet wear with chemicals
Blog

Clean Carpet with Baking Soda

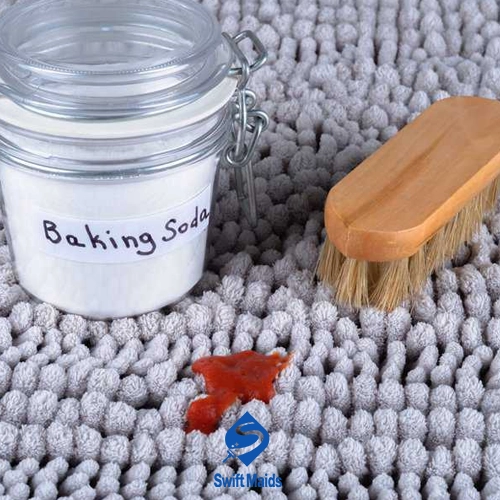
This guide from “Swift Maids” will introduce you to a powerful yet gentle weapon in your home cleaning arsenal: baking soda. That’s right, the same baking soda you use for fluffy pancakes can be a lifesaver when reviving your carpets. Regular vacuuming is a must for keeping your home clean, but sometimes carpets need a deeper clean to remove dirt, grime, and those stubborn smells that just seem to linger forever. So ditch the harsh chemicals and embrace the cleaning power of baking soda! Why should you Clean Carpet with Baking Soda Here’s why baking soda deserves a permanent spot on your cleaning shelf: Safe and gentle: Unlike some harsh cleaners, baking soda is safe for people (including kids and furry friends) when used properly. No more worrying about harmful fumes or irritated skin. baking soda for carpet odor: Baking soda gobbles up bad smells like a champ, leaving your carpets smelling fresh and clean. Say goodbye to that funky carpet odor! Cleans without hurting: Baking soda acts like a gentle scrubber, lifting dirt and grime from carpet fibers without damaging them. No more worries about wearing down your carpets with harsh chemicals. Budget-friendly and easy to find: It’s affordable and available at most grocery stores. Cleaning your carpets doesn’t have to break the bank! Read Also: Most Common Carpet Spots Baking Soda Carpet Cleaning Hacks Now that you know why baking soda is a superhero for carpets, let’s explore some easy ways to use it: Weekly Deodorizer Sprinkle: This is a quick and easy way to keep your carpets smelling fresh between cleanings. All you need is baking soda (and maybe a cheese grater, if you have a big area to cover). Here’s how: Sprinkle magic: Lightly dust baking soda over your entire carpet. If you have a lot of space to clean, using a cheese grater can help spread the baking soda evenly. Let it work its magic: Leave the baking soda on your carpet for at least 30 minutes, or even overnight for an extra deep clean. The longer it sits, the more odors it can absorb. Vacuum goodbye to dirt and smells: After waiting, thoroughly vacuum your carpet to remove the baking soda powder and any absorbed dirt and odors. Stain Stopper: Baking soda can also tackle unexpected spills and stains. Here’s what you’ll need: Baking soda White vinegar (optional) Spray bottle (optional) Soft-bristled brush (optional) Here’s how to fight a stain: Blot, don’t rub! The key to stain removal is to act fast. Grab a clean, absorbent cloth and blot up any excess liquid. Don’t rub, because that can spread the stain further. Baking soda powder: Sprinkle baking soda generously right on the stain. Vinegar boost (optional): For tougher stains, you can create a cleaning paste by mixing a little water with the baking soda. Or, you can mix equal parts white vinegar and water in a spray bottle and lightly mist the stain before applying the baking soda paste. Let it rest: Leave the baking soda (or baking soda paste) on the stain for at least 30 minutes, or longer for stubborn stains. Scrub and vacuum: If you use a baking soda paste, gently scrub the stain with a soft-bristled brush. Then, thoroughly vacuum the area to remove the baking soda powder. For greasy spills, like cooking oil, sprinkle baking soda on the stain before blotting up any excess liquid. The baking soda will help absorb the grease before it sets in. Deep Carpet Cleaning with Baking Soda: Want to give your carpets a more thorough clean? You can combine baking soda with your regular cleaning routine. Here’s what you’ll need: Baking soda Vacuum cleaner Your favorite carpet cleaning solution (check the carpet manufacturer’s instructions to make sure they work together) Here’s how to do it: Pre-vacuum: Thoroughly vacuum your carpet to remove any loose dirt and debris. Baking soda sprinkle: Generously sprinkle baking soda all over your carpet. Imagine you’re giving your carpet a light snow shower! Let it sit: Leave the baking soda on the carpet for at least 30 minutes, or longer for a deeper clean. The longer it sits, the more dirt and grime it can pull out of the carpet fibers. Cleaning solution time: Follow the instructions on your favorite carpet cleaning solution and apply it to your carpet according to the manufacturer’s recommendations. Scrub and vacuum (carefully!): We’ll get the specific instructions for this step from the cleaning solution bottle. Remember, the goal is to gently loosen the dirt and grime, so avoid over-wetting the carpet. Final vacuum: Once you’ve finished cleaning with your chosen solution, allow the carpet to air dry completely. This might take a few hours, so plan accordingly. Then, thoroughly vacuum your carpet to remove any leftover baking soda powder and cleaning residue. Additional Tips to Clean Carpet with Baking Soda Test before you tackle: Before going all out and sprinkling baking soda on your entire carpet, try it on a small, hidden area to make sure it doesn’t discolor the carpet. Better safe than sorry! Fresh is best: For the strongest cleaning power, use fresh baking soda. Old baking soda might not work as well, just like slightly stale pancakes wouldn’t be quite as delicious. Baking soda for furniture too!: While this article focuses on carpets, baking soda can also be used on furniture! Follow the same ideas as carpet cleaning, but be gentle when applying baking soda and avoid getting the fabric too wet. You don’t want to turn your favorite couch into a soaking wet mess! Read Also: Top 9 Benefits Of Carpet Cleaning Beyond Baking Soda: Keeping Your Carpets Clean While baking soda is a fantastic tool for carpet cleaning, there are other things you can do to keep your carpets looking great and needing deep cleaning less often: Regular vacuuming: Vacuum your carpets at least once a week, or more often in high-traffic areas like hallways and around the entrance. This removes dirt, dust, and allergens before they

medical office cleaning checklist
Blog

Maintaining health with the Medical office cleaning checklist

When you enter the office as a patient or healthcare professional, you expect the space to be organized and safe in addition to being specialized in treatment. Cleaning these spaces is something that should be given a lot of attention. It is a critical aspect of patient care and the overall patient experience. To maintain high standards of cleanliness and hygiene, medical offices rely on a structured Medical office cleaning checklist. In this comprehensive guide of Swift Maids, we examine the key and important components of the Medical office cleaning checklist, along with the reasons why this work is necessary and the solutions to ensure that your medical center remains a safe and hygienic place. The importance of the Medical office cleaning checklist First of all, let’s look at the reasons for using a Medical office cleaning checklist and why it is so important: Infection control One of the most important concerns in any healthcare facility is infection control. Patients who have a weak immune system are usually more susceptible to infection than others. A well-structured cleaning checklist helps reduce the transmission of various diseases and infections among patients, visitors, and staff, thus increasing patient safety. Patient safety Patients usually go to medical offices for the treatment of various diseases. A thorough cleaning checklist helps reduce the risk of healthcare-related accidents, injuries, and infections and ensures patient well-being. Professional Image The cleanliness of the medical office shows its professionalism and competence. Patients are more likely to trust a healthcare facility that looks clean, organized, and hygienic. A clean environment can contribute to a positive patient experience and build trust with your customers. Compliance with regulations Medical offices must be subject to strict regulations and standards set by health authorities. The cleaning checklist ensures compliance with these regulations and rules, which are critical to avoiding penalties and legal issues. Read Also: Commercial Cleaning Calgary Key components of a Medical office cleaning checklist Let’s examine what components a medical office cleaning checklist contains and how each of these components should be cleaned: Reception and waiting areas Clean and disinfect reception counters, computers and keyboards because patients and staff usually touch them. Clean and then disinfect all surfaces that are frequently touched by people, including door handles, light switches, and seats. Vacuum and clean the floor of the waiting area to remove dirt and allergens. Empty the trash cans and change their plastic regularly to prevent the spread of germs. Examination and treatment rooms Clean and then disinfect the parts that are related to examining patients, including changing disposable paper covers after each patient. Disinfect medical equipment, including blood pressure devices, medical phones, and other items to prevent cross-contamination. Clean all surfaces, including sinks, cabinets, and all areas that patients come in contact with. Make sure hazardous waste containers are properly sealed and labeled for safety. Replace the necessary equipment, including examination gloves, gowns and face masks to ensure a sterile environment. Toilets Clean and disinfect all bathroom equipment including sink, toilet and mirror. To encourage hand hygiene, prepare special hand sanitizers and regularly refill the paper towel dispenser. Empty and disinfect trash cans as they can harbor germs and odors. Ensure proper ventilation to prevent moisture build-up and mold growth, and use air fresheners if needed. Staff areas Clean and then disinfect areas that are shared, including break rooms and offices, to reduce the risk of cross-contamination. Disinfect appliances such as refrigerators, stoves, microwaves, coffee makers, and shared workstations. Empty the trash cans and replace their plastics to maintain a completely sanitary work space. Ensure that staff personal protective equipment, including gloves and face masks, are properly stored and that safety protocols are followed. Hallways and Corridors Vacuum and mop all public areas regularly to remove dirt and debris. Clean handrails and disinfect elevator buttons as they can be touched by most patients and staff. Try to use proper lighting and replace burned-out bulbs to have a bright and safe environment. Trash disposal Implementing a safe disposal system for all types of waste including biohazardous waste, sharps, and general medical waste. Follow all waste disposal regulations and keep waste disposal records to ensure compliance. Clean and organize waste storage areas to prevent contamination and ensure the safety of personnel. Infection control measures Provide hand disinfection stations for patients, visitors, and staff. Ensure all staff follow hand hygiene and infection control protocols. Periodically conduct infection control training and awareness programs for all employees so that they are aware of best practices. Regular inspection and maintenance Schedule regular inspections to identify cleaning and maintenance needs and address problems promptly. Record all cleaning and maintenance activities to demonstrate your commitment to a clean and safe environment and ensure compliance with regulations. Training and Education Ensure that all staff are trained in medical office cleaning protocols and adhere to established standards. Raising awareness among staff and visitors about the importance of cleanliness and hygiene is very important to encourage collective effort and maintain a safe environment. Communication Establishing clear communication channels for reporting cleaning issues and requesting maintenance is critical to quickly address problems. Encourage feedback from staff and patients to continually improve cleanliness standards and ensure facility cleanliness meets their expectations. Customizing Medical office Cleaning Checklists for Different Specialties A medical office cleaning checklist is not one-size-fits-all. Each medical specialty has unique cleaning needs that require a customized approach to maintain hygiene and patient safety. Customizing the checklist ensures that the specific requirements of different facilities are met effectively. Dental Offices In dental offices, the focus lies on sterilizing equipment like dental chairs, instruments, and surfaces. Regular disinfection of patient areas is a key component of the medical office cleaning checklist, to ensure a germ-free environment for oral health procedures. Surgical Centers For surgical centers, maintaining a sterile environment is critical. A comprehensive cleaning for these facilities includes detailed cleaning steps for surgical tools and high-touch surfaces to minimize infection risks. Furthermore, thorough cleaning of operating rooms, including air filtration systems, is essential to

Scroll to Top