May 25, 2024

Carpet wear with chemicals
Blog

Clean Carpet with Baking Soda

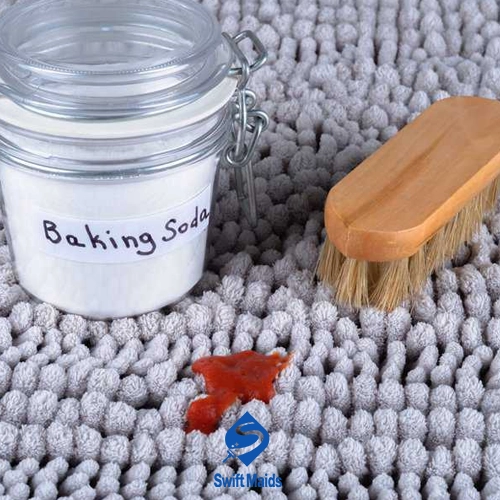
This guide from “Swift Maids” will introduce you to a powerful yet gentle weapon in your home cleaning arsenal: baking soda. That’s right, the same baking soda you use for fluffy pancakes can be a lifesaver when reviving your carpets. Regular vacuuming is a must for keeping your home clean, but sometimes carpets need a deeper clean to remove dirt, grime, and those stubborn smells that just seem to linger forever. So ditch the harsh chemicals and embrace the cleaning power of baking soda! Why should you Clean Carpet with Baking Soda Here’s why baking soda deserves a permanent spot on your cleaning shelf: Safe and gentle: Unlike some harsh cleaners, baking soda is safe for people (including kids and furry friends) when used properly. No more worrying about harmful fumes or irritated skin. baking soda for carpet odor: Baking soda gobbles up bad smells like a champ, leaving your carpets smelling fresh and clean. Say goodbye to that funky carpet odor! Cleans without hurting: Baking soda acts like a gentle scrubber, lifting dirt and grime from carpet fibers without damaging them. No more worries about wearing down your carpets with harsh chemicals. Budget-friendly and easy to find: It’s affordable and available at most grocery stores. Cleaning your carpets doesn’t have to break the bank! Read Also: Most Common Carpet Spots Baking Soda Carpet Cleaning Hacks Now that you know why baking soda is a superhero for carpets, let’s explore some easy ways to use it: Weekly Deodorizer Sprinkle: This is a quick and easy way to keep your carpets smelling fresh between cleanings. All you need is baking soda (and maybe a cheese grater, if you have a big area to cover). Here’s how: Sprinkle magic: Lightly dust baking soda over your entire carpet. If you have a lot of space to clean, using a cheese grater can help spread the baking soda evenly. Let it work its magic: Leave the baking soda on your carpet for at least 30 minutes, or even overnight for an extra deep clean. The longer it sits, the more odors it can absorb. Vacuum goodbye to dirt and smells: After waiting, thoroughly vacuum your carpet to remove the baking soda powder and any absorbed dirt and odors. Stain Stopper: Baking soda can also tackle unexpected spills and stains. Here’s what you’ll need: Baking soda White vinegar (optional) Spray bottle (optional) Soft-bristled brush (optional) Here’s how to fight a stain: Blot, don’t rub! The key to stain removal is to act fast. Grab a clean, absorbent cloth and blot up any excess liquid. Don’t rub, because that can spread the stain further. Baking soda powder: Sprinkle baking soda generously right on the stain. Vinegar boost (optional): For tougher stains, you can create a cleaning paste by mixing a little water with the baking soda. Or, you can mix equal parts white vinegar and water in a spray bottle and lightly mist the stain before applying the baking soda paste. Let it rest: Leave the baking soda (or baking soda paste) on the stain for at least 30 minutes, or longer for stubborn stains. Scrub and vacuum: If you use a baking soda paste, gently scrub the stain with a soft-bristled brush. Then, thoroughly vacuum the area to remove the baking soda powder. For greasy spills, like cooking oil, sprinkle baking soda on the stain before blotting up any excess liquid. The baking soda will help absorb the grease before it sets in. Deep Carpet Cleaning with Baking Soda: Want to give your carpets a more thorough clean? You can combine baking soda with your regular cleaning routine. Here’s what you’ll need: Baking soda Vacuum cleaner Your favorite carpet cleaning solution (check the carpet manufacturer’s instructions to make sure they work together) Here’s how to do it: Pre-vacuum: Thoroughly vacuum your carpet to remove any loose dirt and debris. Baking soda sprinkle: Generously sprinkle baking soda all over your carpet. Imagine you’re giving your carpet a light snow shower! Let it sit: Leave the baking soda on the carpet for at least 30 minutes, or longer for a deeper clean. The longer it sits, the more dirt and grime it can pull out of the carpet fibers. Cleaning solution time: Follow the instructions on your favorite carpet cleaning solution and apply it to your carpet according to the manufacturer’s recommendations. Scrub and vacuum (carefully!): We’ll get the specific instructions for this step from the cleaning solution bottle. Remember, the goal is to gently loosen the dirt and grime, so avoid over-wetting the carpet. Final vacuum: Once you’ve finished cleaning with your chosen solution, allow the carpet to air dry completely. This might take a few hours, so plan accordingly. Then, thoroughly vacuum your carpet to remove any leftover baking soda powder and cleaning residue. Additional Tips to Clean Carpet with Baking Soda Test before you tackle: Before going all out and sprinkling baking soda on your entire carpet, try it on a small, hidden area to make sure it doesn’t discolor the carpet. Better safe than sorry! Fresh is best: For the strongest cleaning power, use fresh baking soda. Old baking soda might not work as well, just like slightly stale pancakes wouldn’t be quite as delicious. Baking soda for furniture too!: While this article focuses on carpets, baking soda can also be used on furniture! Follow the same ideas as carpet cleaning, but be gentle when applying baking soda and avoid getting the fabric too wet. You don’t want to turn your favorite couch into a soaking wet mess! Read Also: Top 9 Benefits Of Carpet Cleaning Beyond Baking Soda: Keeping Your Carpets Clean While baking soda is a fantastic tool for carpet cleaning, there are other things you can do to keep your carpets looking great and needing deep cleaning less often: Regular vacuuming: Vacuum your carpets at least once a week, or more often in high-traffic areas like hallways and around the entrance. This removes dirt, dust, and allergens before they
medical office cleaning checklist
Blog

Maintaining health with the Medical office cleaning checklist

When you enter the office as a patient or healthcare professional, you expect the space to be organized and safe in addition to being specialized in treatment. Cleaning these spaces is something that should be given a lot of attention. It is a critical aspect of patient care and the overall patient experience. To maintain high standards of cleanliness and hygiene, medical offices rely on a structured Medical office cleaning checklist. In this comprehensive guide of Swift Maids, we examine the key and important components of the Medical office cleaning checklist, along with the reasons why this work is necessary and the solutions to ensure that your medical center remains a safe and hygienic place. The importance of the Medical office cleaning checklist First of all, let’s look at the reasons for using a Medical office cleaning checklist and why it is so important: Infection control One of the most important concerns in any healthcare facility is infection control. Patients who have a weak immune system are usually more susceptible to infection than others. A well-structured cleaning checklist helps reduce the transmission of various diseases and infections among patients, visitors, and staff, thus increasing patient safety. Patient safety Patients usually go to medical offices for the treatment of various diseases. A thorough cleaning checklist helps reduce the risk of healthcare-related accidents, injuries, and infections and ensures patient well-being. Professional Image The cleanliness of the medical office shows its professionalism and competence. Patients are more likely to trust a healthcare facility that looks clean, organized, and hygienic. A clean environment can contribute to a positive patient experience and build trust with your customers. Compliance with regulations Medical offices must be subject to strict regulations and standards set by health authorities. The cleaning checklist ensures compliance with these regulations and rules, which are critical to avoiding penalties and legal issues. Read Also: Commercial Cleaning Calgary Key components of a Medical office cleaning checklist Let’s examine what components a medical office cleaning checklist contains and how each of these components should be cleaned: Reception and waiting areas Clean and disinfect reception counters, computers and keyboards because patients and staff usually touch them. Clean and then disinfect all surfaces that are frequently touched by people, including door handles, light switches, and seats. Vacuum and clean the floor of the waiting area to remove dirt and allergens. Empty the trash cans and change their plastic regularly to prevent the spread of germs. Examination and treatment rooms Clean and then disinfect the parts that are related to examining patients, including changing disposable paper covers after each patient. Disinfect medical equipment, including blood pressure devices, medical phones, and other items to prevent cross-contamination. Clean all surfaces, including sinks, cabinets, and all areas that patients come in contact with. Make sure hazardous waste containers are properly sealed and labeled for safety. Replace the necessary equipment, including examination gloves, gowns and face masks to ensure a sterile environment. Toilets Clean and disinfect all bathroom equipment including sink, toilet and mirror. To encourage hand hygiene, prepare special hand sanitizers and regularly refill the paper towel dispenser. Empty and disinfect trash cans as they can harbor germs and odors. Ensure proper ventilation to prevent moisture build-up and mold growth, and use air fresheners if needed. Staff areas Clean and then disinfect areas that are shared, including break rooms and offices, to reduce the risk of cross-contamination. Disinfect appliances such as refrigerators, stoves, microwaves, coffee makers, and shared workstations. Empty the trash cans and replace their plastics to maintain a completely sanitary work space. Ensure that staff personal protective equipment, including gloves and face masks, are properly stored and that safety protocols are followed. Hallways and Corridors Vacuum and mop all public areas regularly to remove dirt and debris. Clean handrails and disinfect elevator buttons as they can be touched by most patients and staff. Try to use proper lighting and replace burned-out bulbs to have a bright and safe environment. Trash disposal Implementing a safe disposal system for all types of waste including biohazardous waste, sharps, and general medical waste. Follow all waste disposal regulations and keep waste disposal records to ensure compliance. Clean and organize waste storage areas to prevent contamination and ensure the safety of personnel. Infection control measures Provide hand disinfection stations for patients, visitors, and staff. Ensure all staff follow hand hygiene and infection control protocols. Periodically conduct infection control training and awareness programs for all employees so that they are aware of best practices. Regular inspection and maintenance Schedule regular inspections to identify cleaning and maintenance needs and address problems promptly. Record all cleaning and maintenance activities to demonstrate your commitment to a clean and safe environment and ensure compliance with regulations. Training and Education Ensure that all staff are trained in medical office cleaning protocols and adhere to established standards. Raising awareness among staff and visitors about the importance of cleanliness and hygiene is very important to encourage collective effort and maintain a safe environment. Communication Establishing clear communication channels for reporting cleaning issues and requesting maintenance is critical to quickly address problems. Encourage feedback from staff and patients to continually improve cleanliness standards and ensure facility cleanliness meets their expectations. Customizing Medical office Cleaning Checklists for Different Specialties A medical office cleaning checklist is not one-size-fits-all. Each medical specialty has unique cleaning needs that require a customized approach to maintain hygiene and patient safety. Customizing the checklist ensures that the specific requirements of different facilities are met effectively. Dental Offices In dental offices, the focus lies on sterilizing equipment like dental chairs, instruments, and surfaces. Regular disinfection of patient areas is a key component of the medical office cleaning checklist, to ensure a germ-free environment for oral health procedures. Surgical Centers For surgical centers, maintaining a sterile environment is critical. A comprehensive cleaning for these facilities includes detailed cleaning steps for surgical tools and high-touch surfaces to minimize infection risks. Furthermore, thorough cleaning of operating rooms, including air filtration systems, is essential to

Scroll to Top